Building a Free Personal Blog Analytics System from Scratch (umami + Vercel + Heroku)

Author: pseudoyu | 885 words, 5 minutes | comments | 2022-05-21 | Category: Tools

blog, heroku, hugo, self-host, serverless, umami, vercel

Translations: ZH, DE

'Here After Us - Mayday'

Preface

umami_dashboard_white

Previously, I wrote an article titled “Free Personal Blog System Setup and Deployment Solution (Hugo + GitHub Pages + Cusdis)”, detailing my blog system built using Serverless and some open-source projects. I also started a series to document the setup process.

A few days ago, I came across an article by Reorx titled “Deploy umami for Personal Website Analytics”. He introduced the umami project and demonstrated its serverless deployment using Railway.

However, since I had previously used Heroku’s free Postgres database service and deployed with Vercel when setting up Cusdis, I wanted to continue using these platforms for umami to reduce setup and maintenance costs.

The following text will record the specific setup and deployment process. Thanks to the official one-click deployment method, the entire setup process was very smooth.

[2024-06-30 Update]

Later, as Heroku discontinued its free plan, if you still want to use it completely free, you can use Vercel/Netlify/Zeabur for free deployment of the main project + Supabase for deploying PostgreSQL database instances. Pass the link as an environment variable to the Umami service. The rest of the process remains applicable.

Setup and Deployment Instructions

Creating a Postgres Database with Heroku

Creating the Postgres Database

First, register for a Heroku account. After logging in successfully, click the button in the upper right corner to create a new application.

cretae_app_in_heroku_1

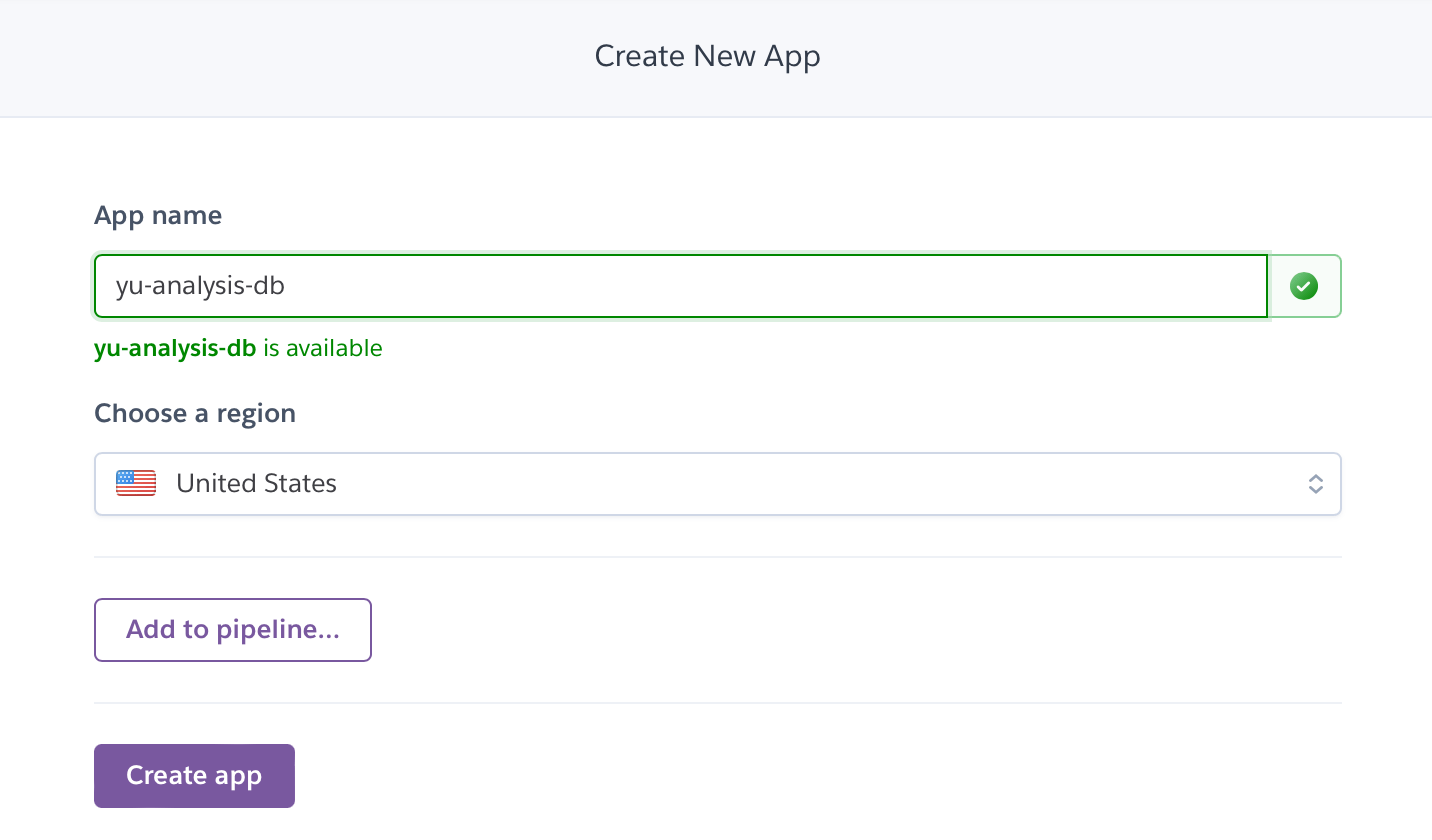
Enter the instance name, and choose the region as you prefer. I selected United States. Click create.

cretae_app_in_heroku_2

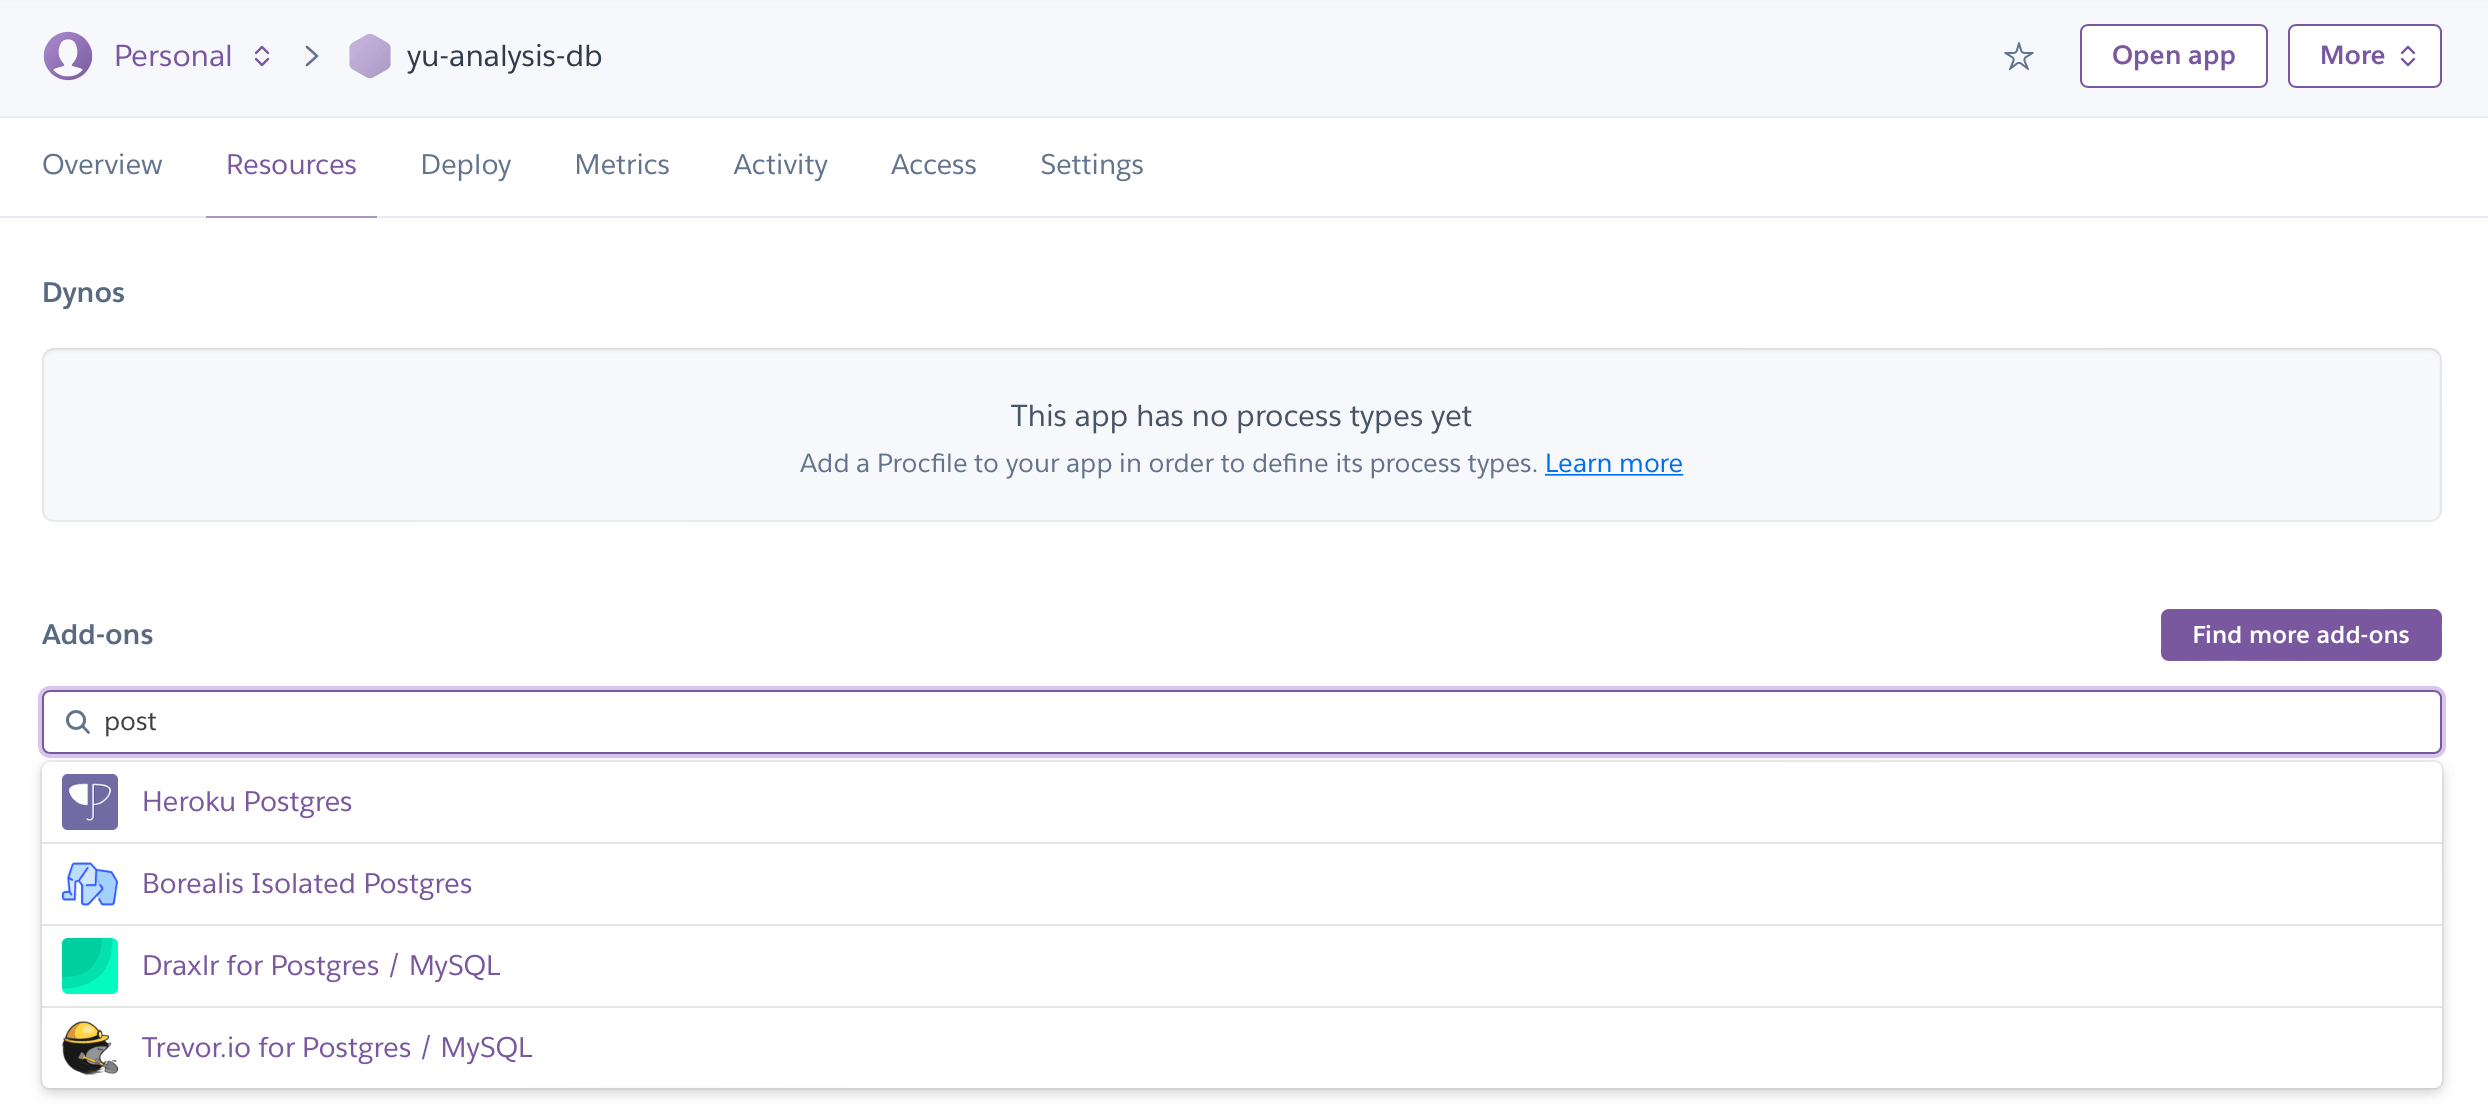
After creation, search and select the Postgres database in the Adds-on section of the Resources Tab.

add_heroku_postgres

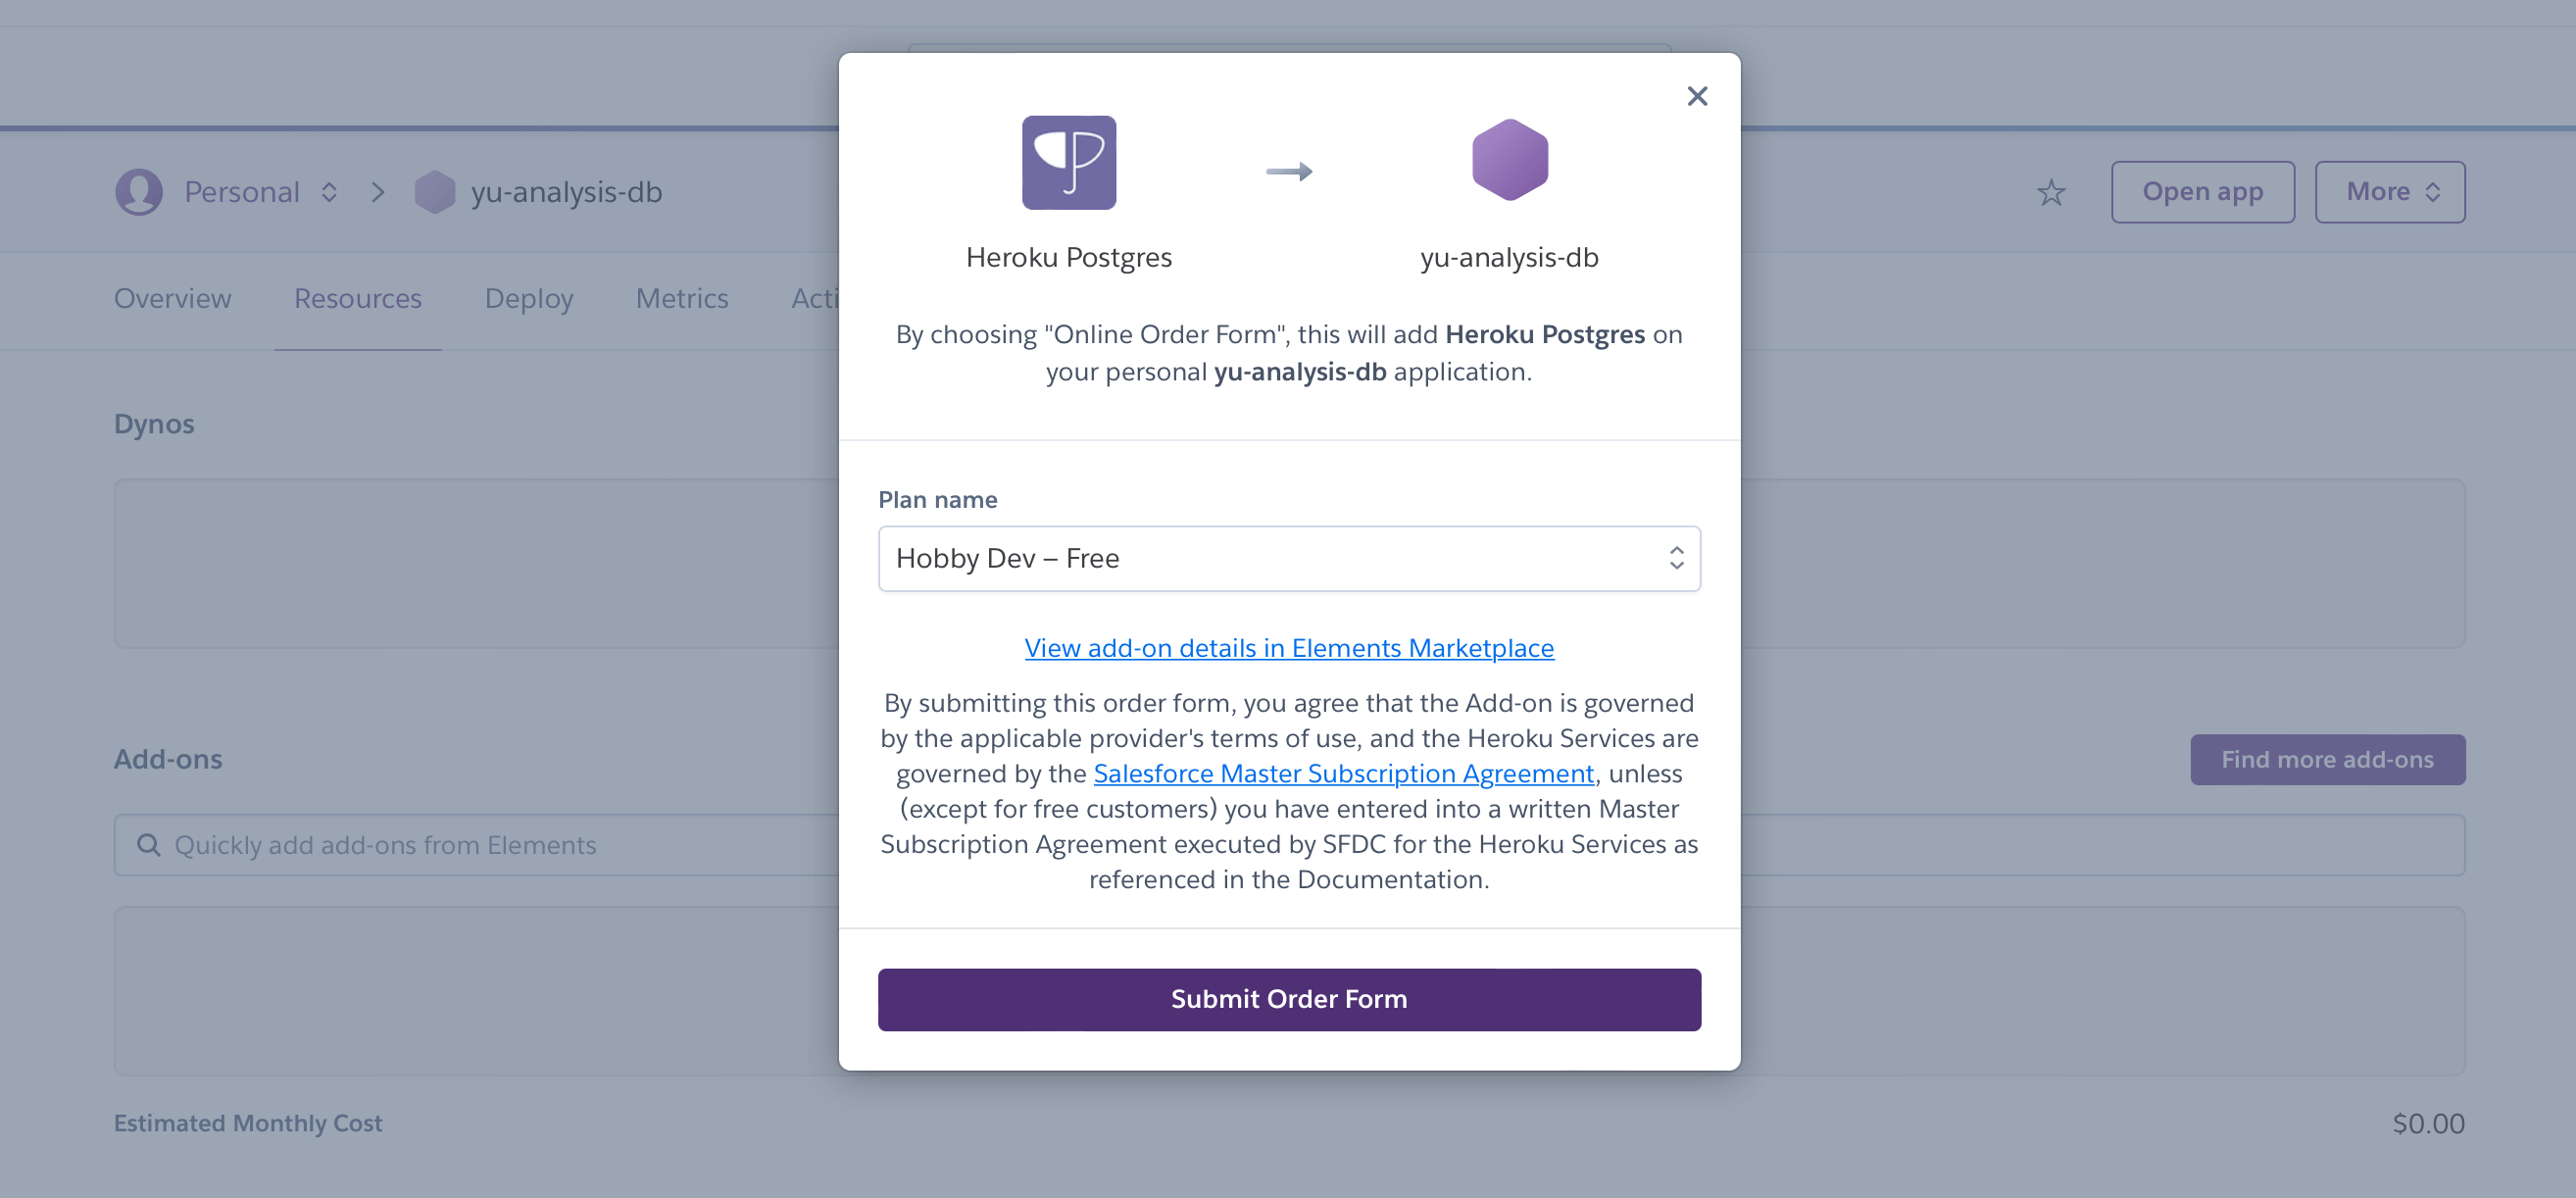
Choose the Free Plan. The Postgres database in Heroku is free and can be used continuously, eliminating setup and maintenance costs.

heroku_postgres_plan

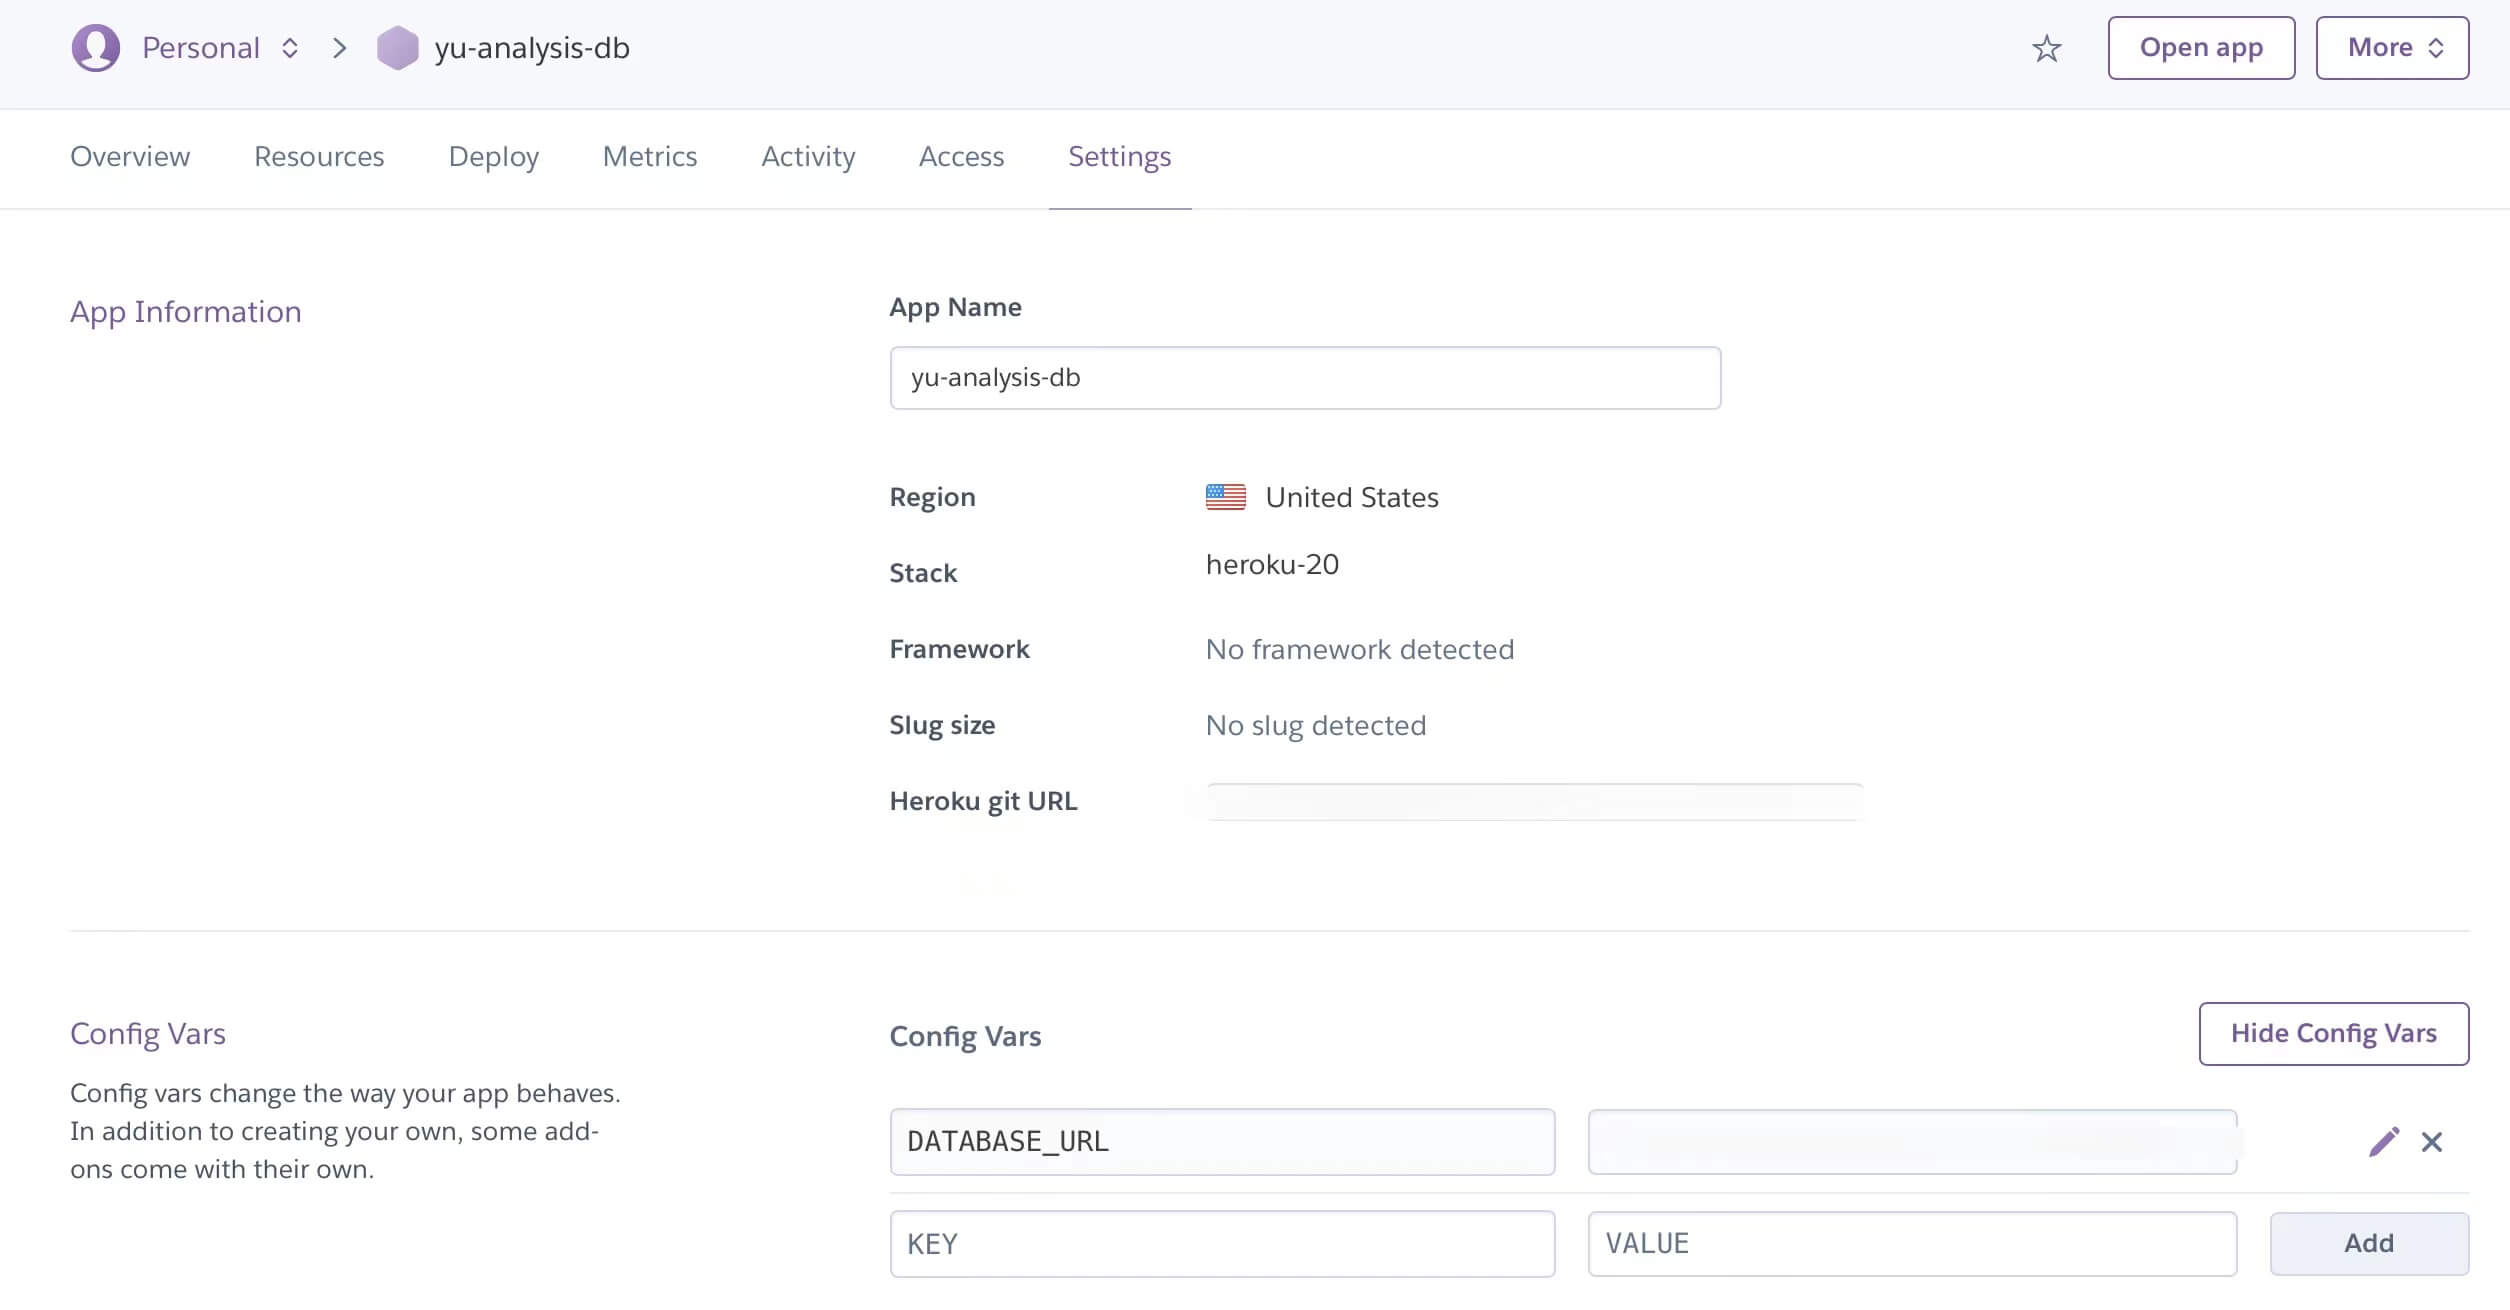
After creation, check the DATABASE_URL in Settings, which will be used later for deployment.

postgres_data_url

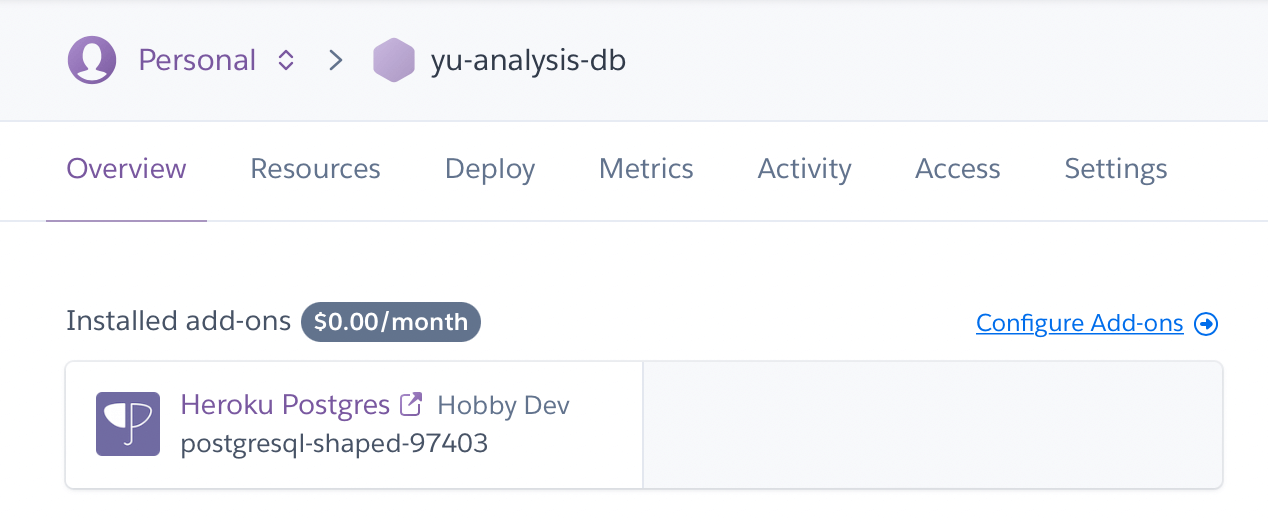
Click on the newly added Postgres add-on to proceed with settings.

postgres_addon_details

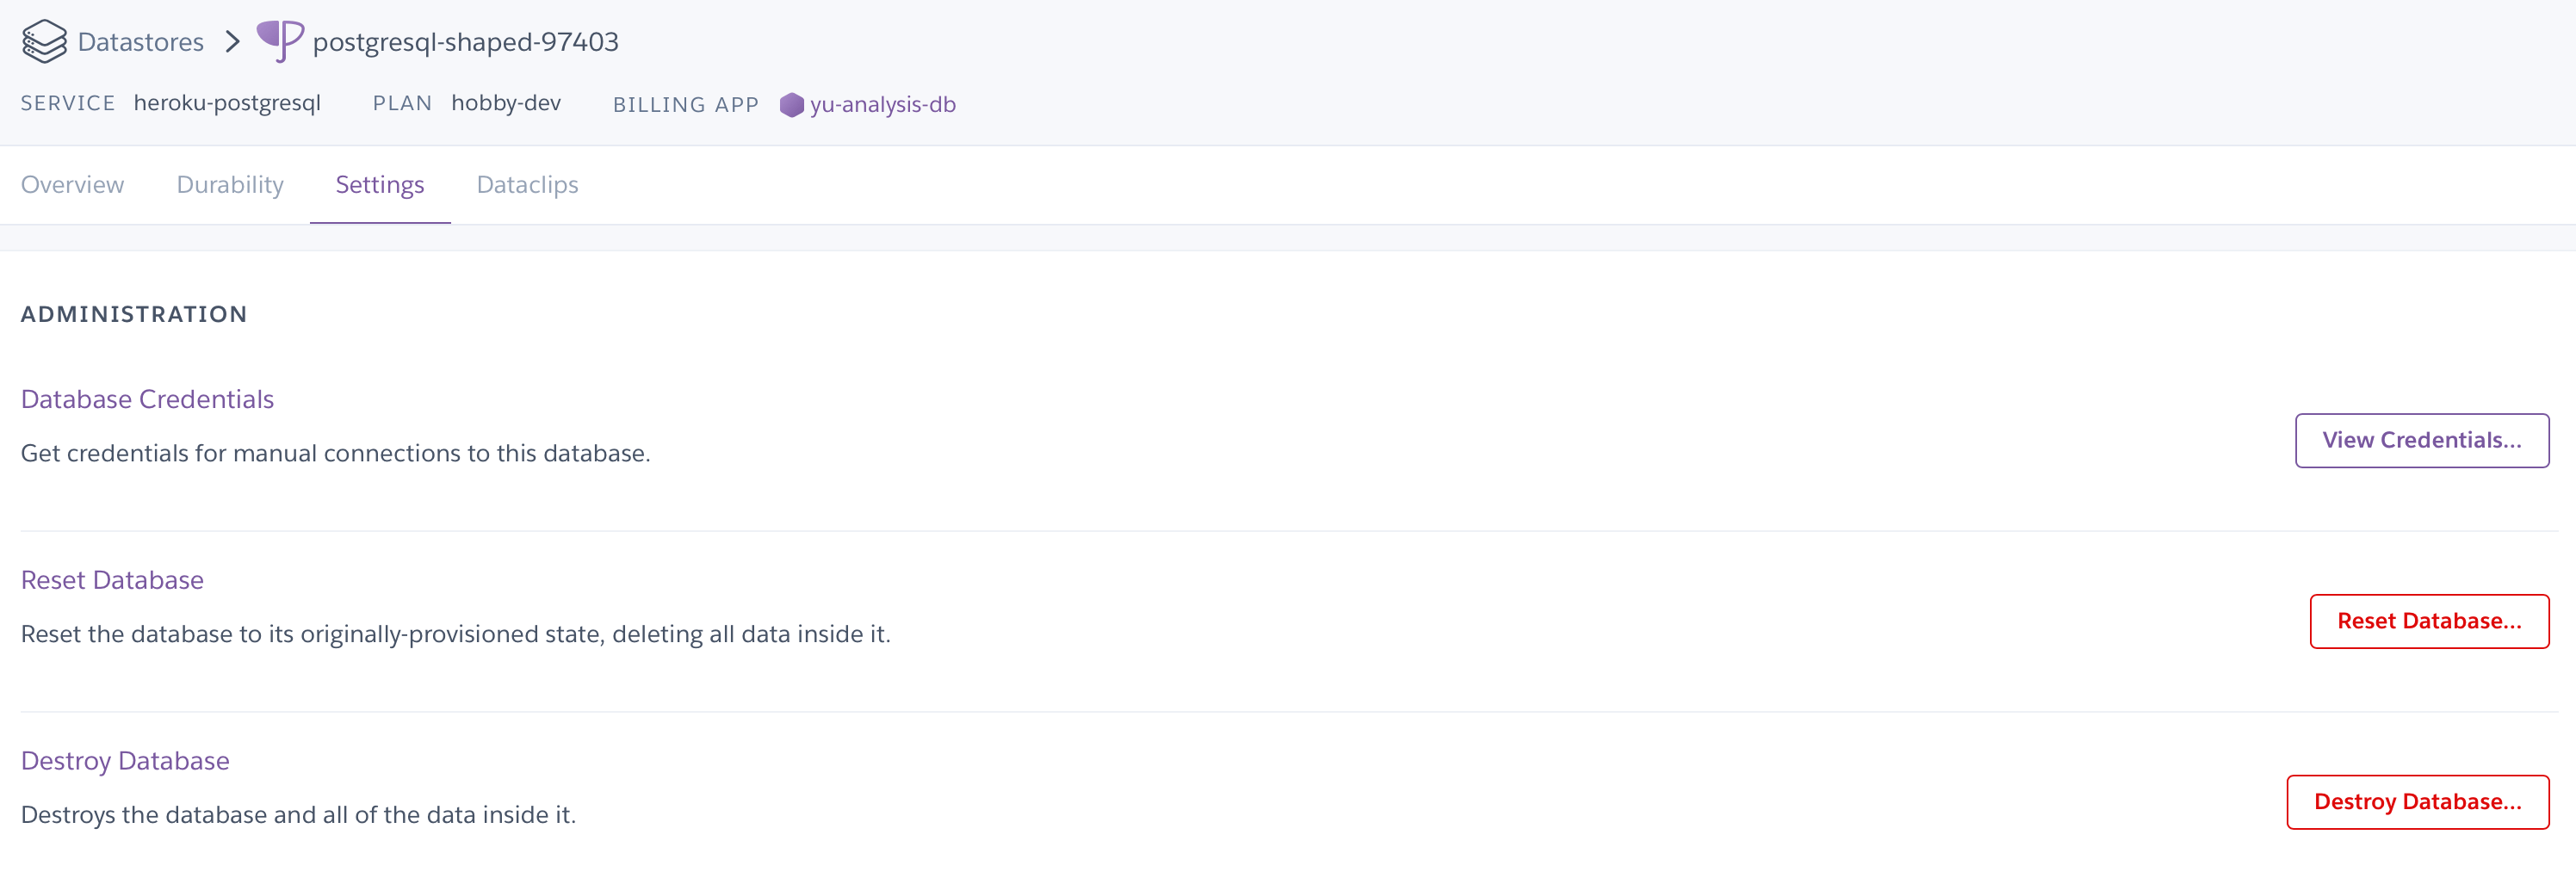
Once inside, select View Credentials in the Settings page and record the configuration parameters.

heroku_credentials

postgres_settings

Initializing the Postgres Database

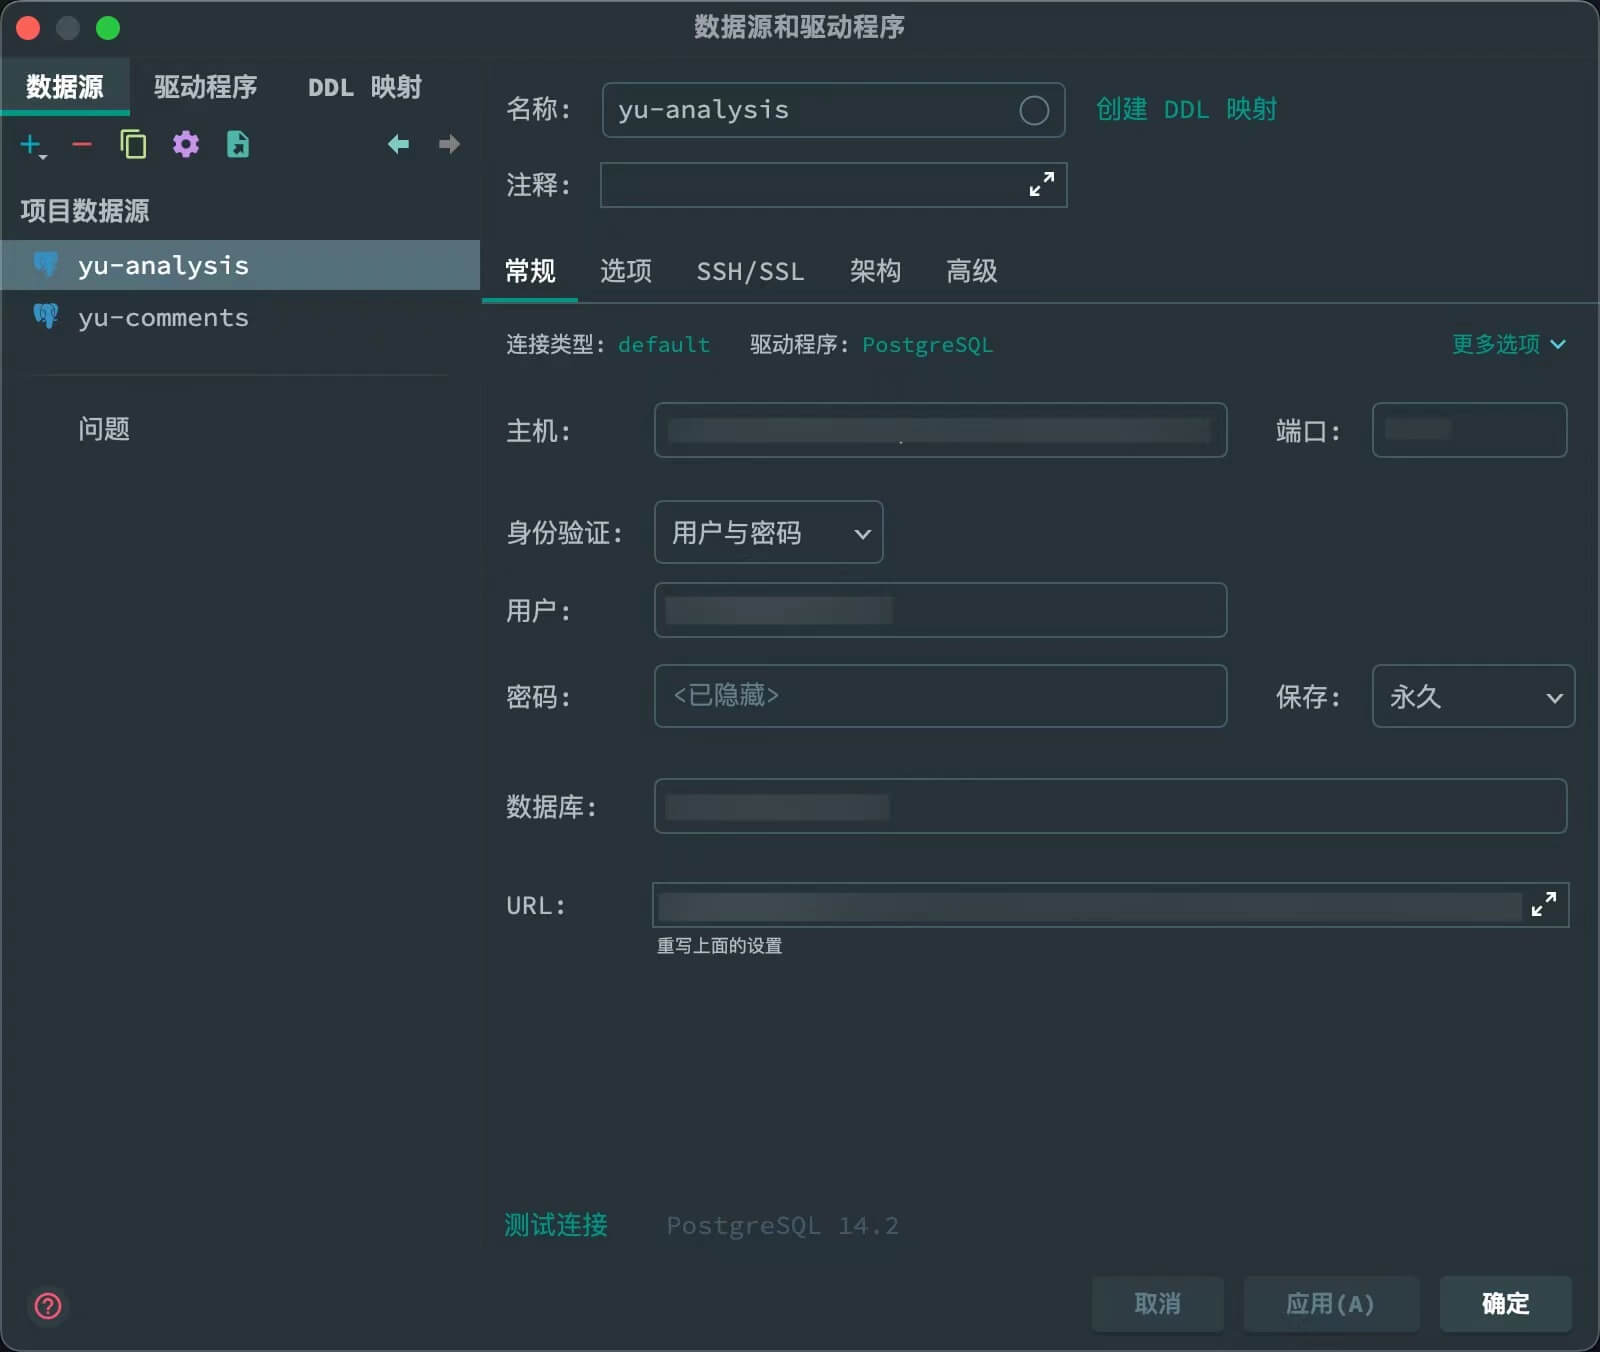
As database initialization is required, I used the DataGrip database management tool for connection, which is quite convenient. You can also connect and configure through the Heroku CLI.

postgres_config

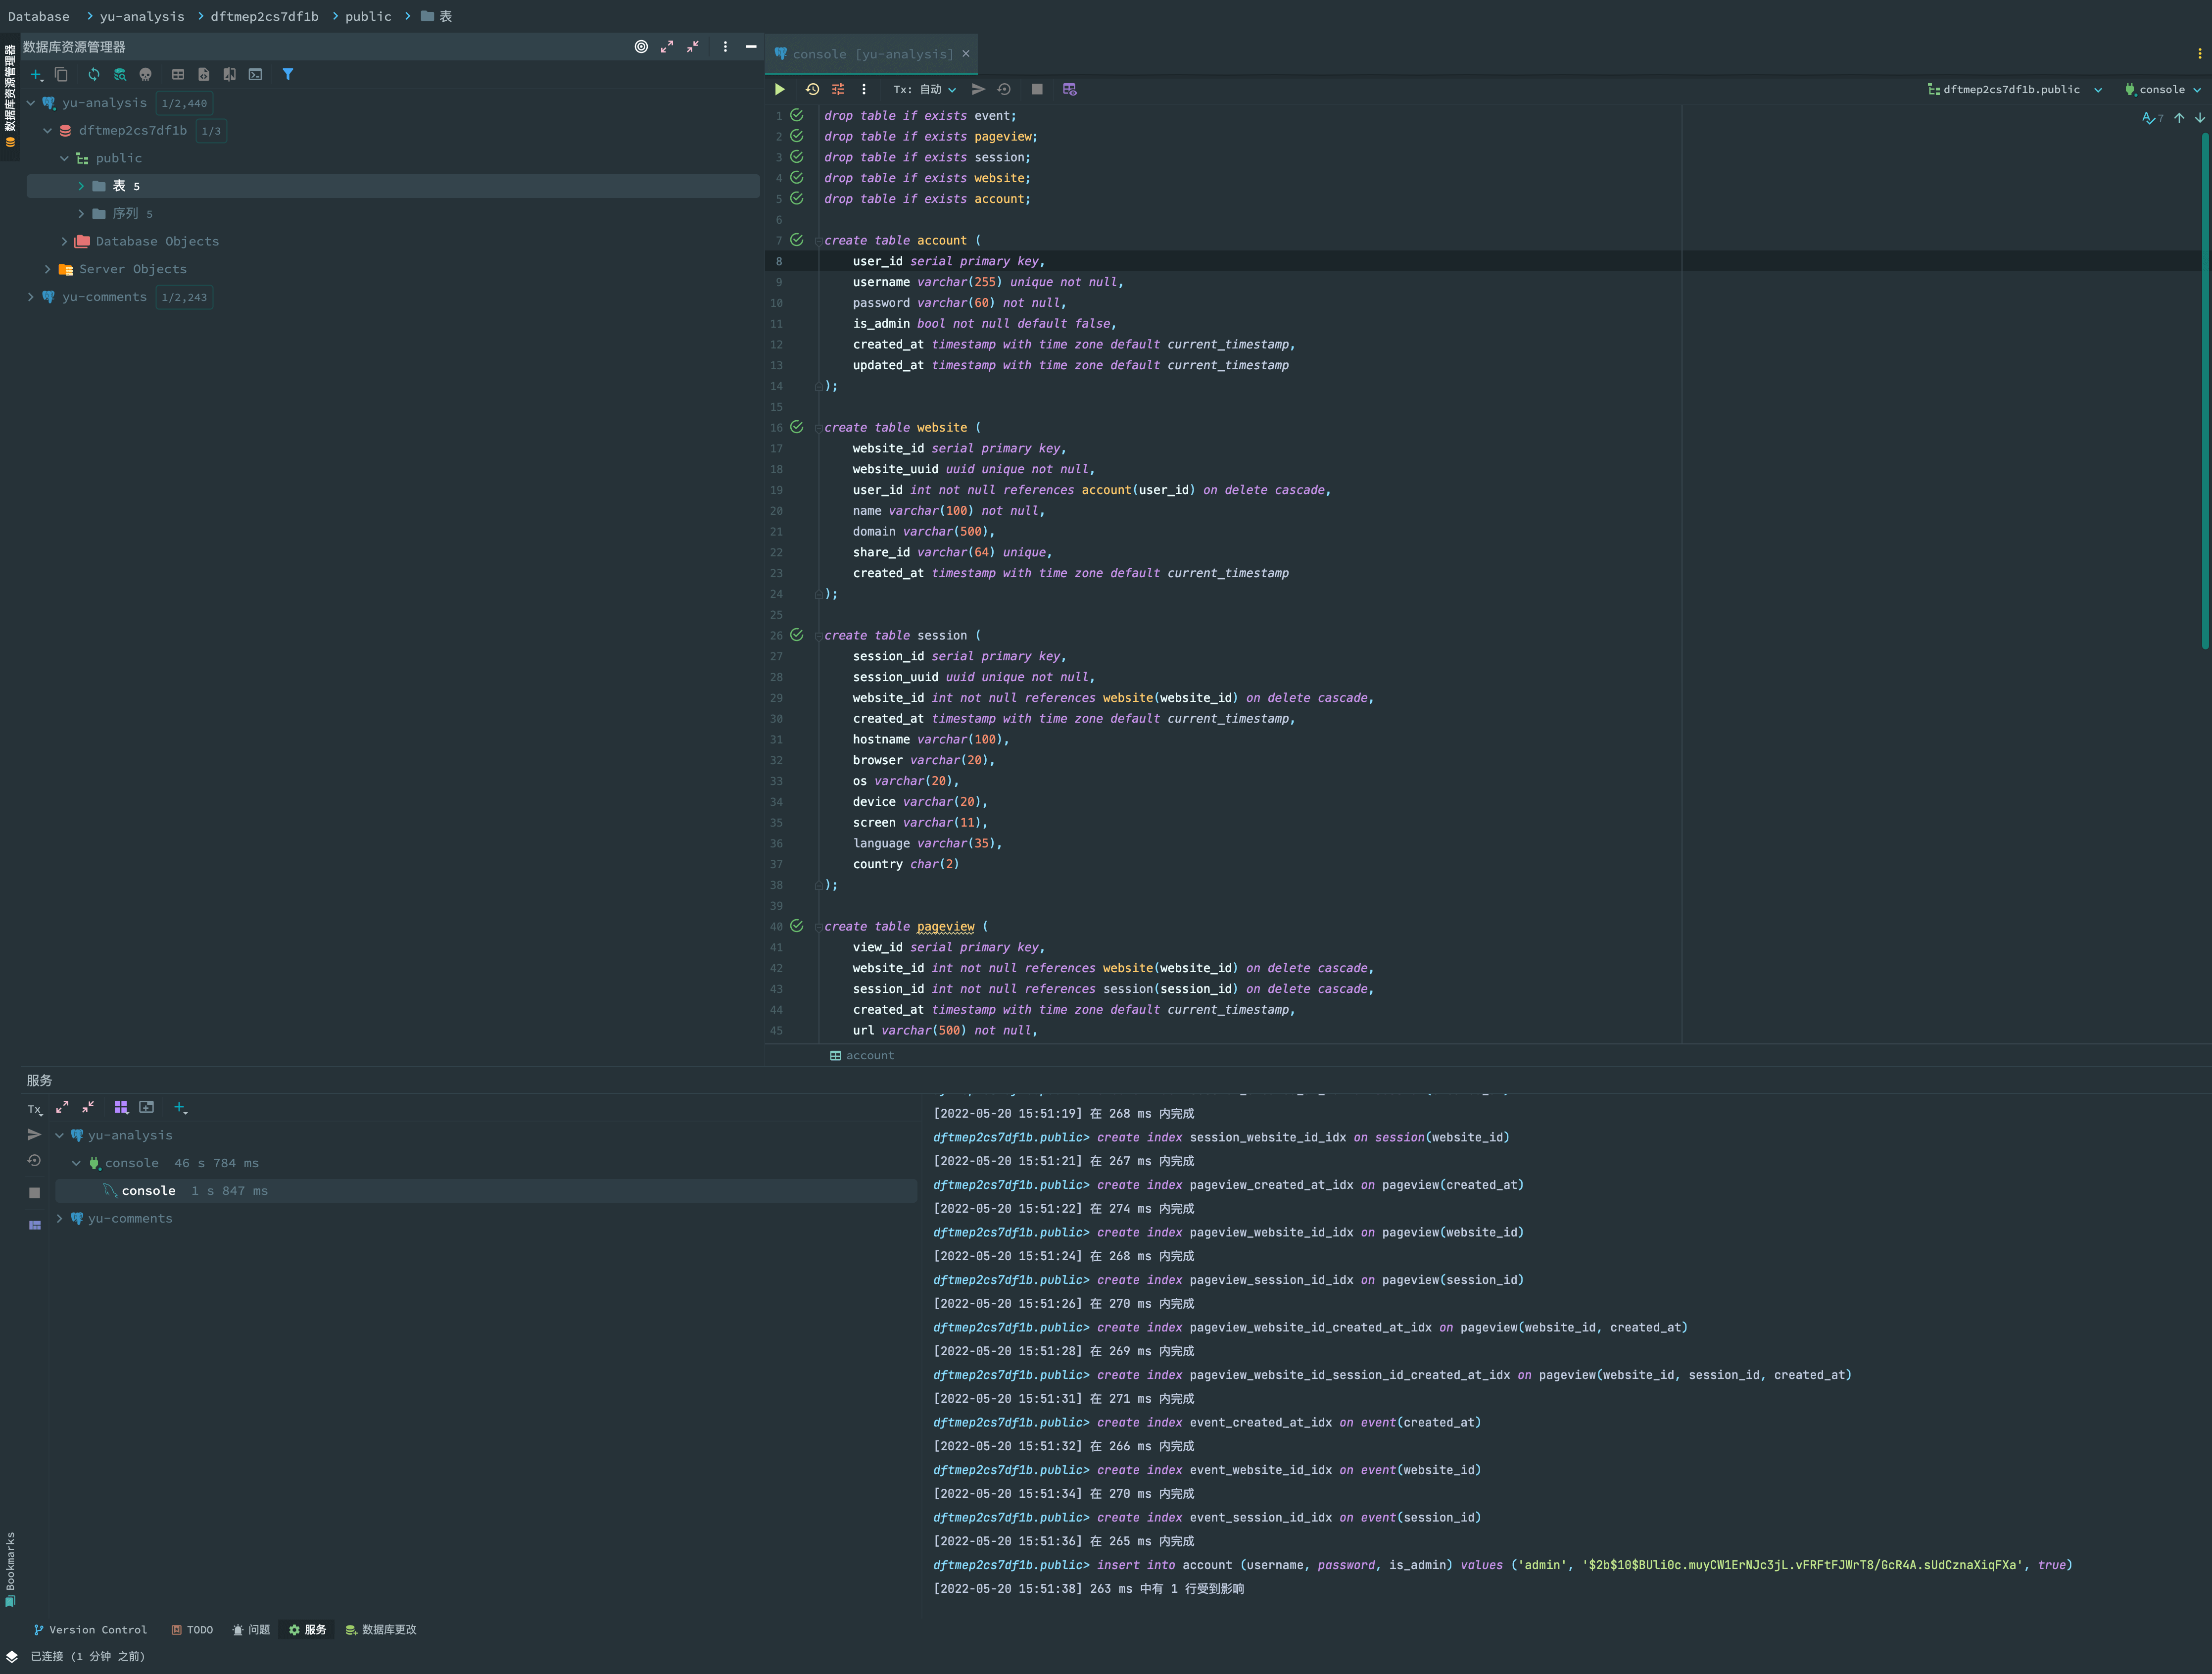
Umami needs to be initialized using the official umami/sql/schema.postgresql.sql script.

postgres_init_script

After execution, the database will have five tables with initialized data, and you can proceed with subsequent deployment work.

One-Click Deployment of umami Service Using Vercel

Deploying the umami Service

After creating the database instance, you can deploy the umami service with one click through Vercel.

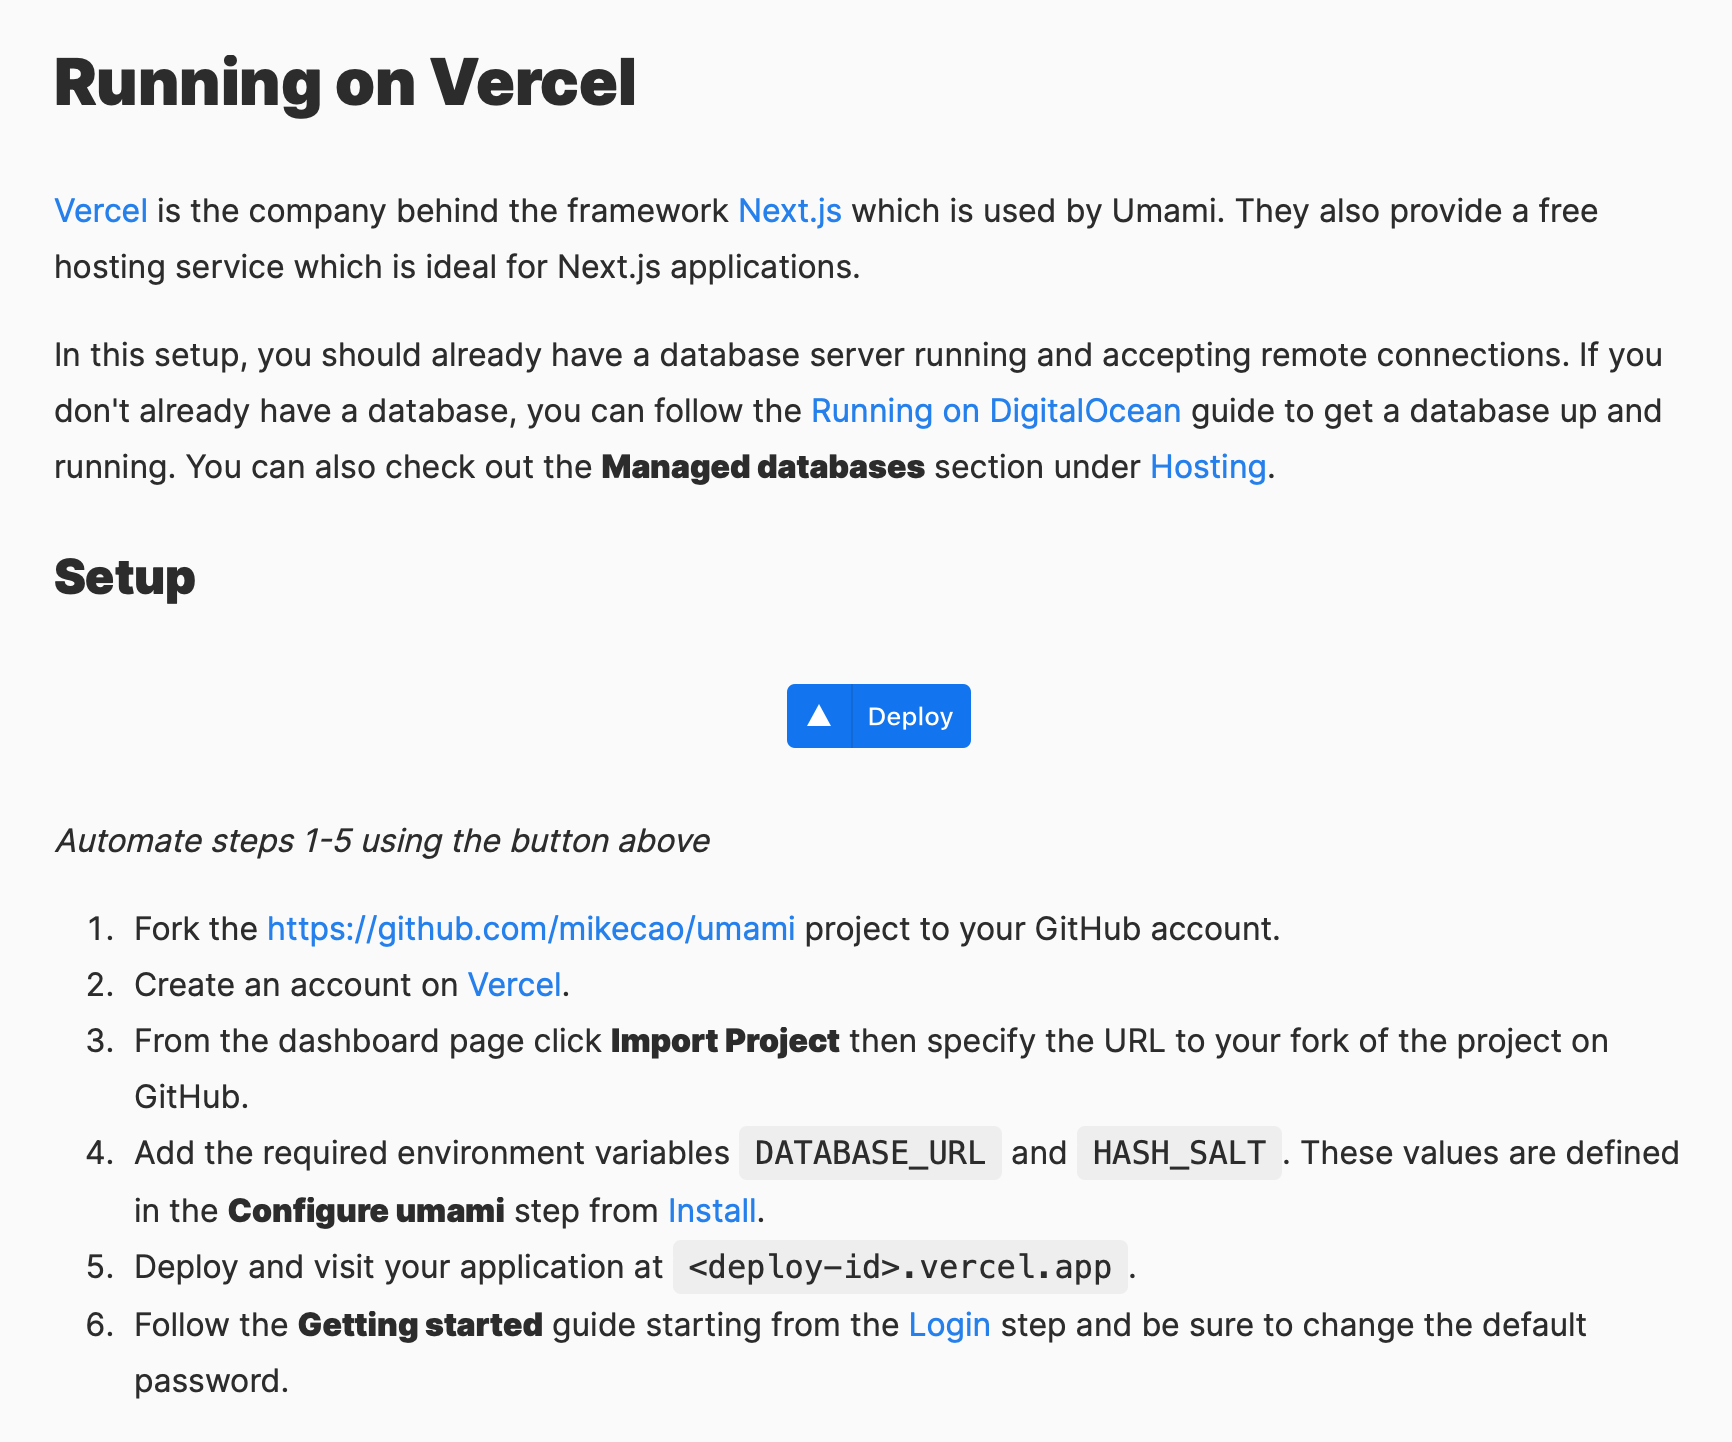
Visit the Running on Vercel module in the umami official documentation for operation instructions and one-click deployment script.

running_on_vercel

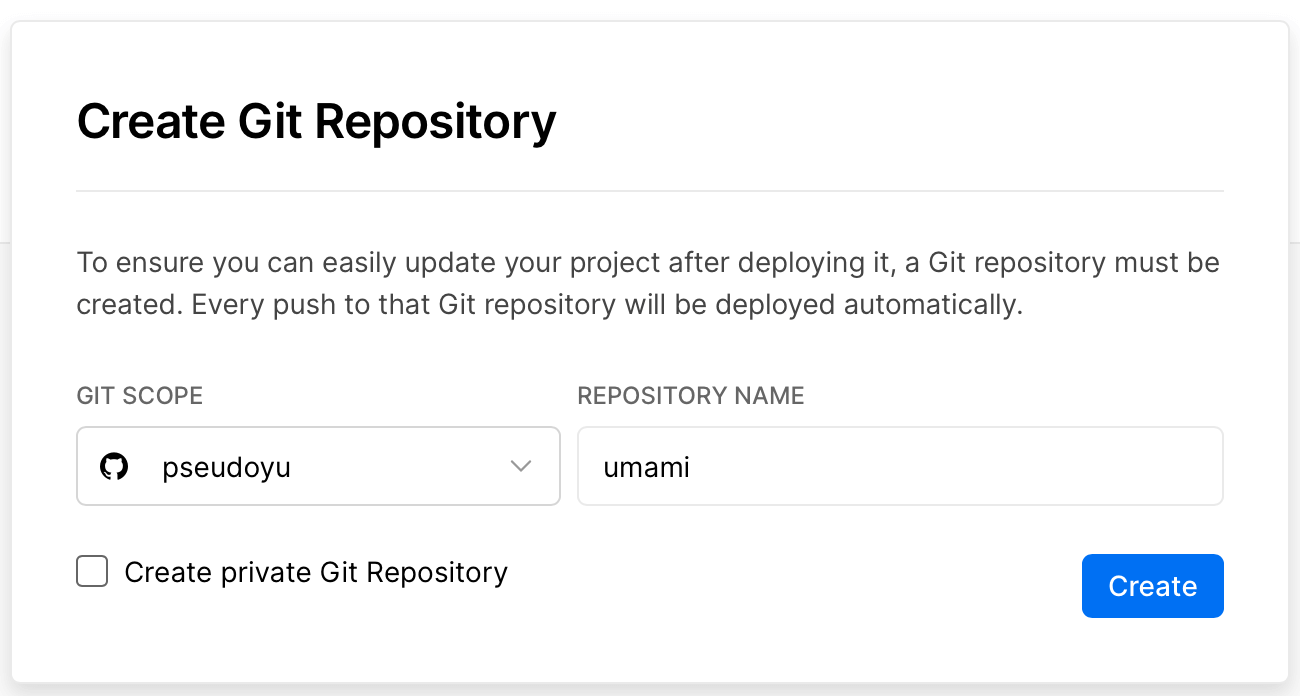
After clicking the one-click deployment button, you will be redirected to Vercel’s one-click deployment page to create a Github repository for umami.

vercel_create_umami_repo

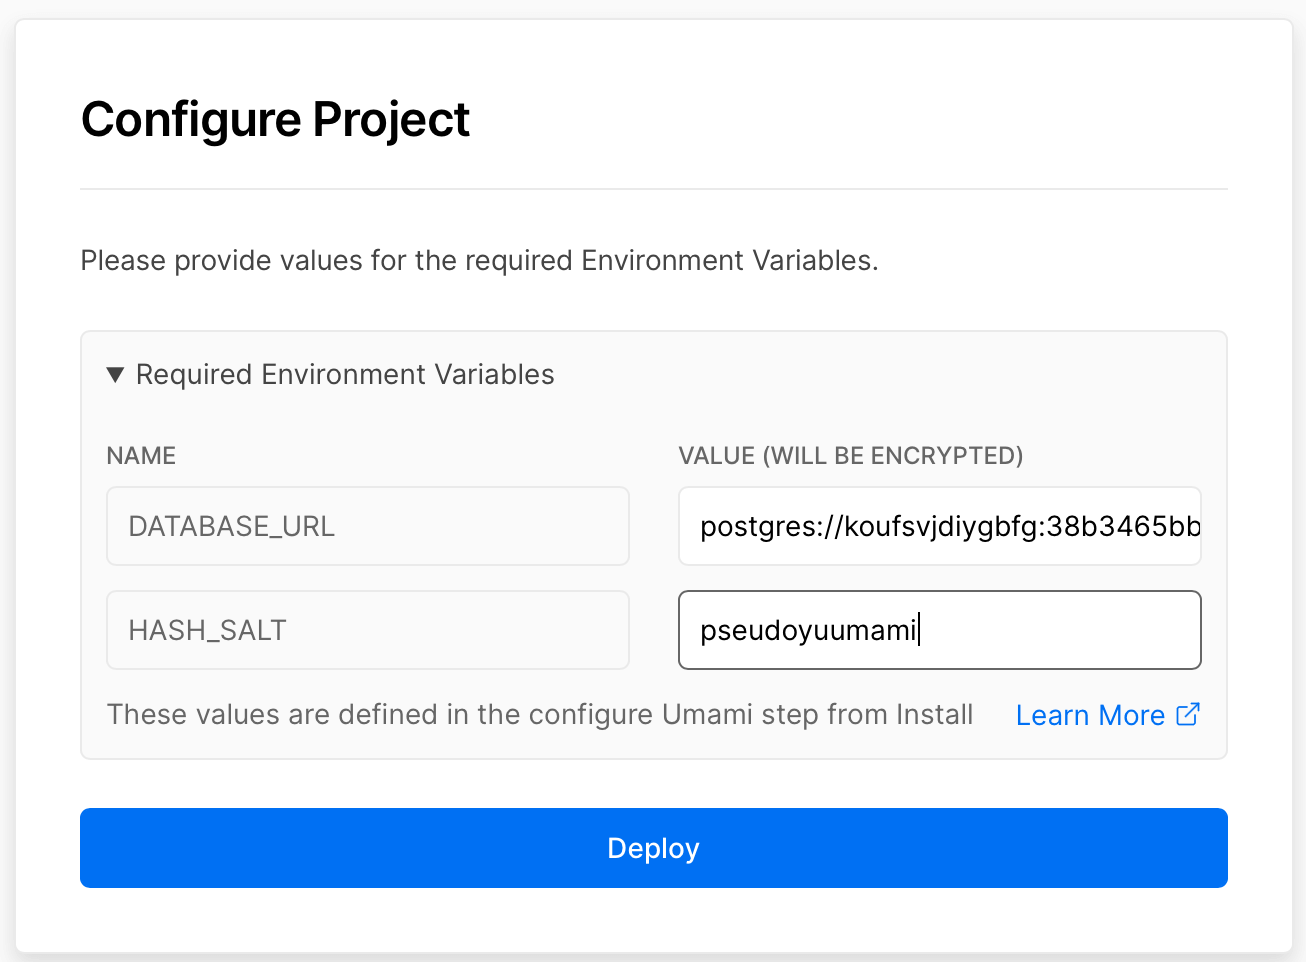
Next, you need to enter the DATABASE_URL parameter address recorded when deploying the Heroku Postgres instance earlier, and you need to fill in a custom string HASH_SLAT.

vercel_config_umami

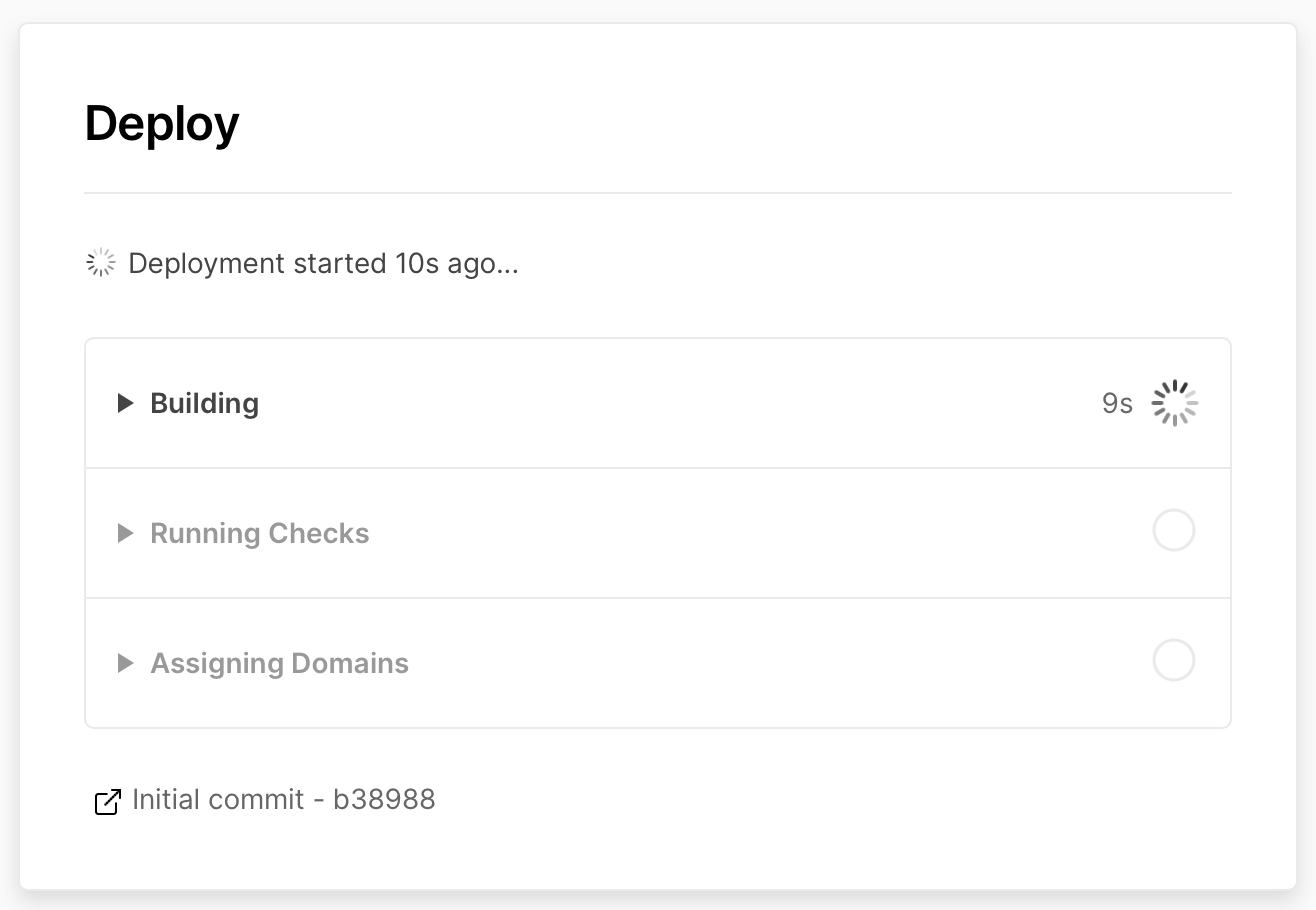
Click Deploy to start deployment. It will be completed in a few minutes.

vercel_deploy

vecel_deploy_done

Accessing the umami Service

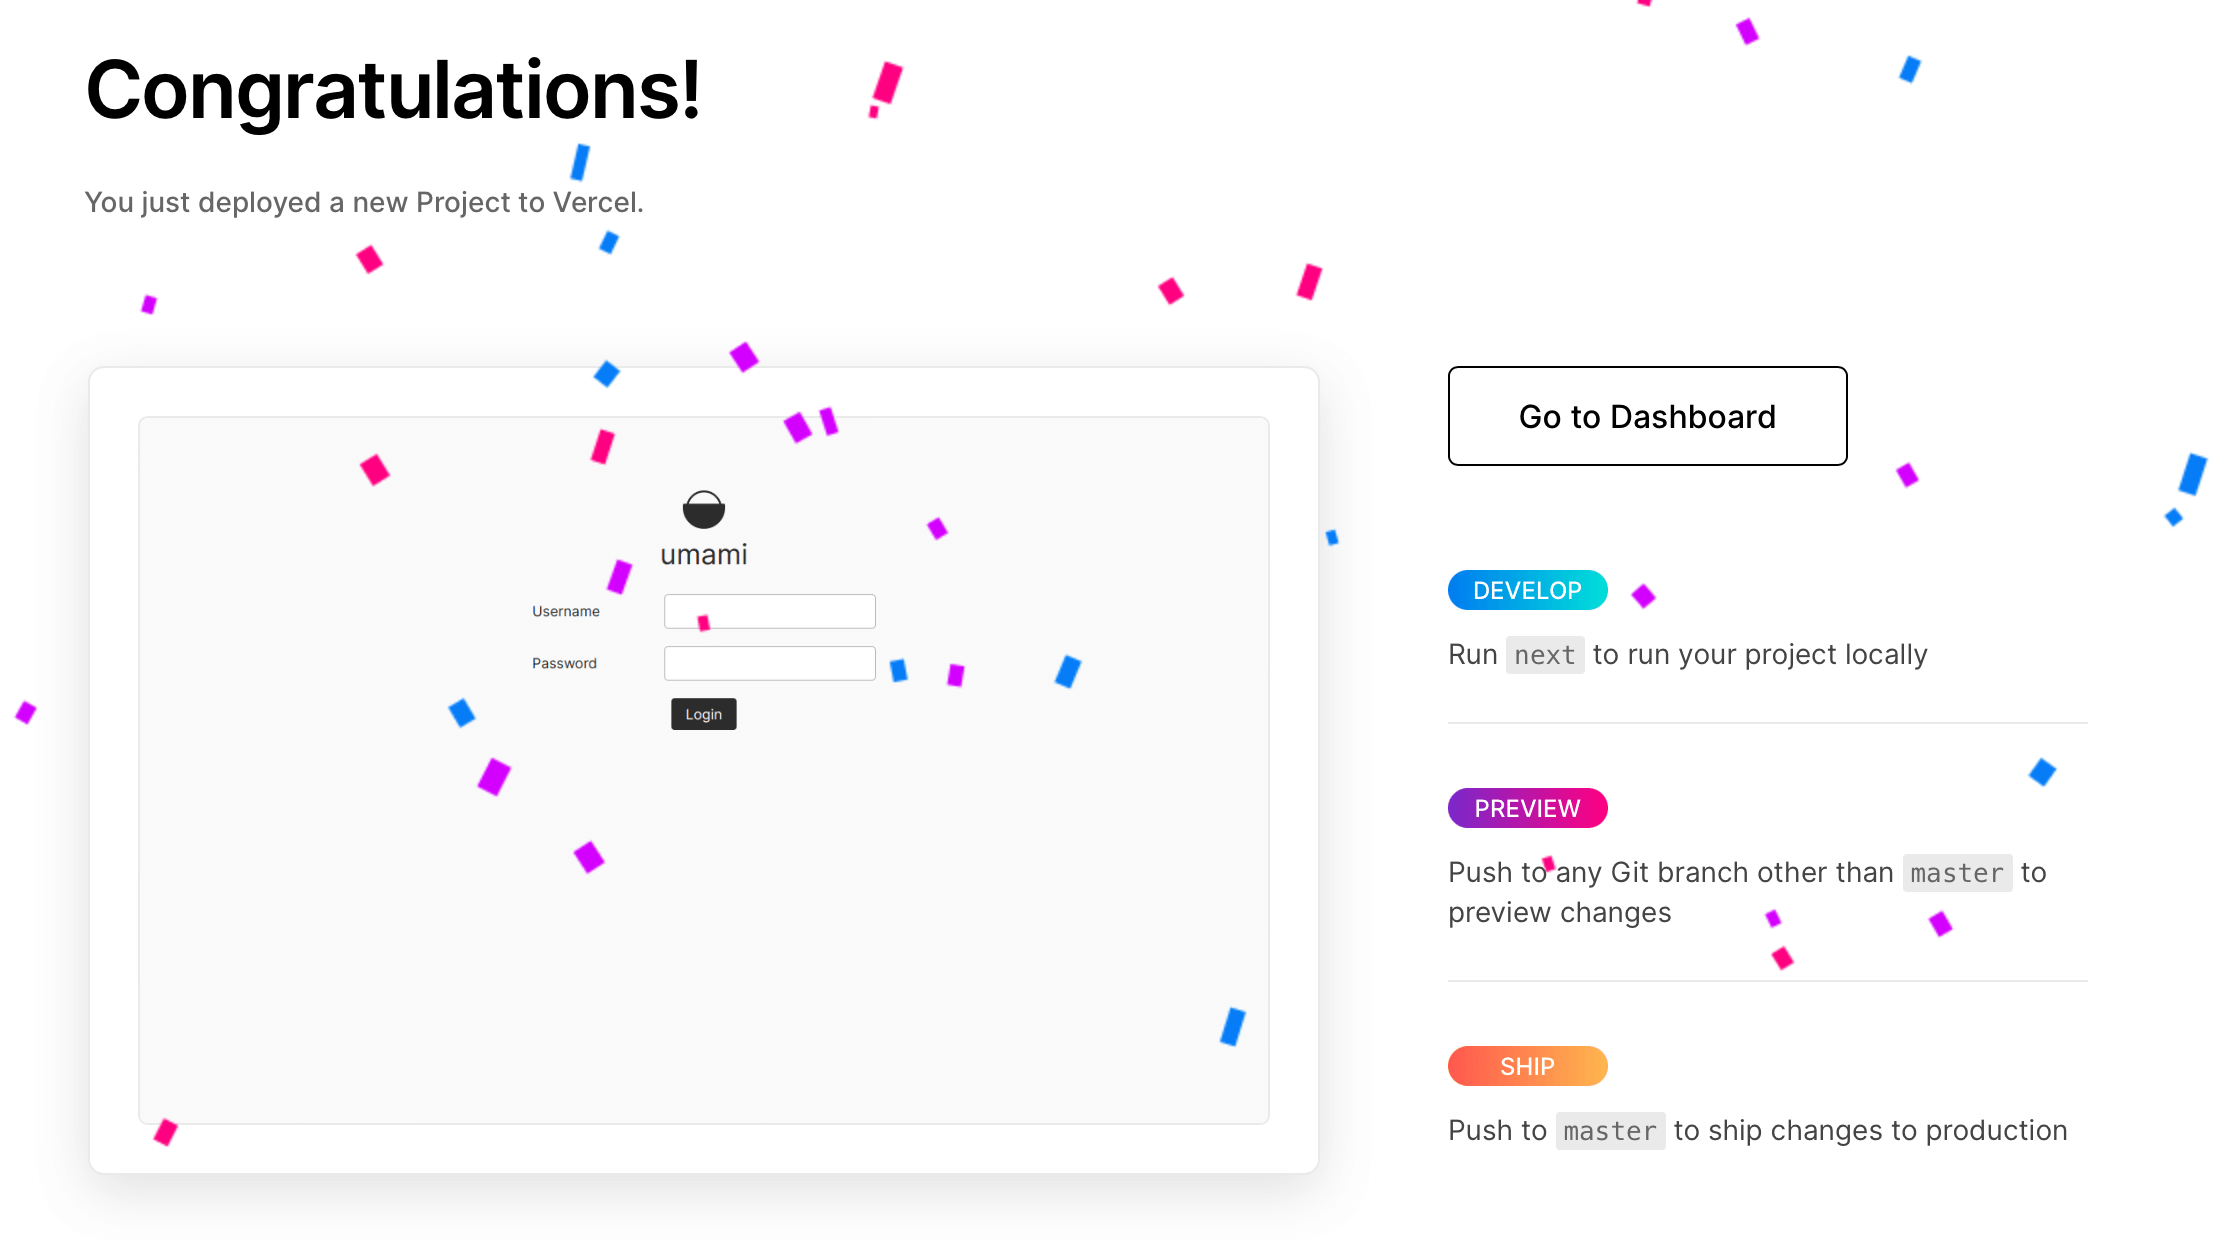
After deployment, click Dashboard or the assigned Vercel domain to access the service. You will see the umami login interface.

umami_login

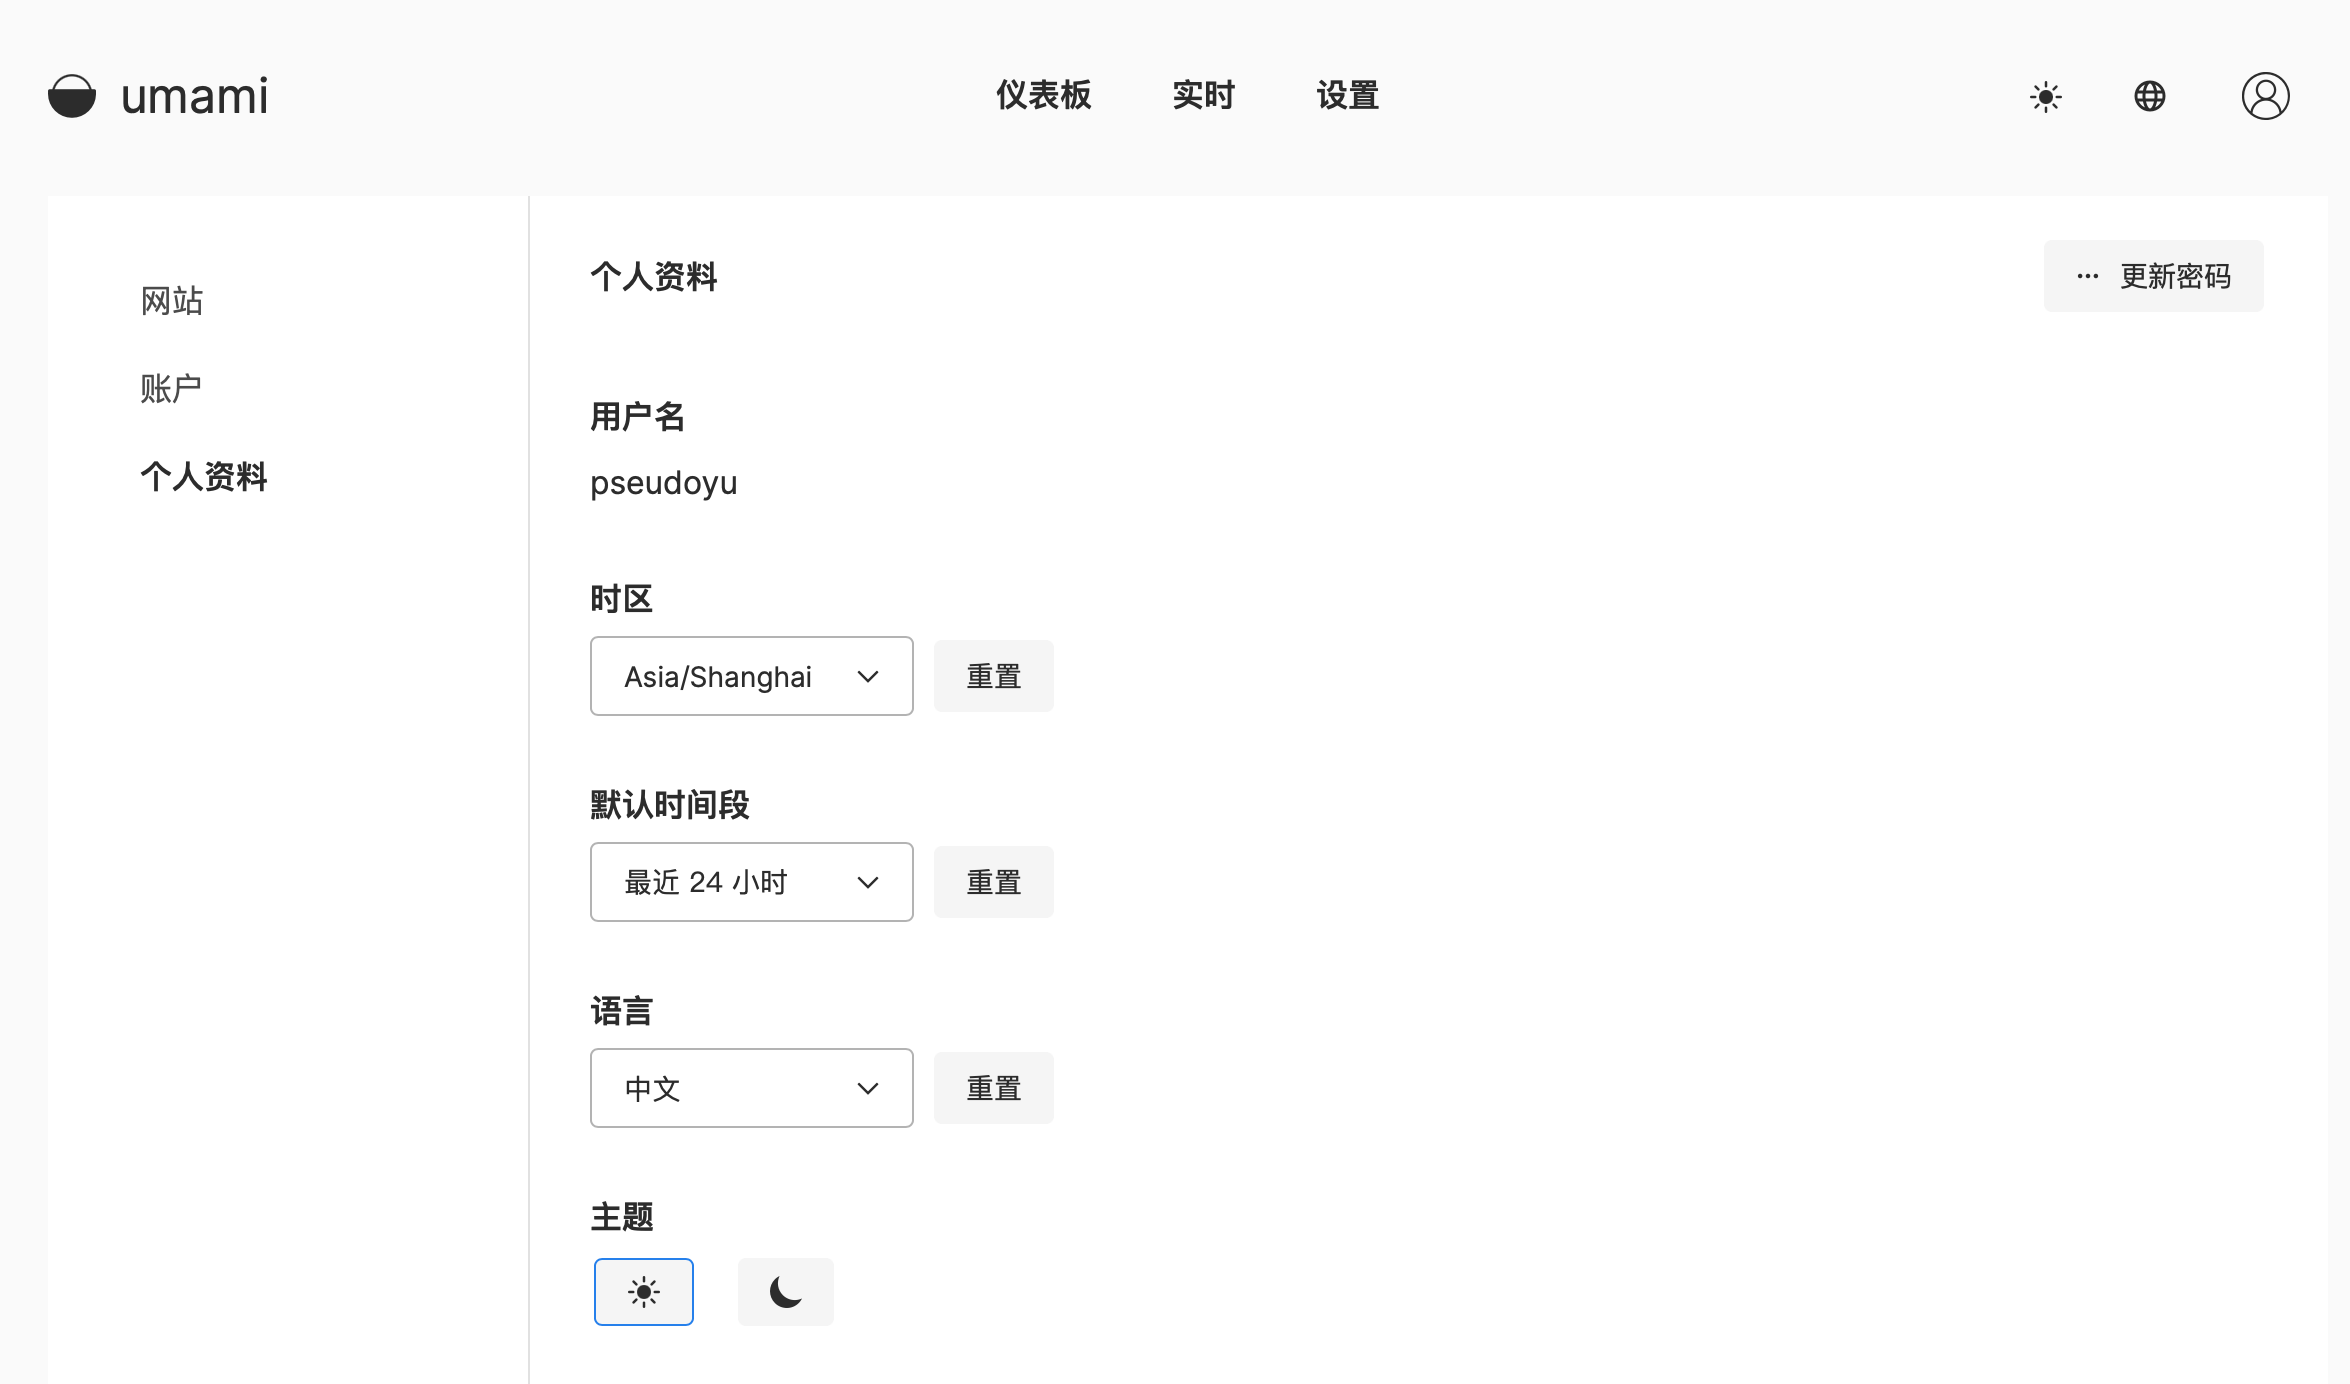
For the first login, enter the default username admin and default password umami. After successful login, you will be redirected to the umami management page. You can click on the avatar in the upper right corner to change your password.

umami_change_password

Configuring Personal Website to umami Service

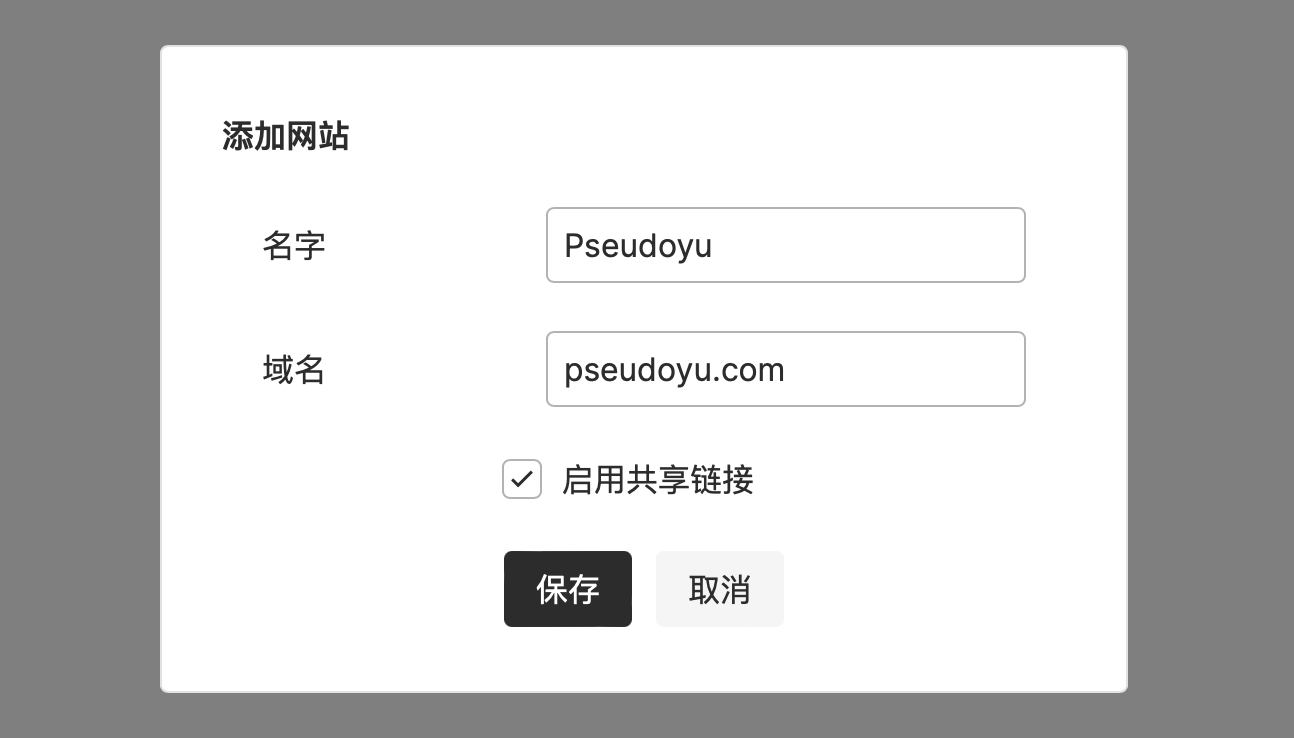
After completing the basic account configuration, click on the Websites tab in the sidebar, then click Add Website.

umami_add_website_1

Fill in the basic website information. If you check the share link, it will generate a publicly accessible URL. I added it as a bookmark on my iPad’s home screen, which also works great as a data dashboard.

umami_add_website_2

Configuring umami Script to Personal Blog Website

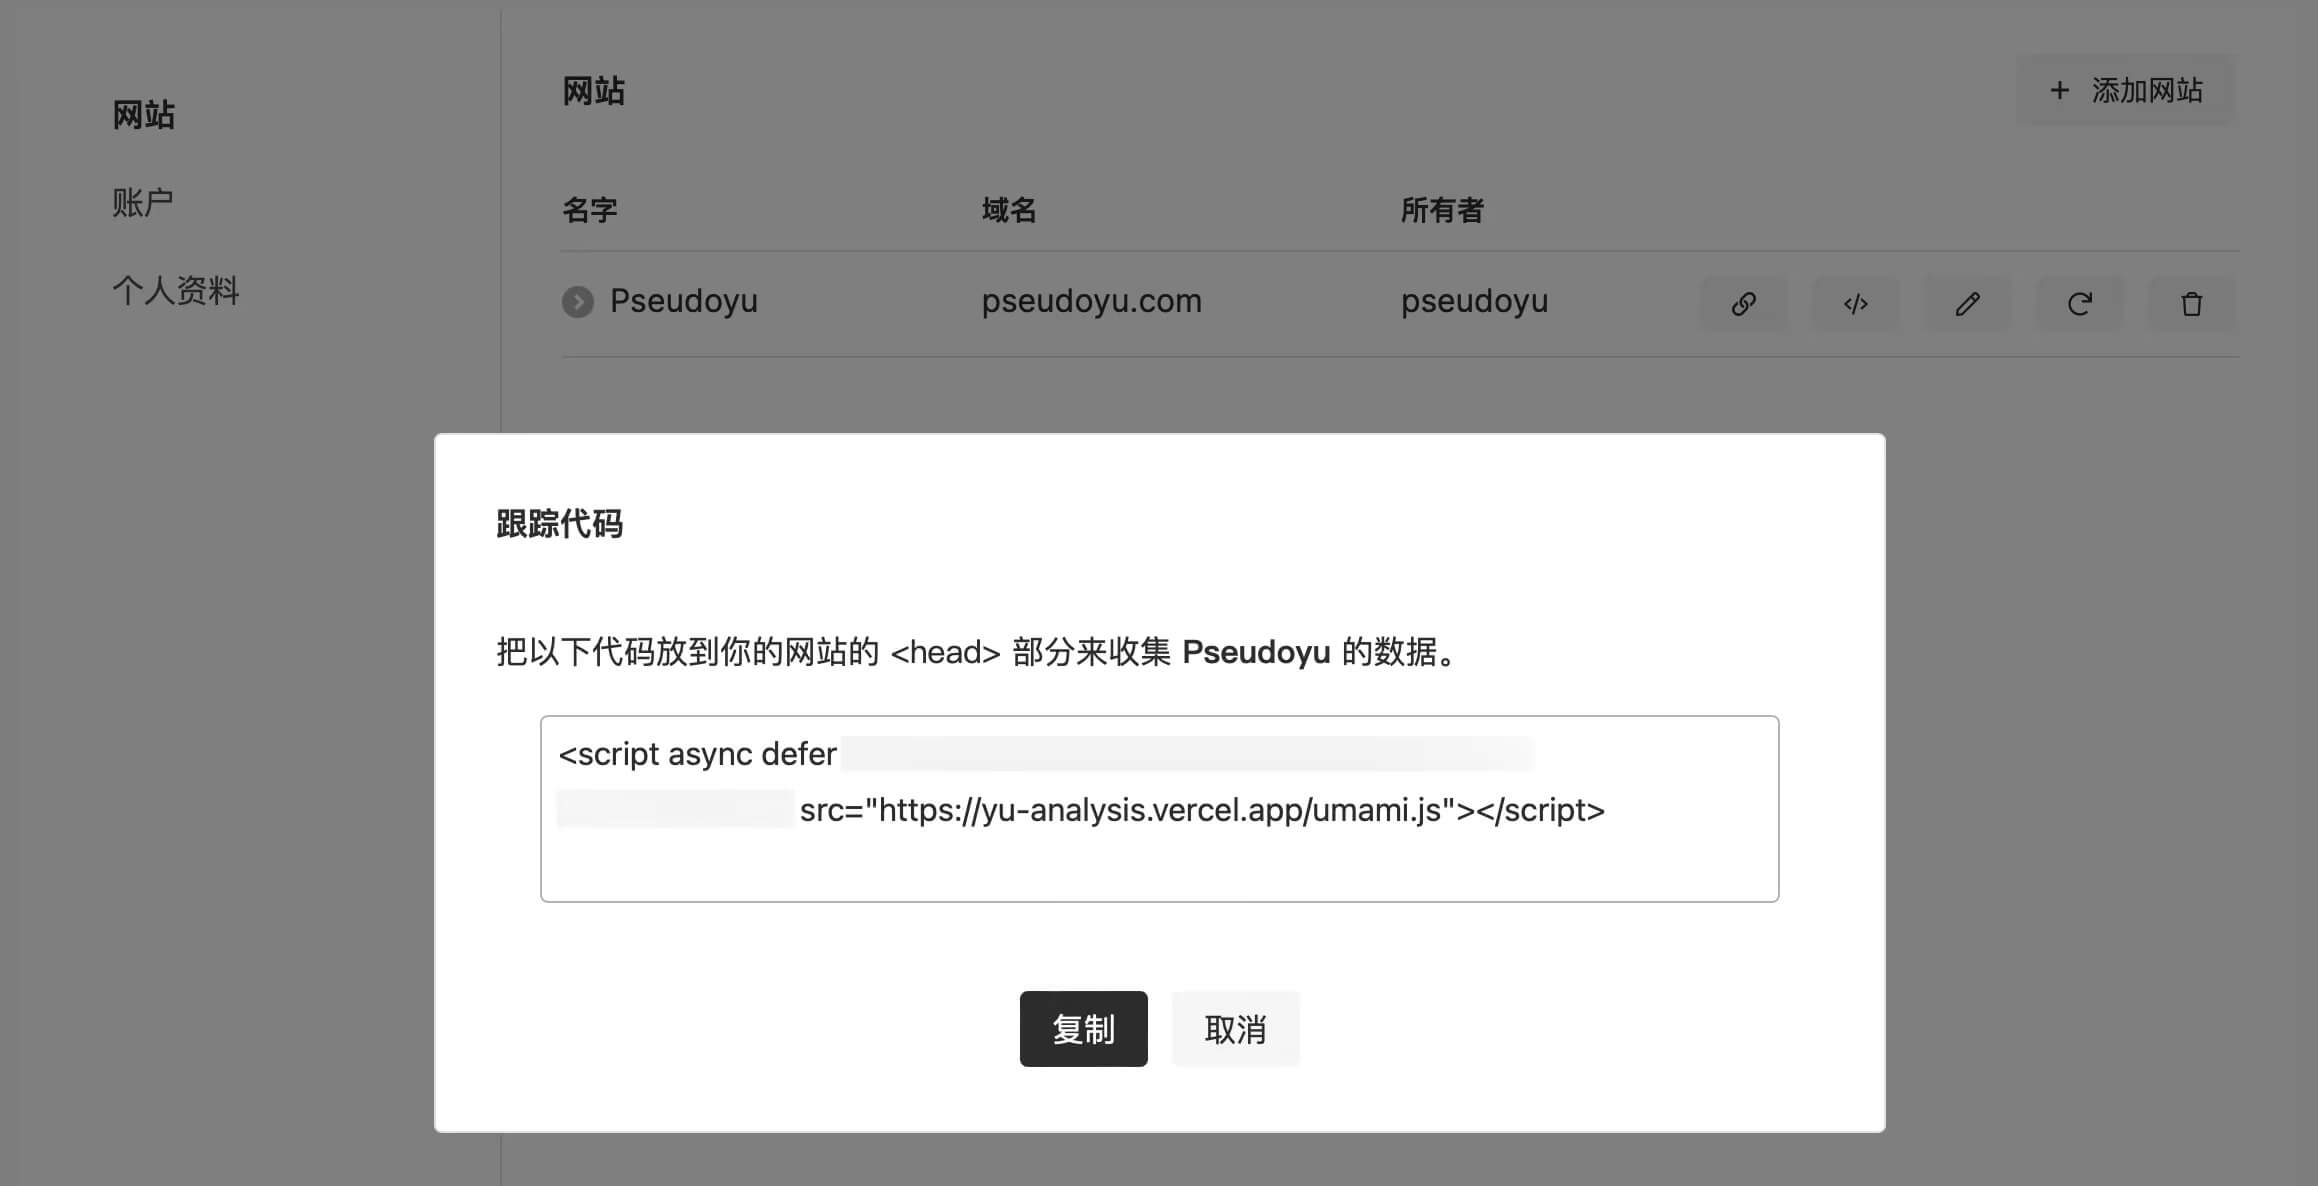
After creating the website, obtain the umami script.

get_umami_script

Once obtained, add the umami script to your personal website. I use the static blog Hugo, adding it within the <head> tag in the theme.

set_umami_script

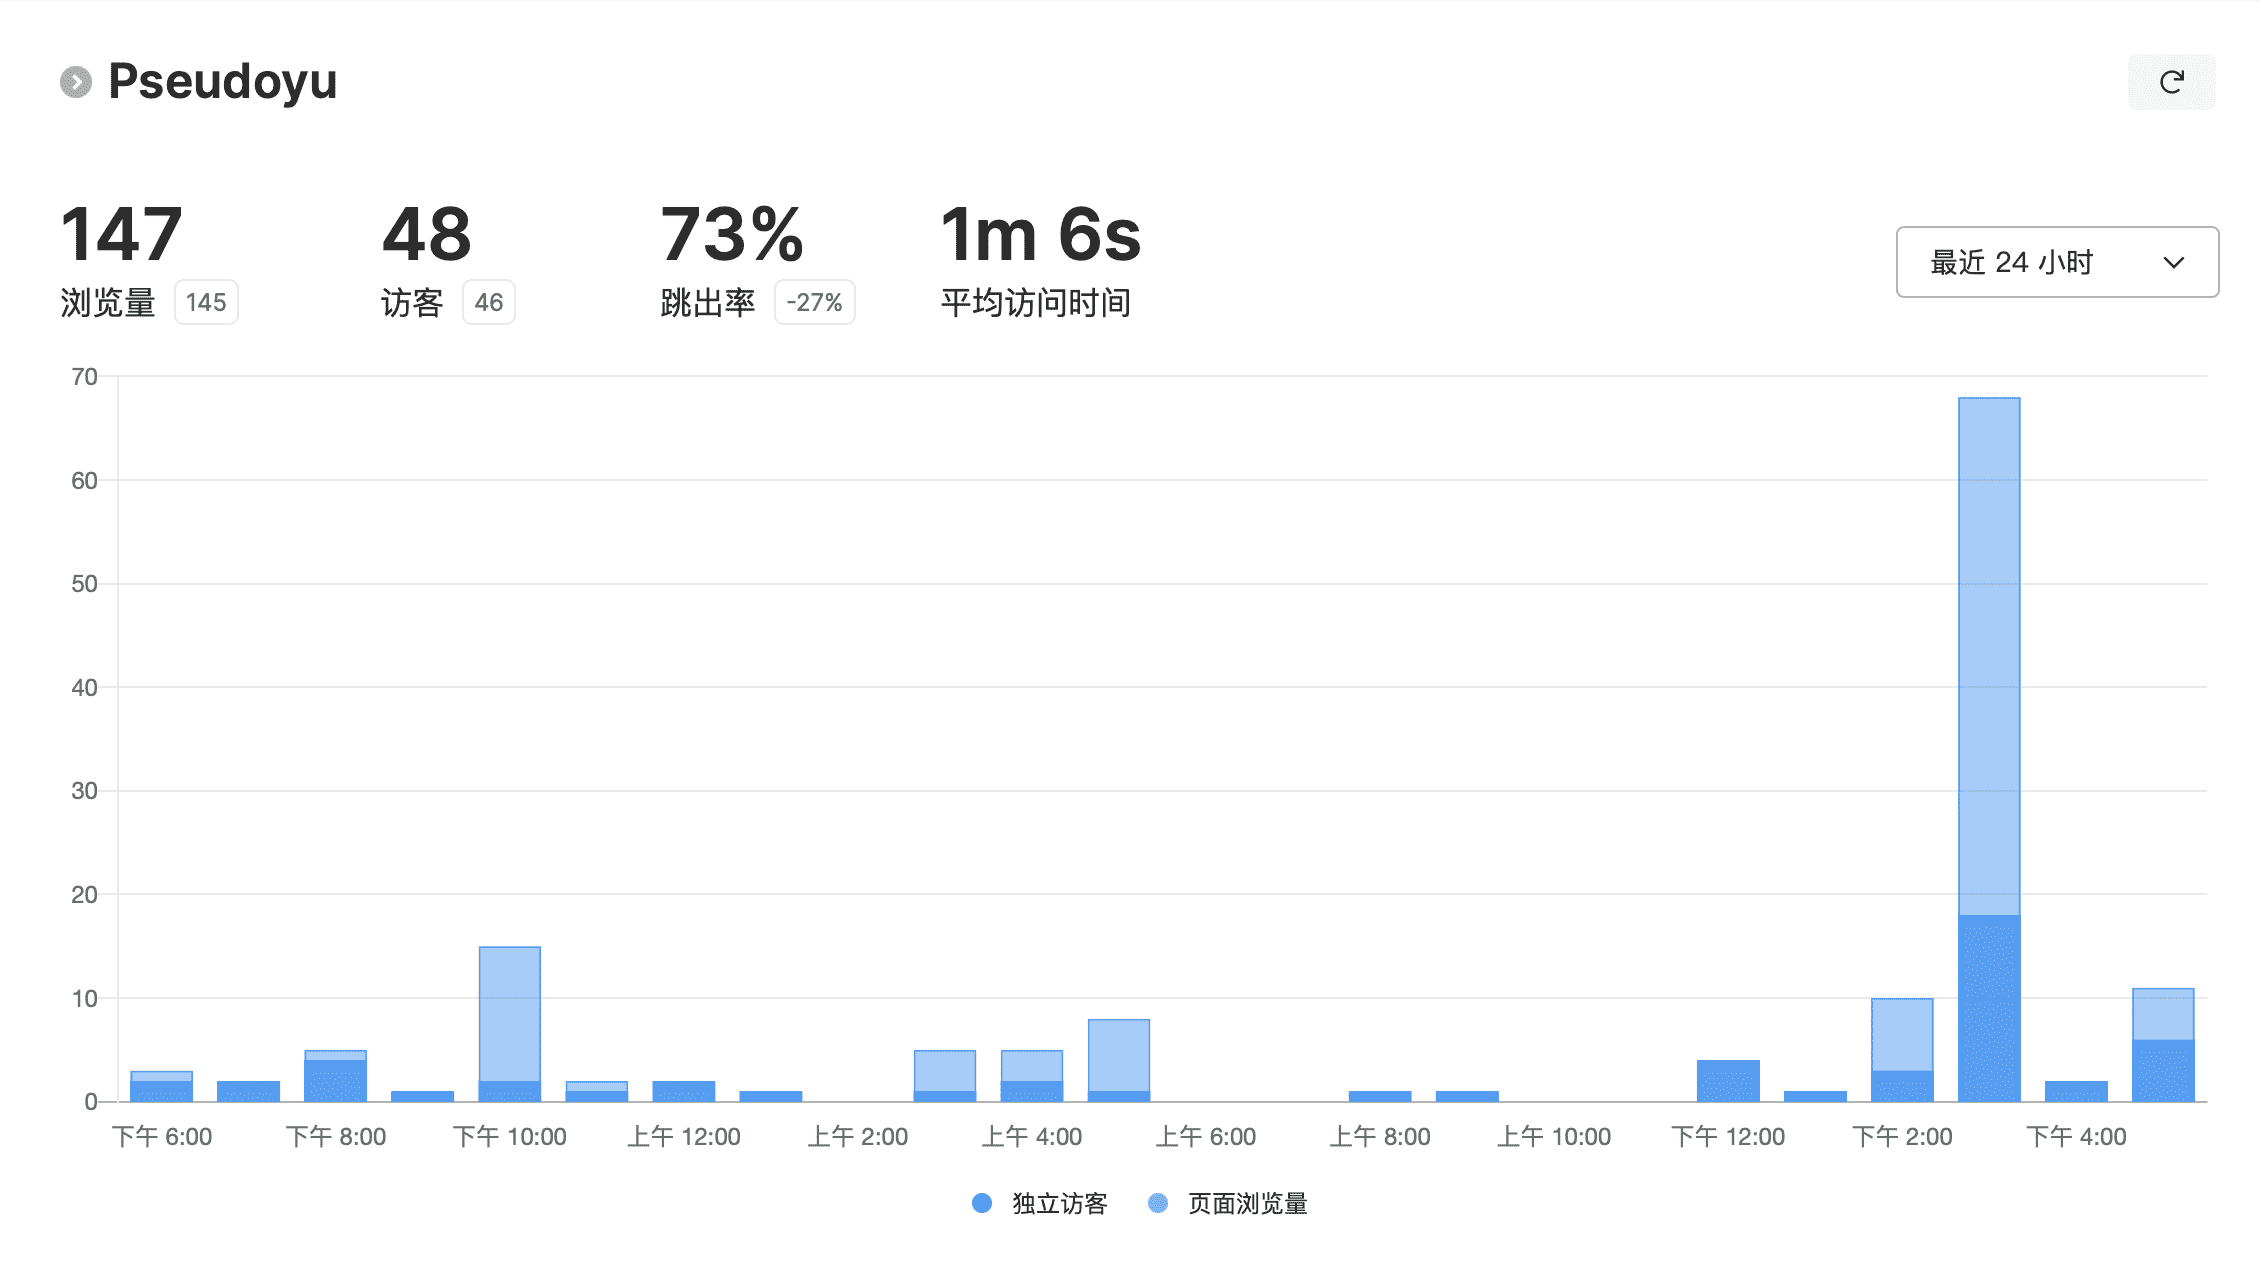
After configuration and deployment, you can start tracking website data.

umami_dashboard_white

Configuring Custom Script Name

Using the official umami.js script name might be blocked by some filtering rules. Therefore, we can customize the script name to achieve more accurate website data tracking.

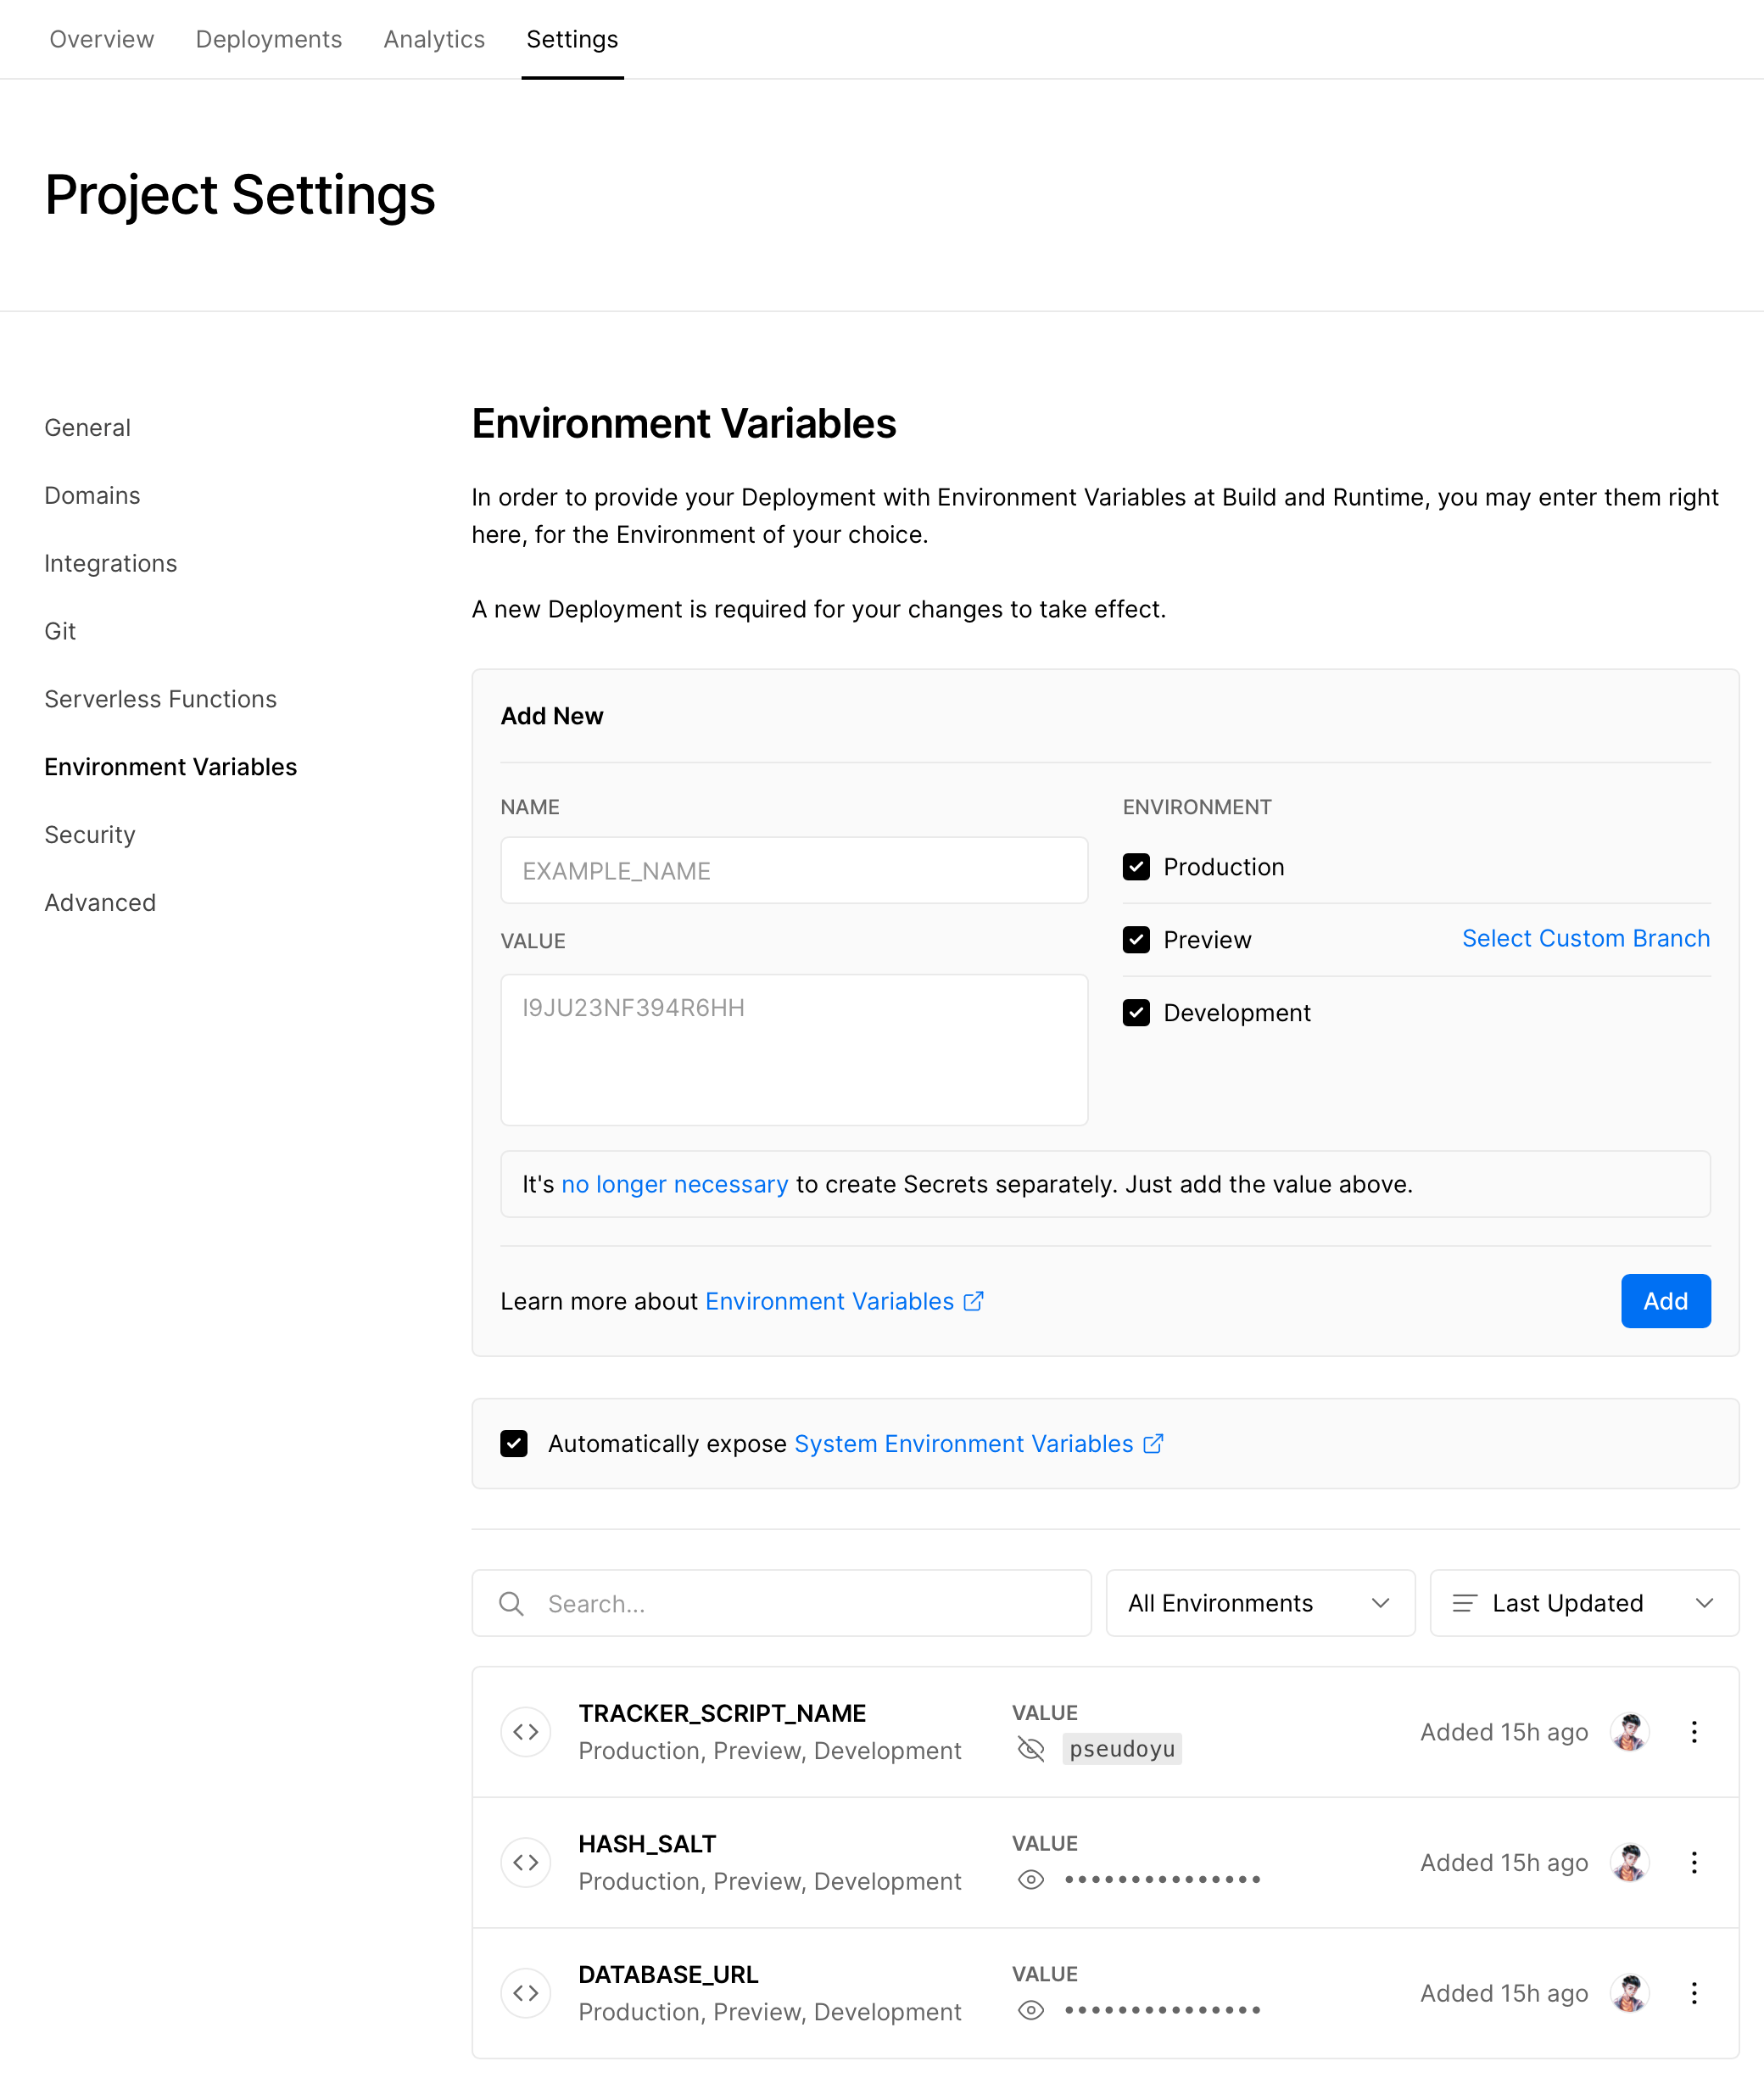
The official also provides a convenient modification method. You can add the TRACKER_SCRIPT_NAME environment variable in the umami service already deployed in Vercel, configuring it to a custom name.

umami_script_environment_varible

After configuration, redeploy, and then change the script name in your personal website script.

change_umami_script

Configuring Custom Domain

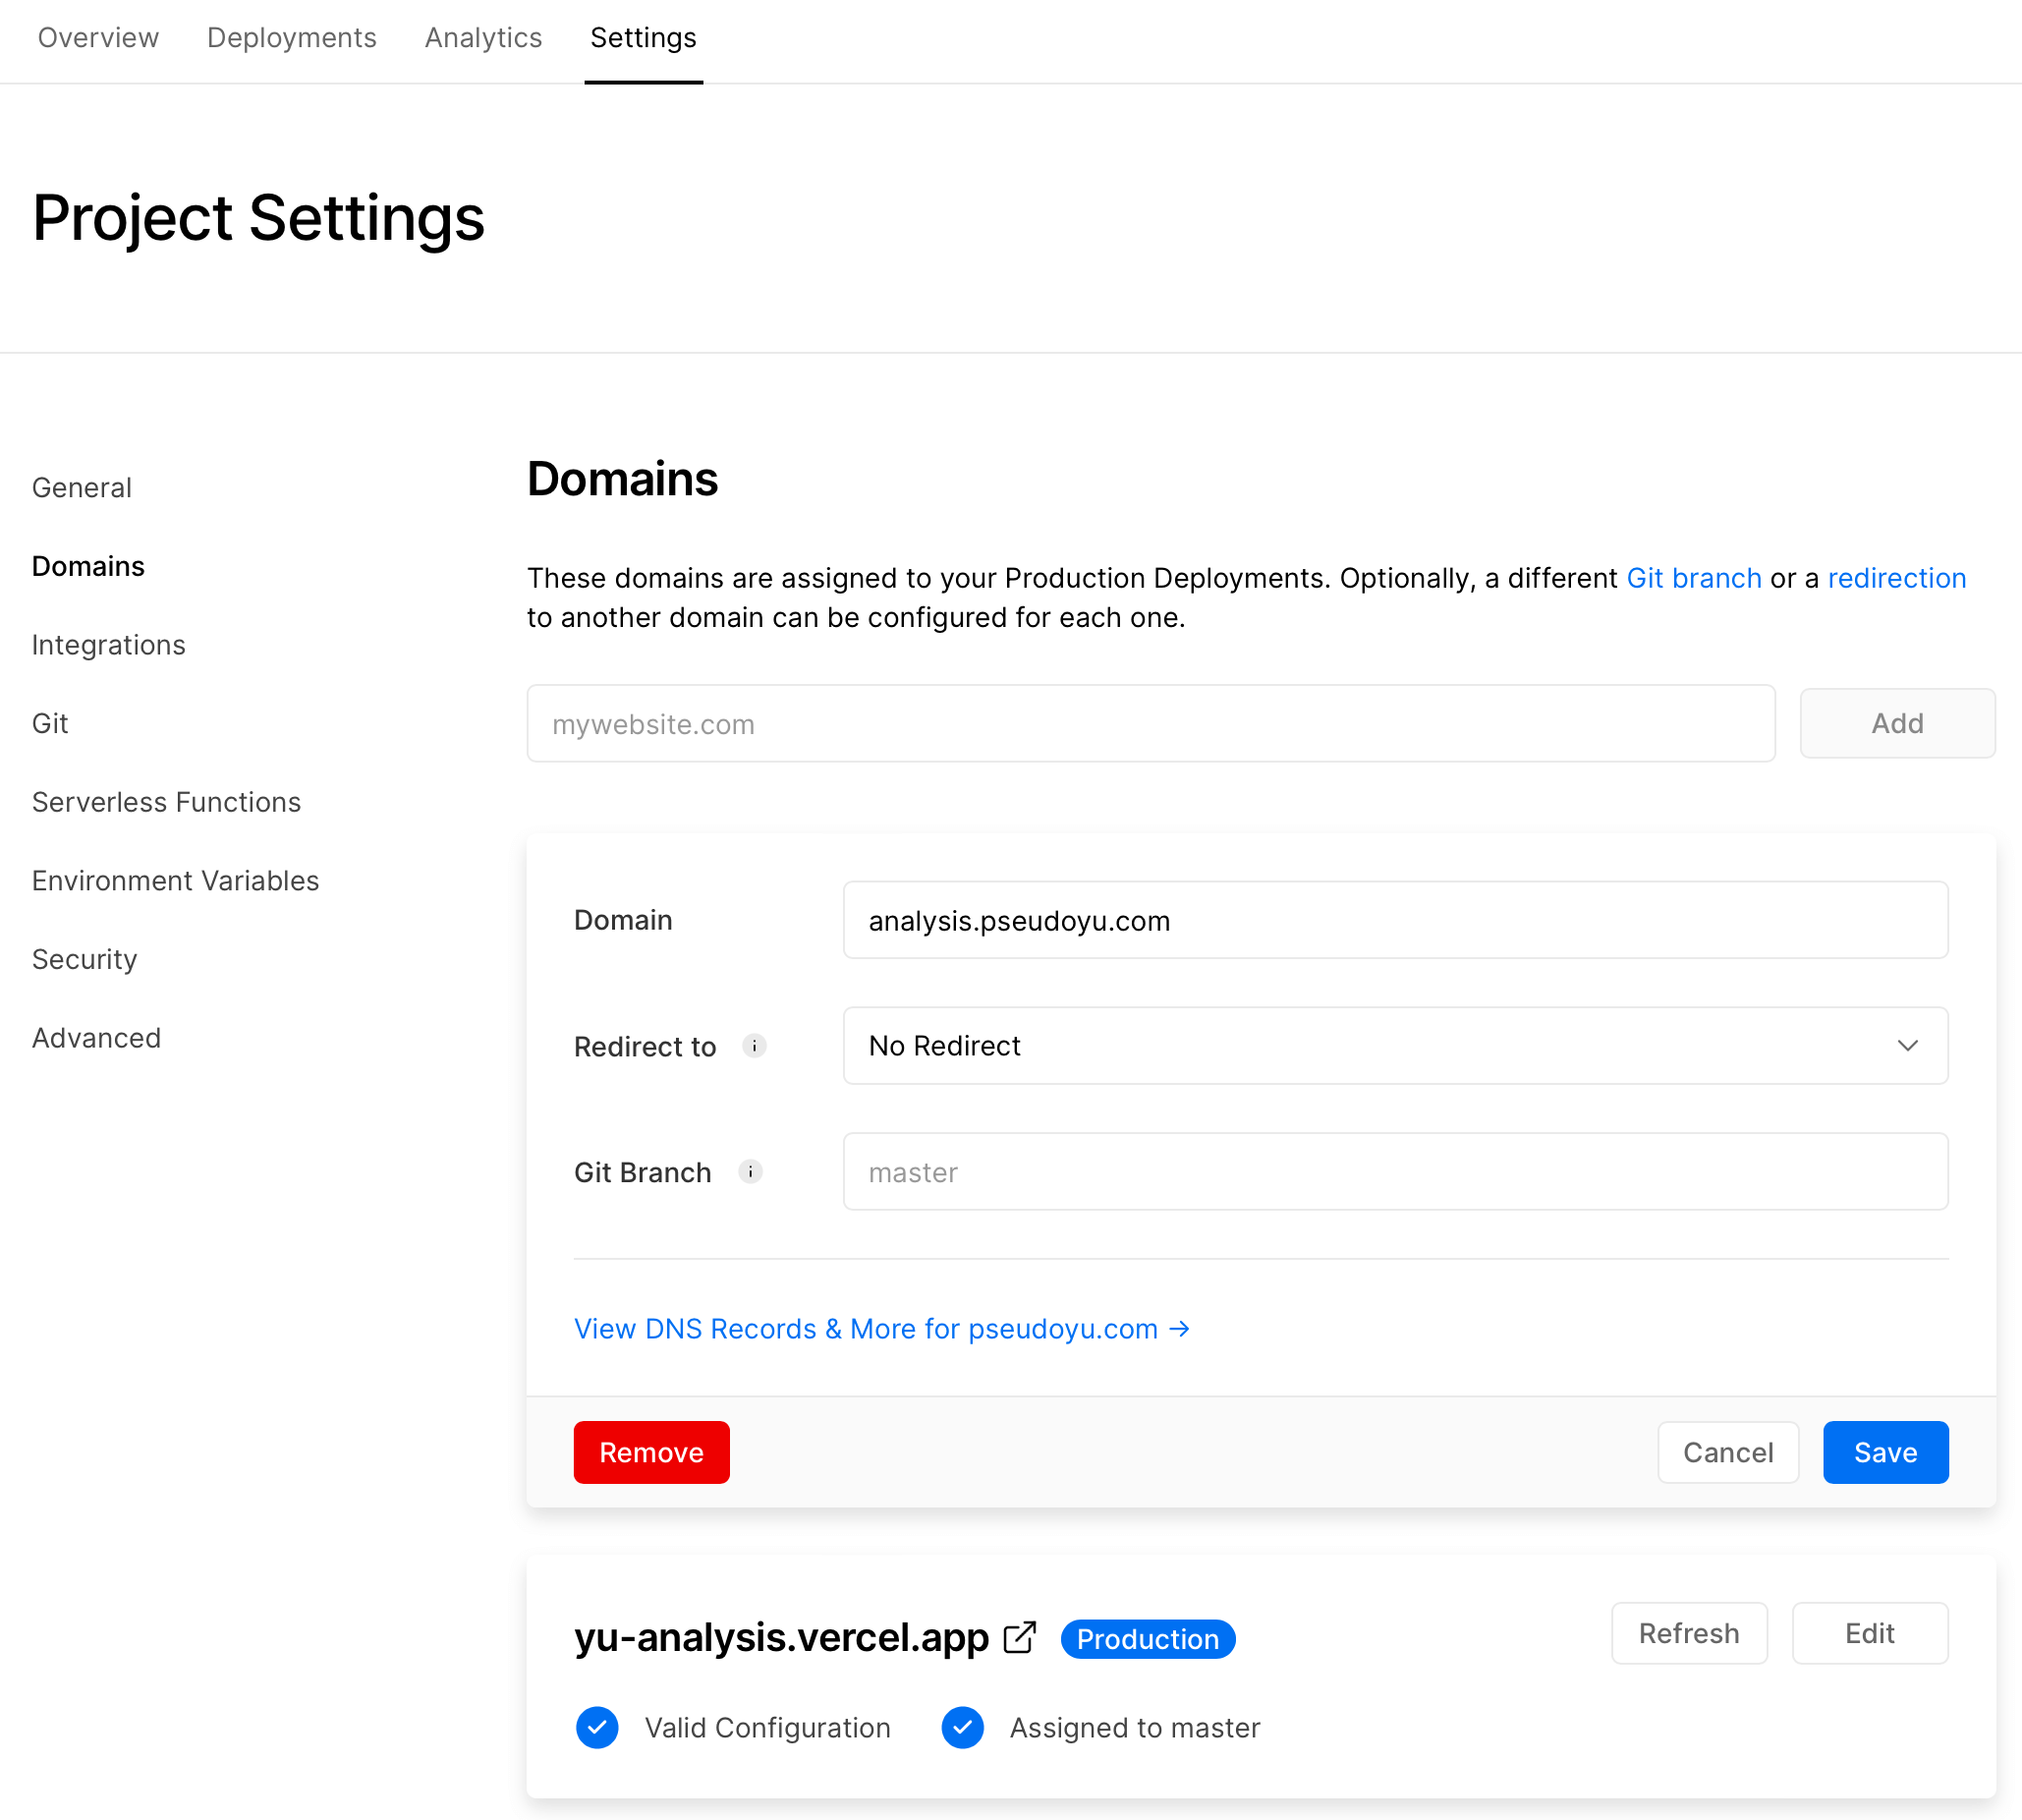
If you don’t want to use the vercel.app domain provided by Vercel, you can add a custom domain in Vercel. Follow the official Vercel guide to configure CNAME etc. for your domain provider.

set_custom_domain

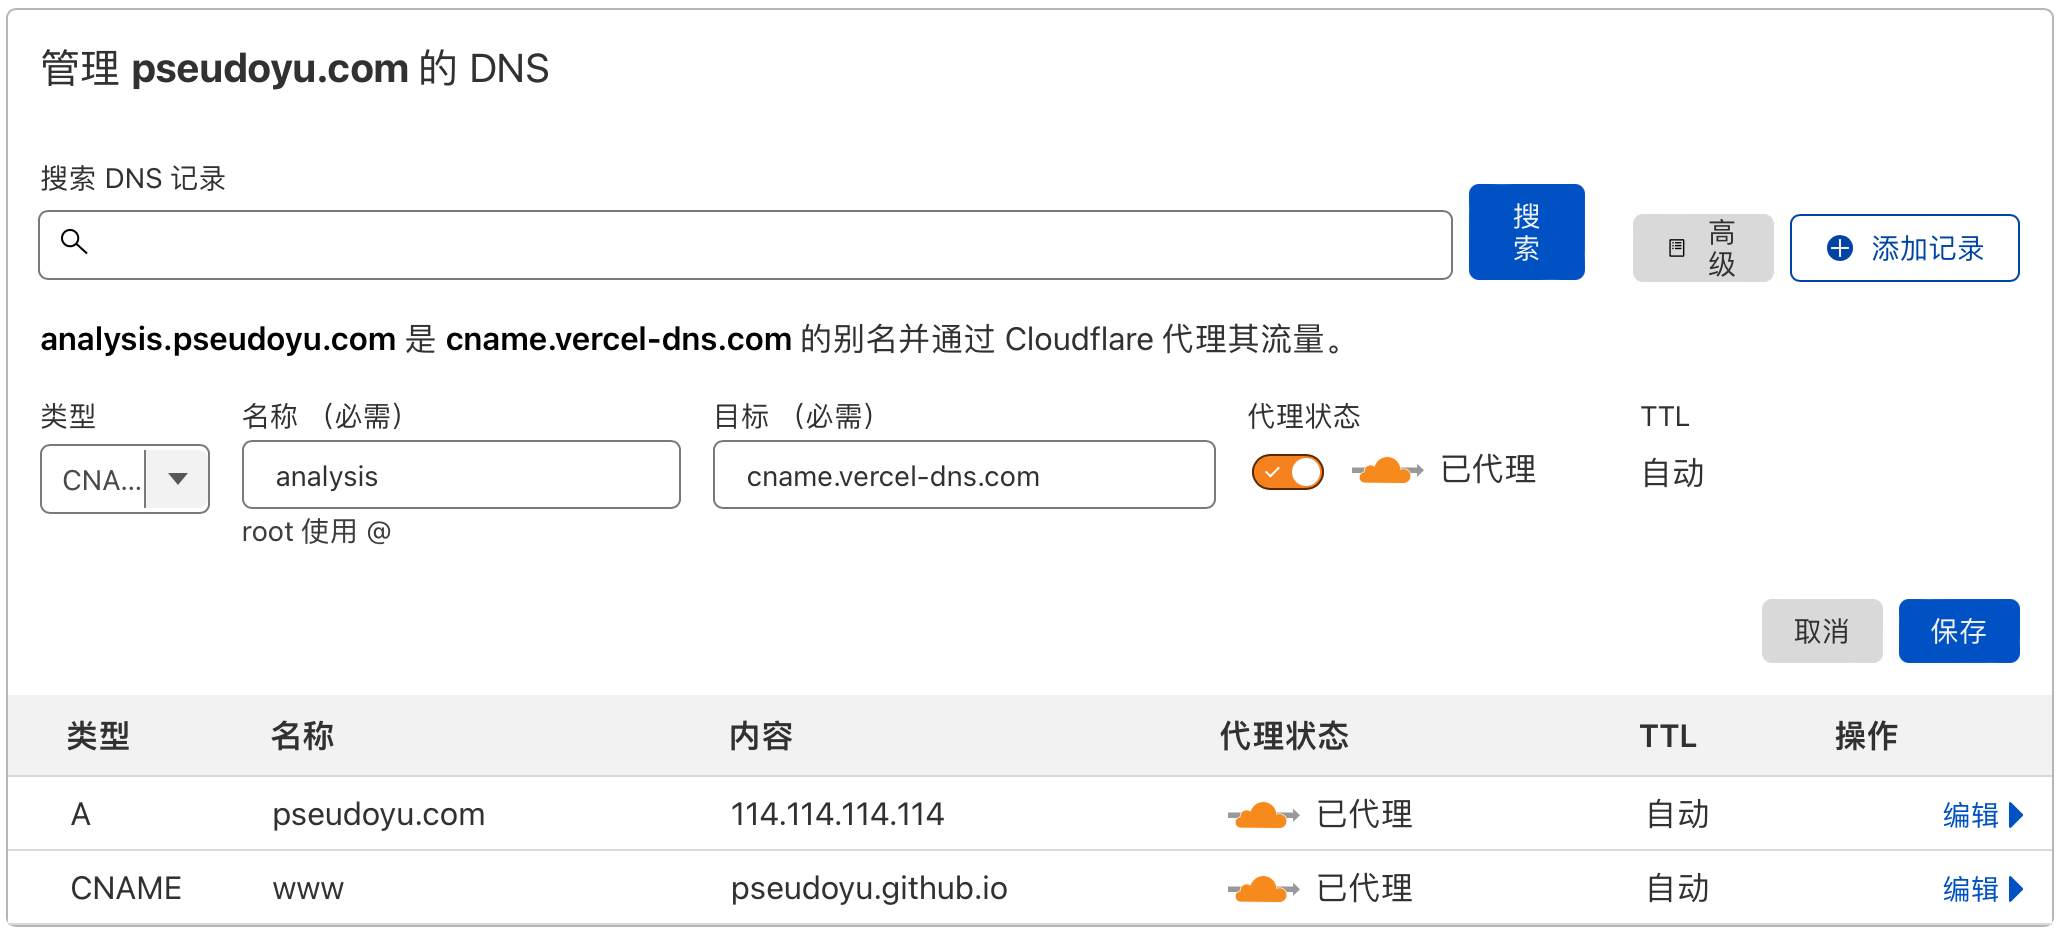
For example, I use a domain hosted by Cloudflare, so I need to add domain resolution first.

cloudflare_canme_config

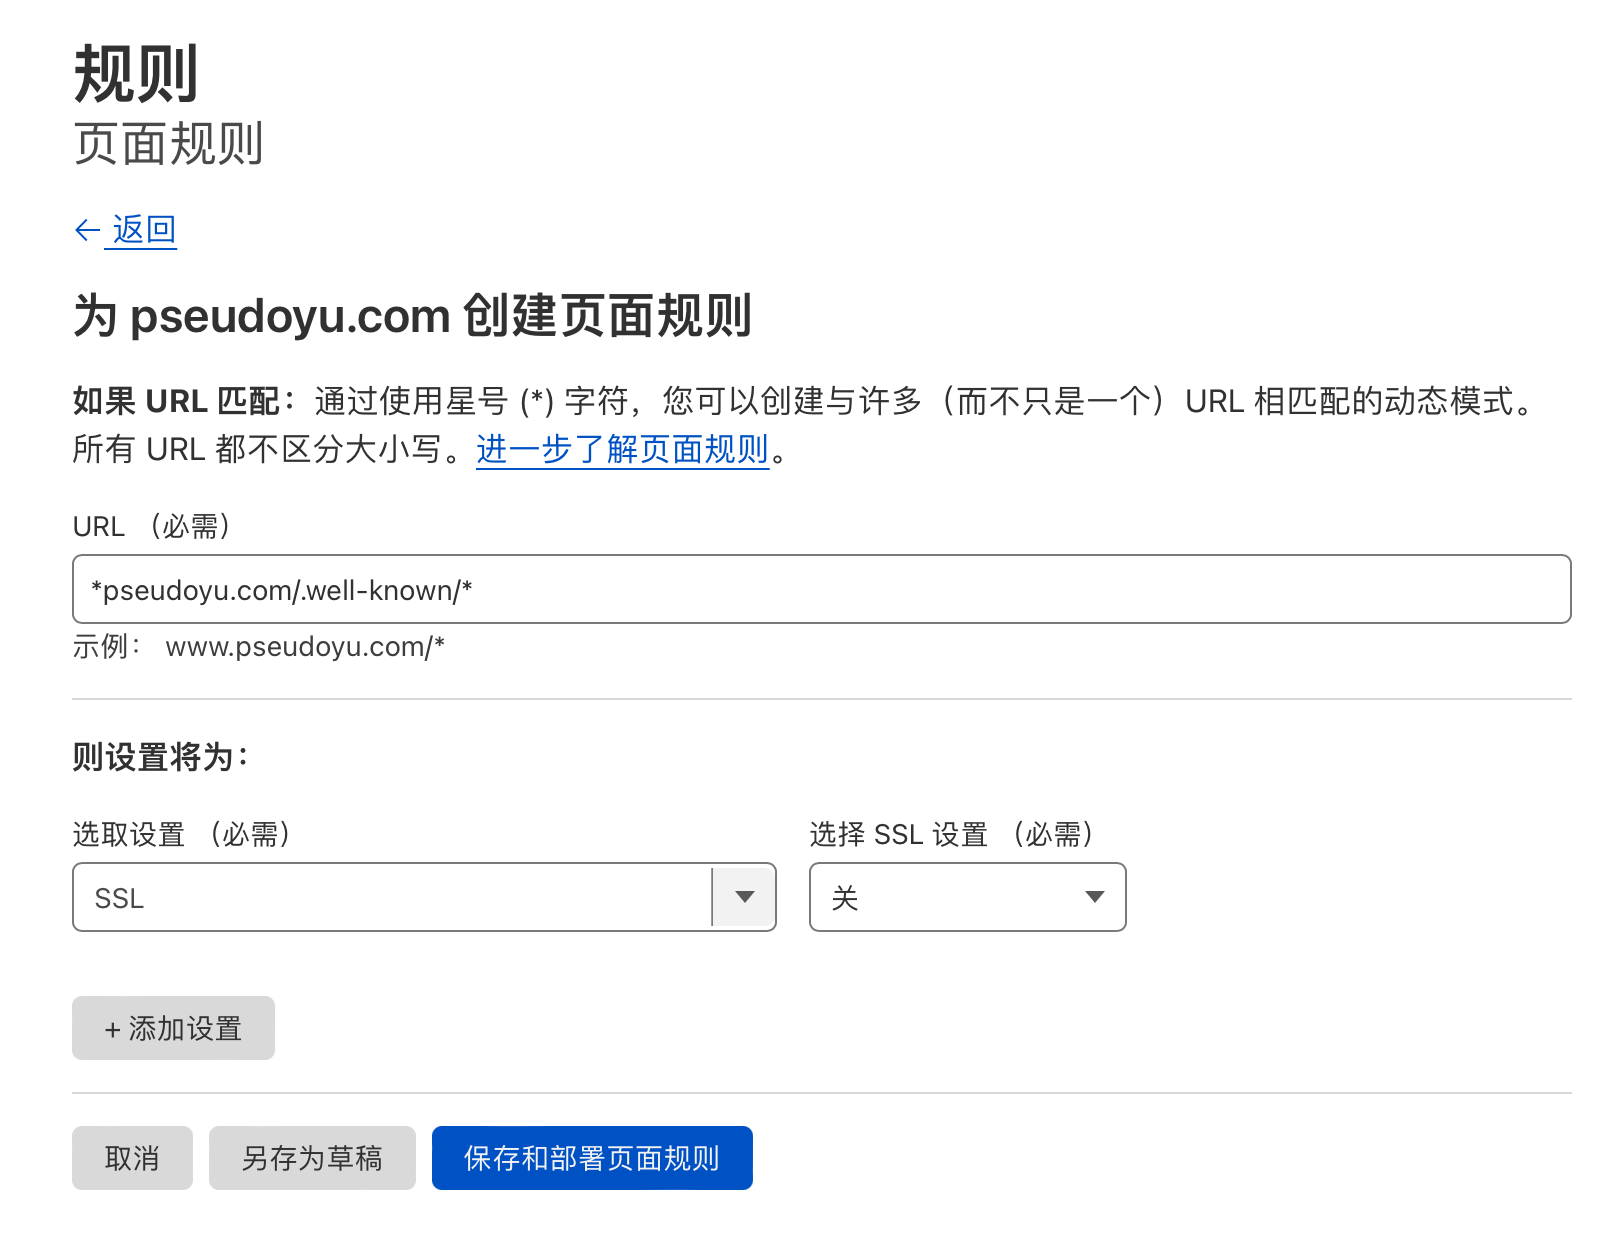
According to the official instructions, Cloudflare also needs to add a page rule. After configuration, you can complete the custom domain configuration.

cloudflare_page_rule

Conclusion

The above is the complete process of adding the umami website statistics service to our website. Once configured, it requires no subsequent maintenance and allows for convenient website data tracking through the dashboard. This is one of my blog setup and deployment series tutorials. Please stay tuned, and I hope it can be of reference to everyone.

References

  1. umami
  2. Deploy umami for Personal Website Analytics
  3. Vercel Official Website
  4. Heroku Official Website

Related Posts

2024-08-06
Setting up a Website Analytics System with GoatCounter and Zeabur
2024-07-22
Build Your Free Blog Comment System from Scratch (Remark42 + fly.io)
2024-07-02
Adding Privacy and Copyright Protection to Your Image Hosting with WebP Cloud and Cloudflare WAF
2024-06-30
Build Your Free Image Hosting System from Scratch (Cloudflare R2 + WebP Cloud + PicGo)
2024-06-29
In 2024, What Changes Have Come to My Blog
pseudoyu

Author

pseudoyu

Backend & Smart Contract Developer, MSc Graduate in ECIC(Electronic Commerce and Internet Computing) @ The University of Hong Kong (HKU). Love to learn and build things. Follow me on GitHub


Comments