Preface
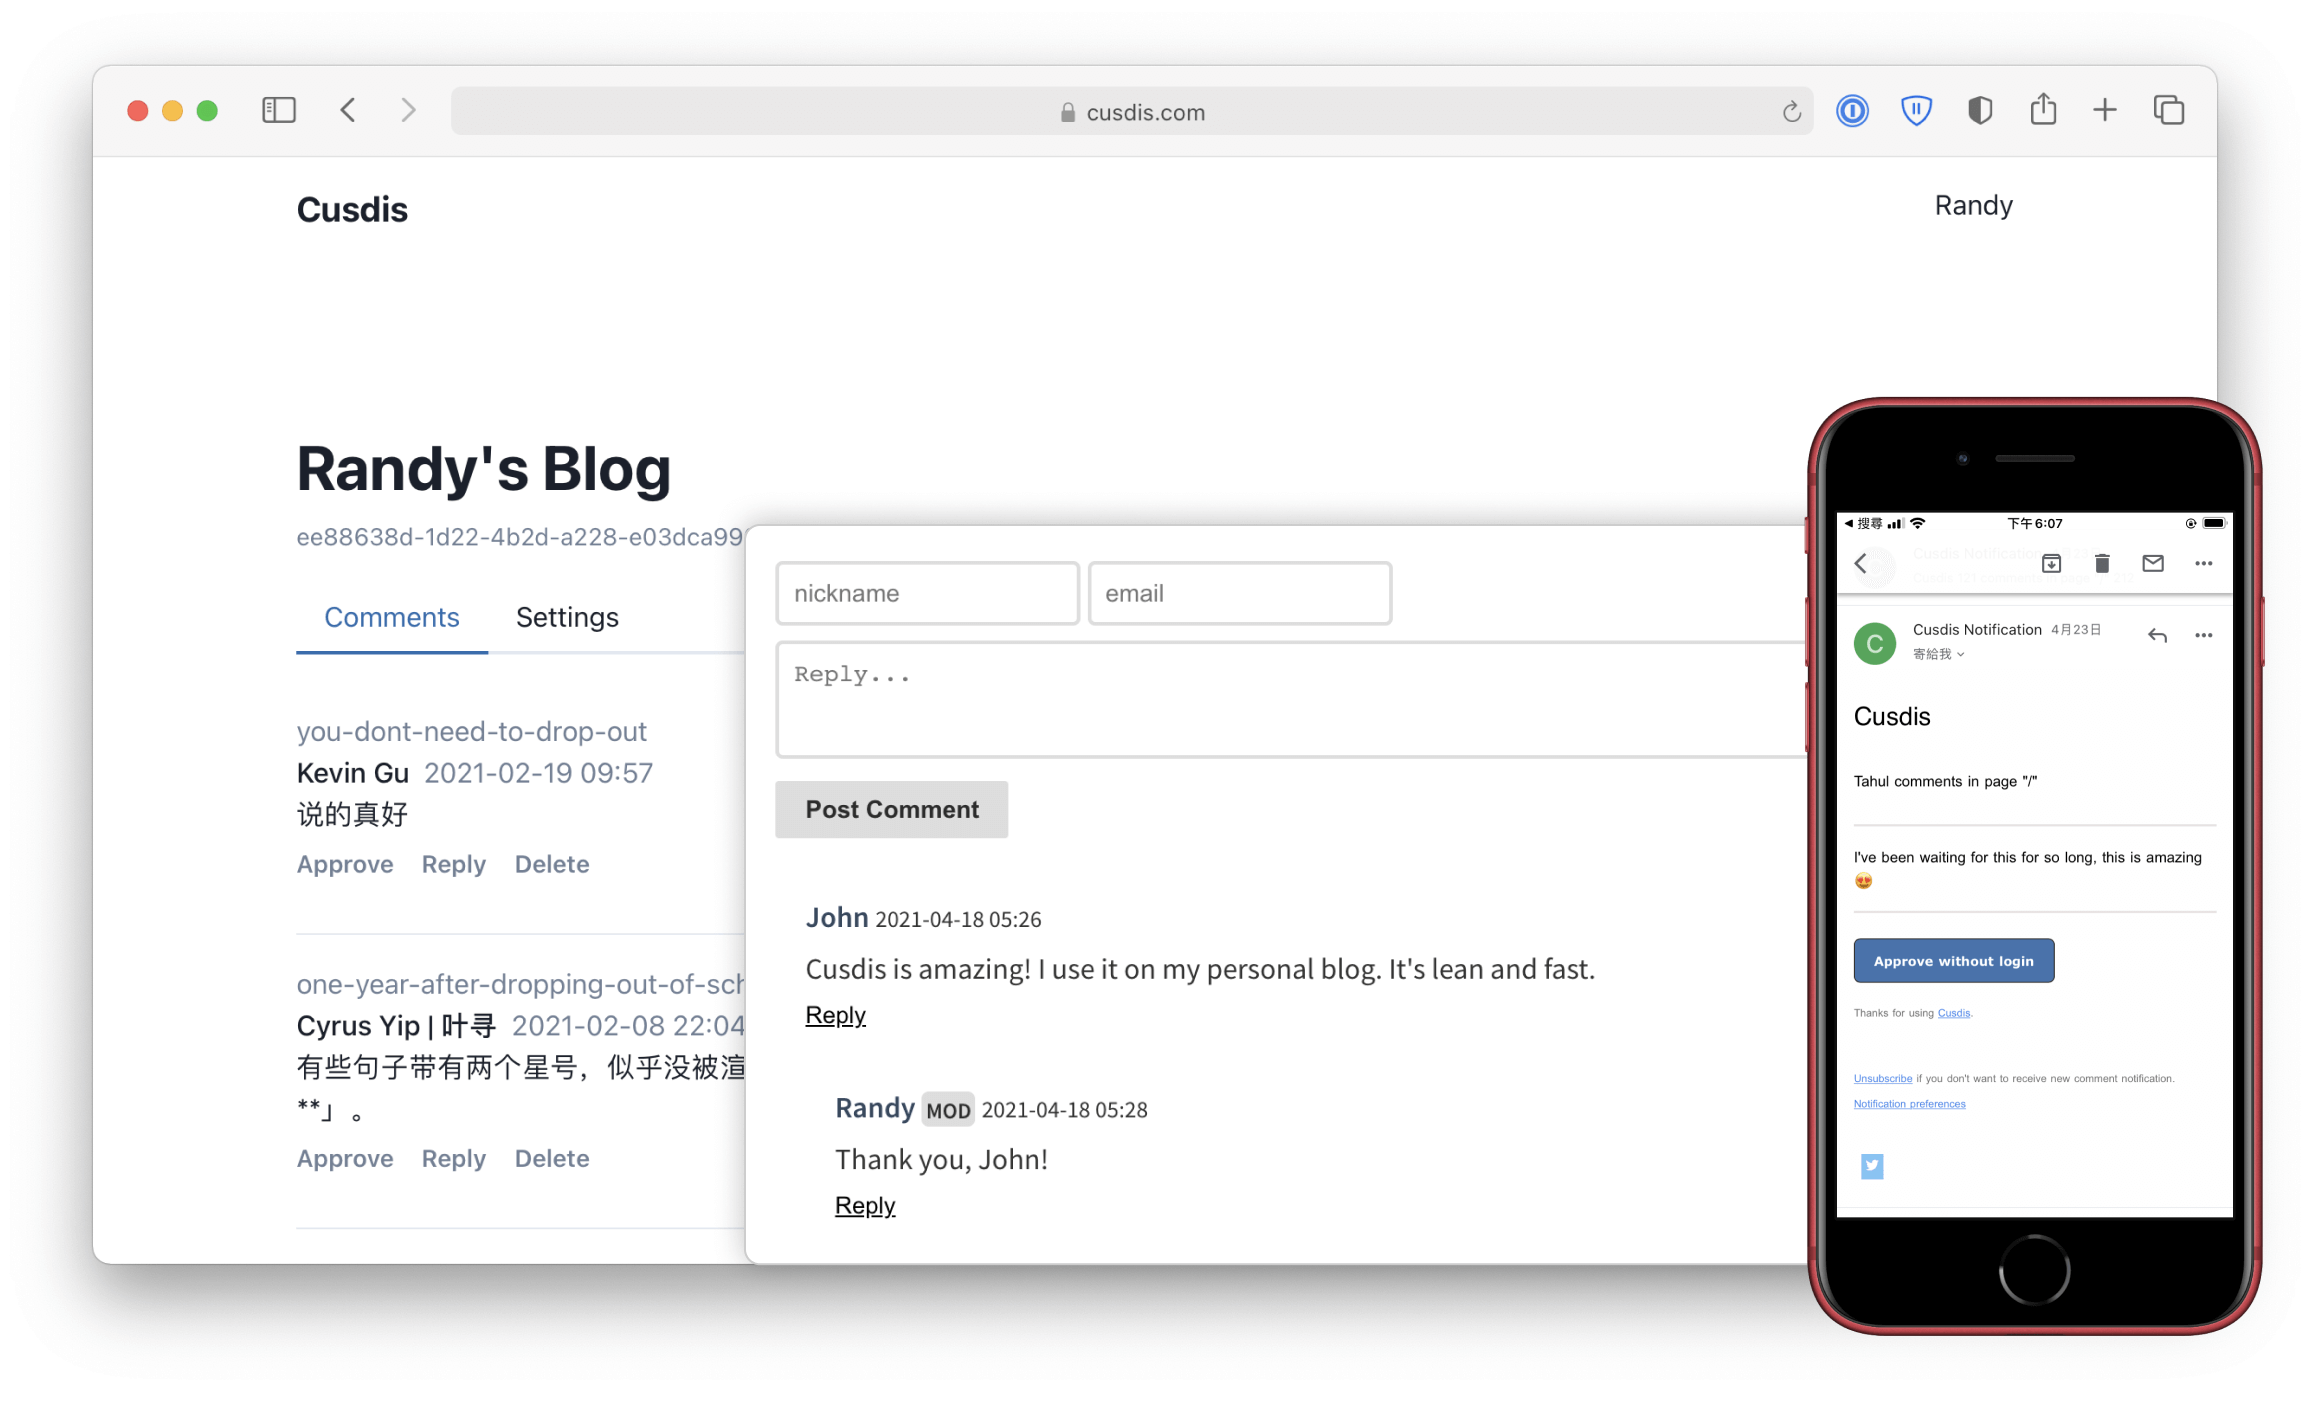
Previously, I wrote an article titled “Free Personal Blog System Setup and Deployment Solution (Hugo + GitHub Pages + Cusdis),” detailing my blog system built using Serverless and some open-source projects. I also started a series to document the setup process.
This article focuses on the blog comment system solution. The earliest comment system I used was the notorious Disqus, a cumbersome system known for collecting user privacy data. Due to its slow loading and frequent advertisements in the free version, it became unbearable. So, I switched to another comment system based on GitHub issues called utterances. It generates an issue for each article and allows users to comment on the issue by authorizing GitHub login. The advantage of this method is that it only requires authorizing a utterances-bot for management, without the need for self-deployment of services or database maintenance. However, after using it for a while, I found several shortcomings:
- It relies on the GitHub API for comment management. If there are future API changes or restrictions on using issues for comments, it may become unstable.
- Readers must authorize GitHub login, which is inconvenient for non-technical users or those reading on mobile devices.
- It clutters the GitHub repository and makes it difficult to migrate to other systems in the future.
After some research, Randy’s Cusdis caught my attention. Cusdis is an open-source comment system that prioritizes data privacy and is extremely lightweight, with a gzipped size of only about 5kb. From its name, you can tell that the developer was also frustrated with Disqus and created an alternative version. Therefore, it also supports importing historical data from Disqus, which is very thoughtful.
Although this is an early-stage project, it already provides email notifications and comment alerts through Webhook integration with Telegram, making it convenient for users to manage. Cusdis offers both free hosted services and self-hosted options. If you don’t want to bother with setup, you can directly use the service provided by the author. Self-hosting requires a server and a PostgreSQL instance. We will mainly demonstrate the self-hosted approach.
In my previous article “Building a Free Personal Blog Analytics System from Scratch (umami + Vercel + Heroku),” I used Vercel and Heroku for setup. As someone who enjoys tinkering, we’ll use Railway to build and deploy this comment system.
Railway is similar to Vercel, also a PaaS platform that supports deployment of projects in multiple languages. For personal projects, its $5 monthly free quota is more than enough. After testing, deploying the previous umami website analytics system along with a PostgreSQL database instance on the Railway platform costs about $0.7 per month, which is completely sufficient for personal use.
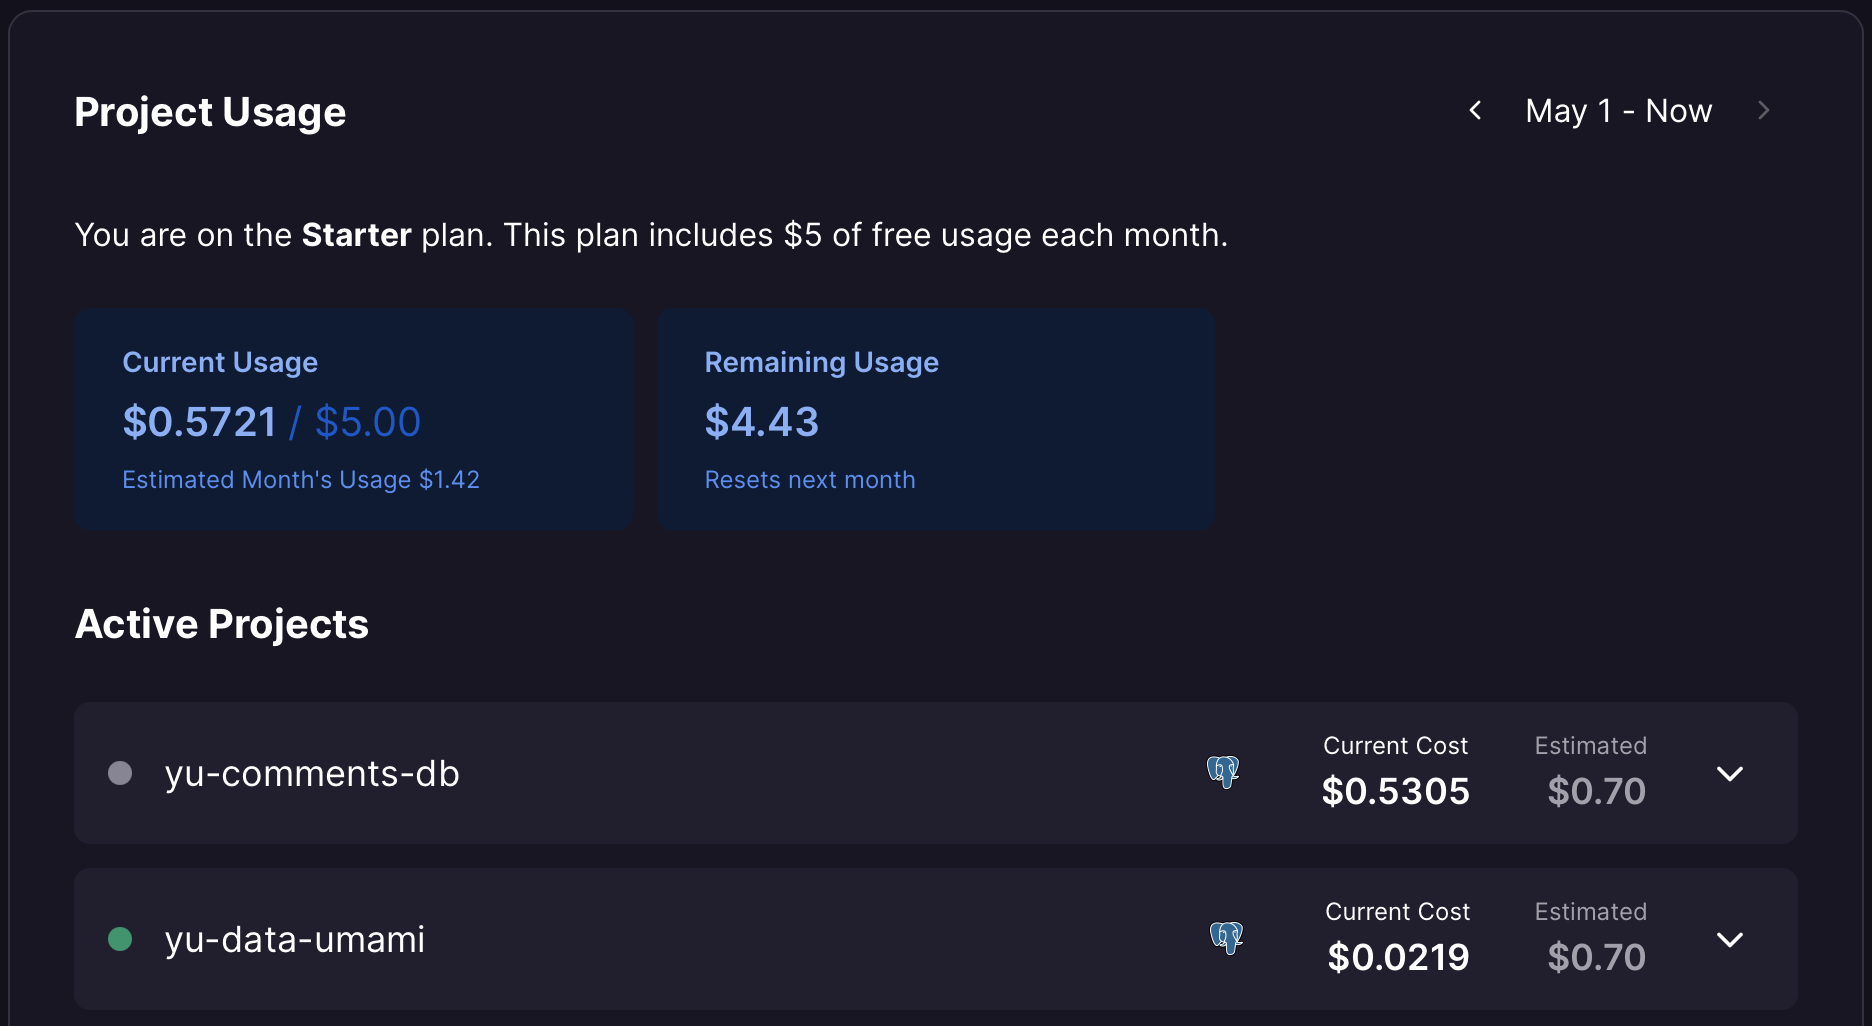
Compared to Vercel, it also supports deploying database instances, allowing you to deploy the database and instance together in a single project, reducing setup and maintenance costs. The following will record the specific setup and deployment process, which is very smooth due to official support for one-click deployment on Railway.
[2024-06-30 Update]
Given that Railway has discontinued its Free Plan since August last year, if you still want to use it completely free of charge, you can use Vercel/Netlify/Zeabur to deploy the main project for free, and deploy a free PostgreSQL database instance on Supabase, passing the connection as an environment variable to the Cusdis service. The rest of the process remains largely the same.
Setup and Deployment Instructions
One-Click Deployment of Service and Database Instance Using Railway
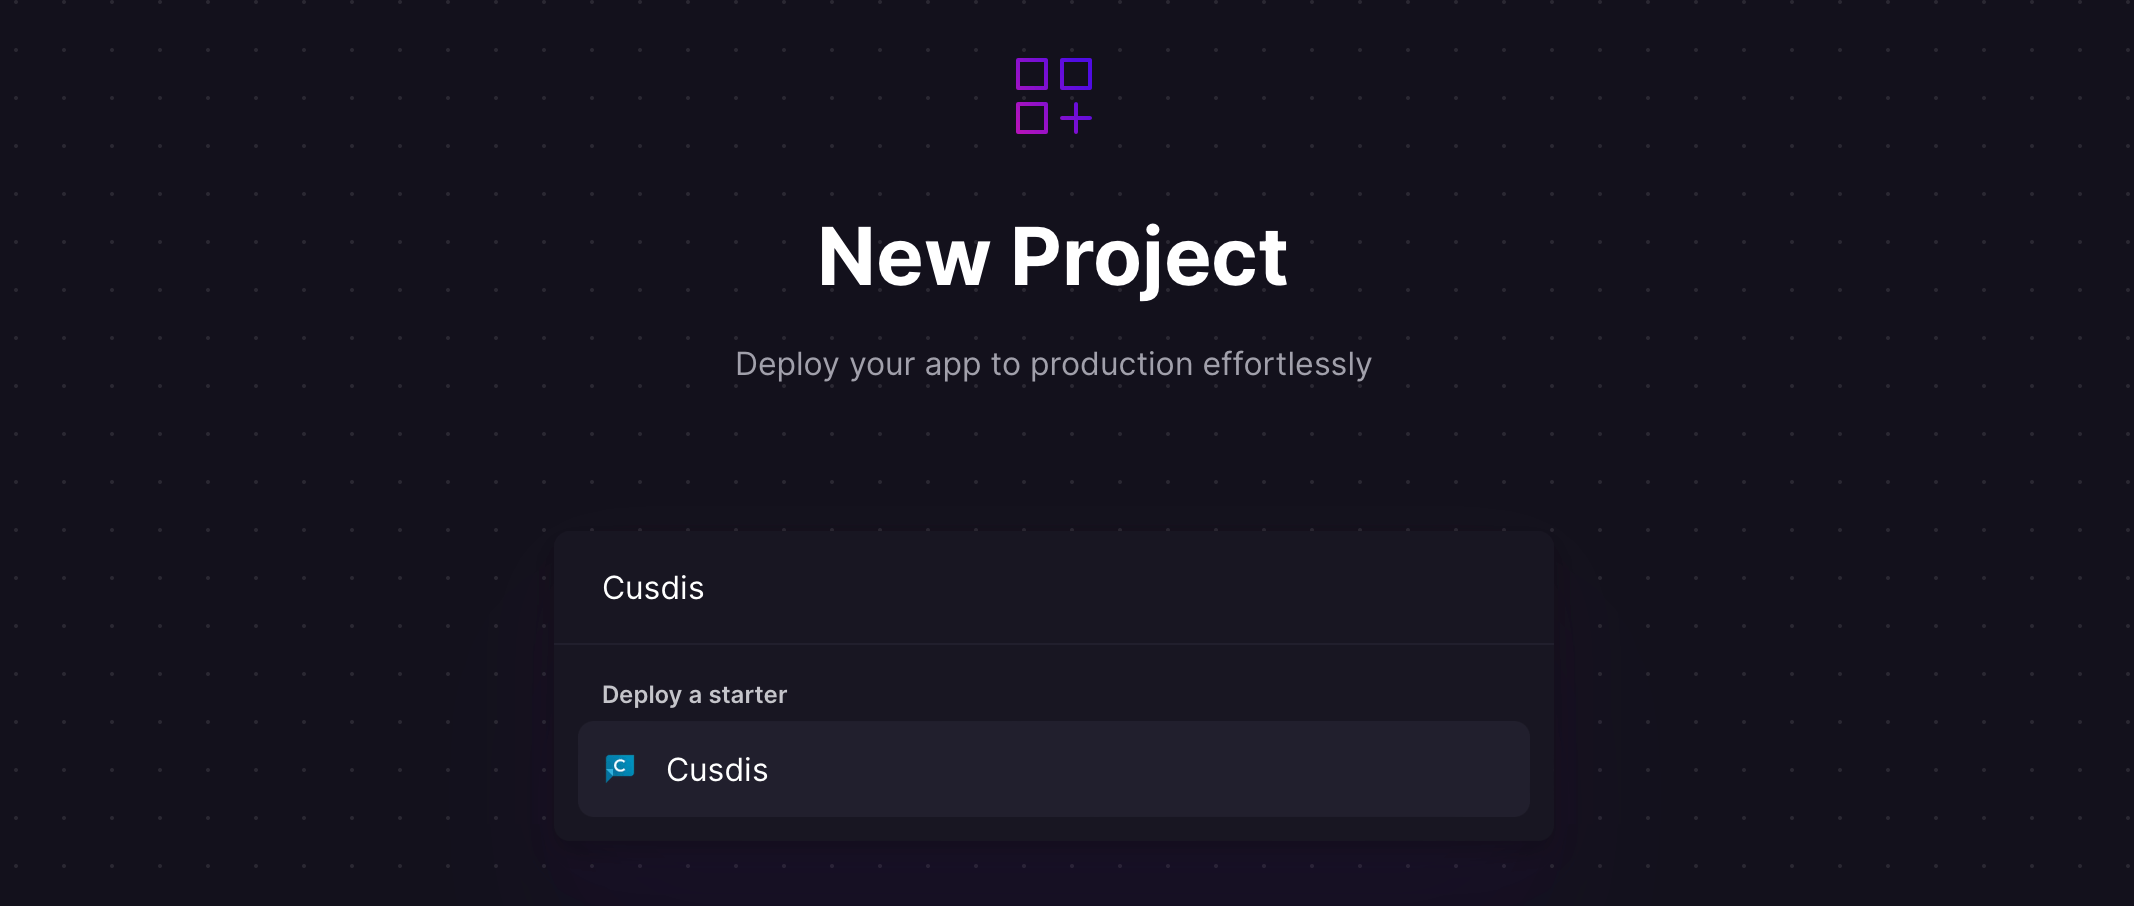
First, register for a Railway account. You can use my invitation link. After registration and login, click on New Project in the upper right corner to create a project.

Then search for Cusdis and click on the appearing project to start deployment. The first few steps can also be done by clicking the Deploy on Railway button in the Cusdis project repository for one-click deployment.
Before starting deployment, you need to manually enter three environment variables:
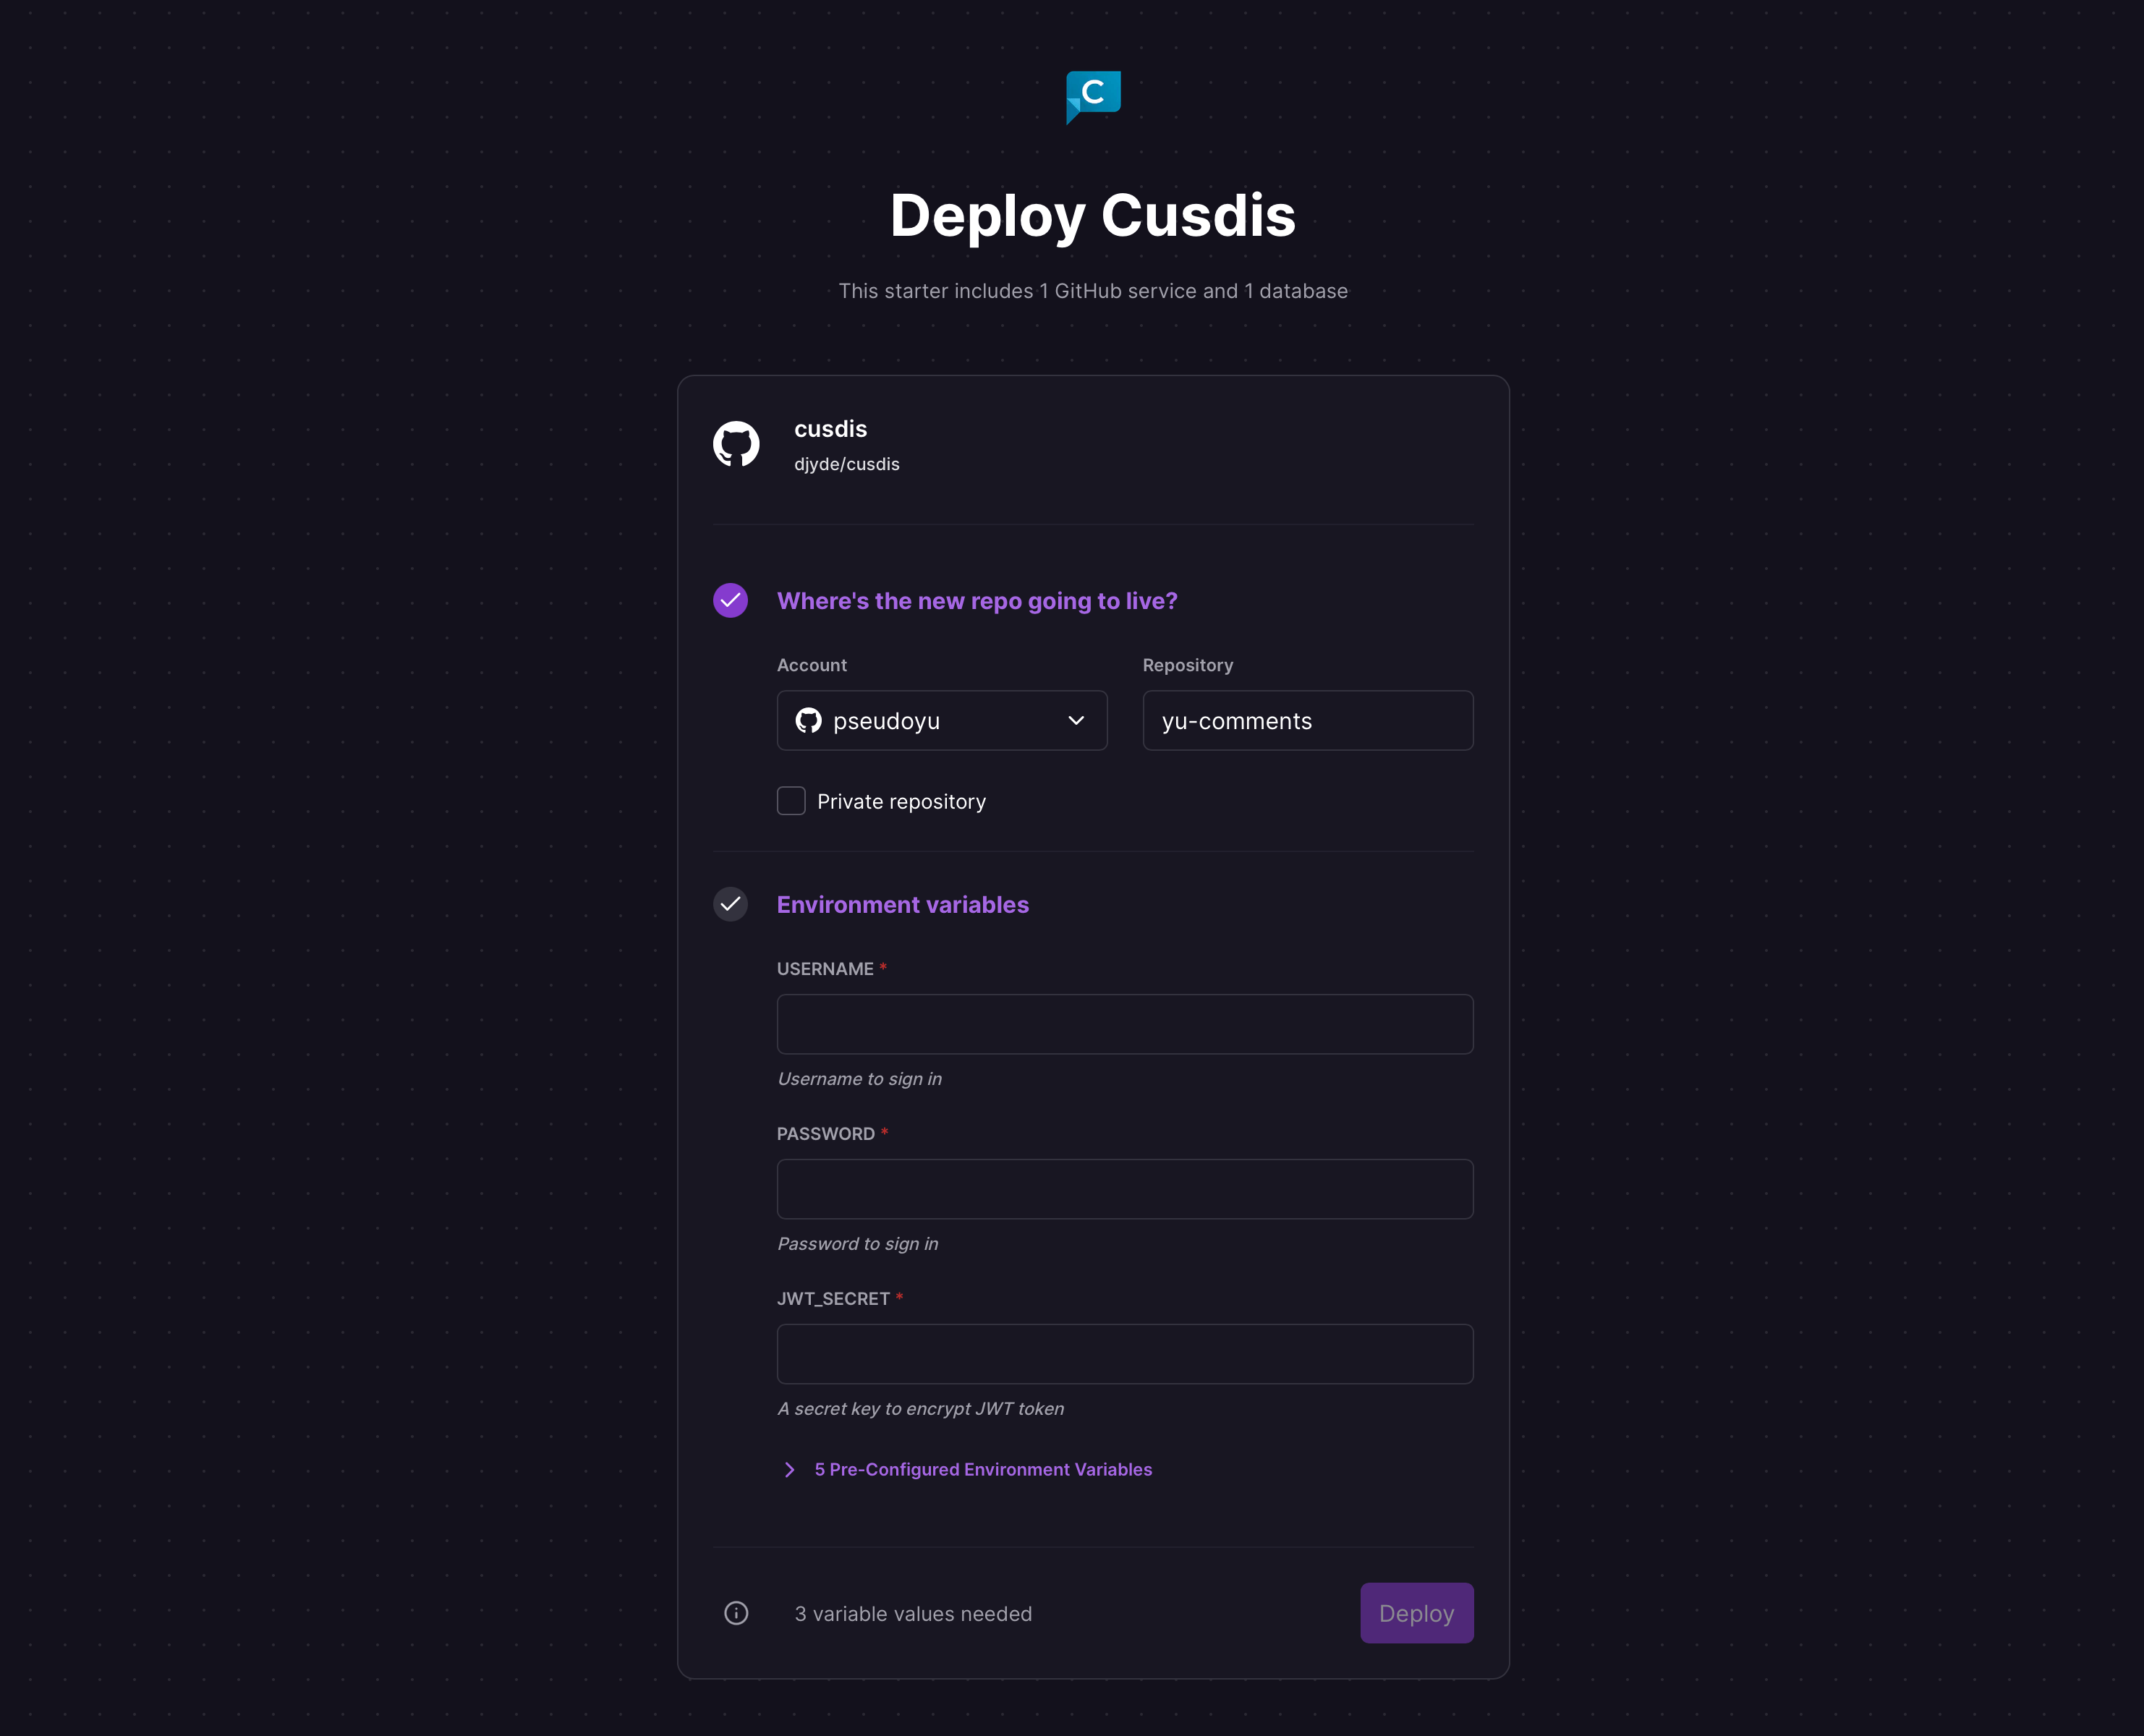
- USERNAME: Account for login
- PASSWORD: Password for login
- JWT_SECRET: A random string
Other environment variables have been preset with default values, please do not modify them:
- NEXTAUTH_URL:
${{ RAILWAY_STATIC_URL }} - DB_TYPE:
pgsql - DB_URL:
${{ DATABASE_URL }} - PORT:
3000
Click deploy and wait for completion. It will automatically deploy the service and initialize the database.
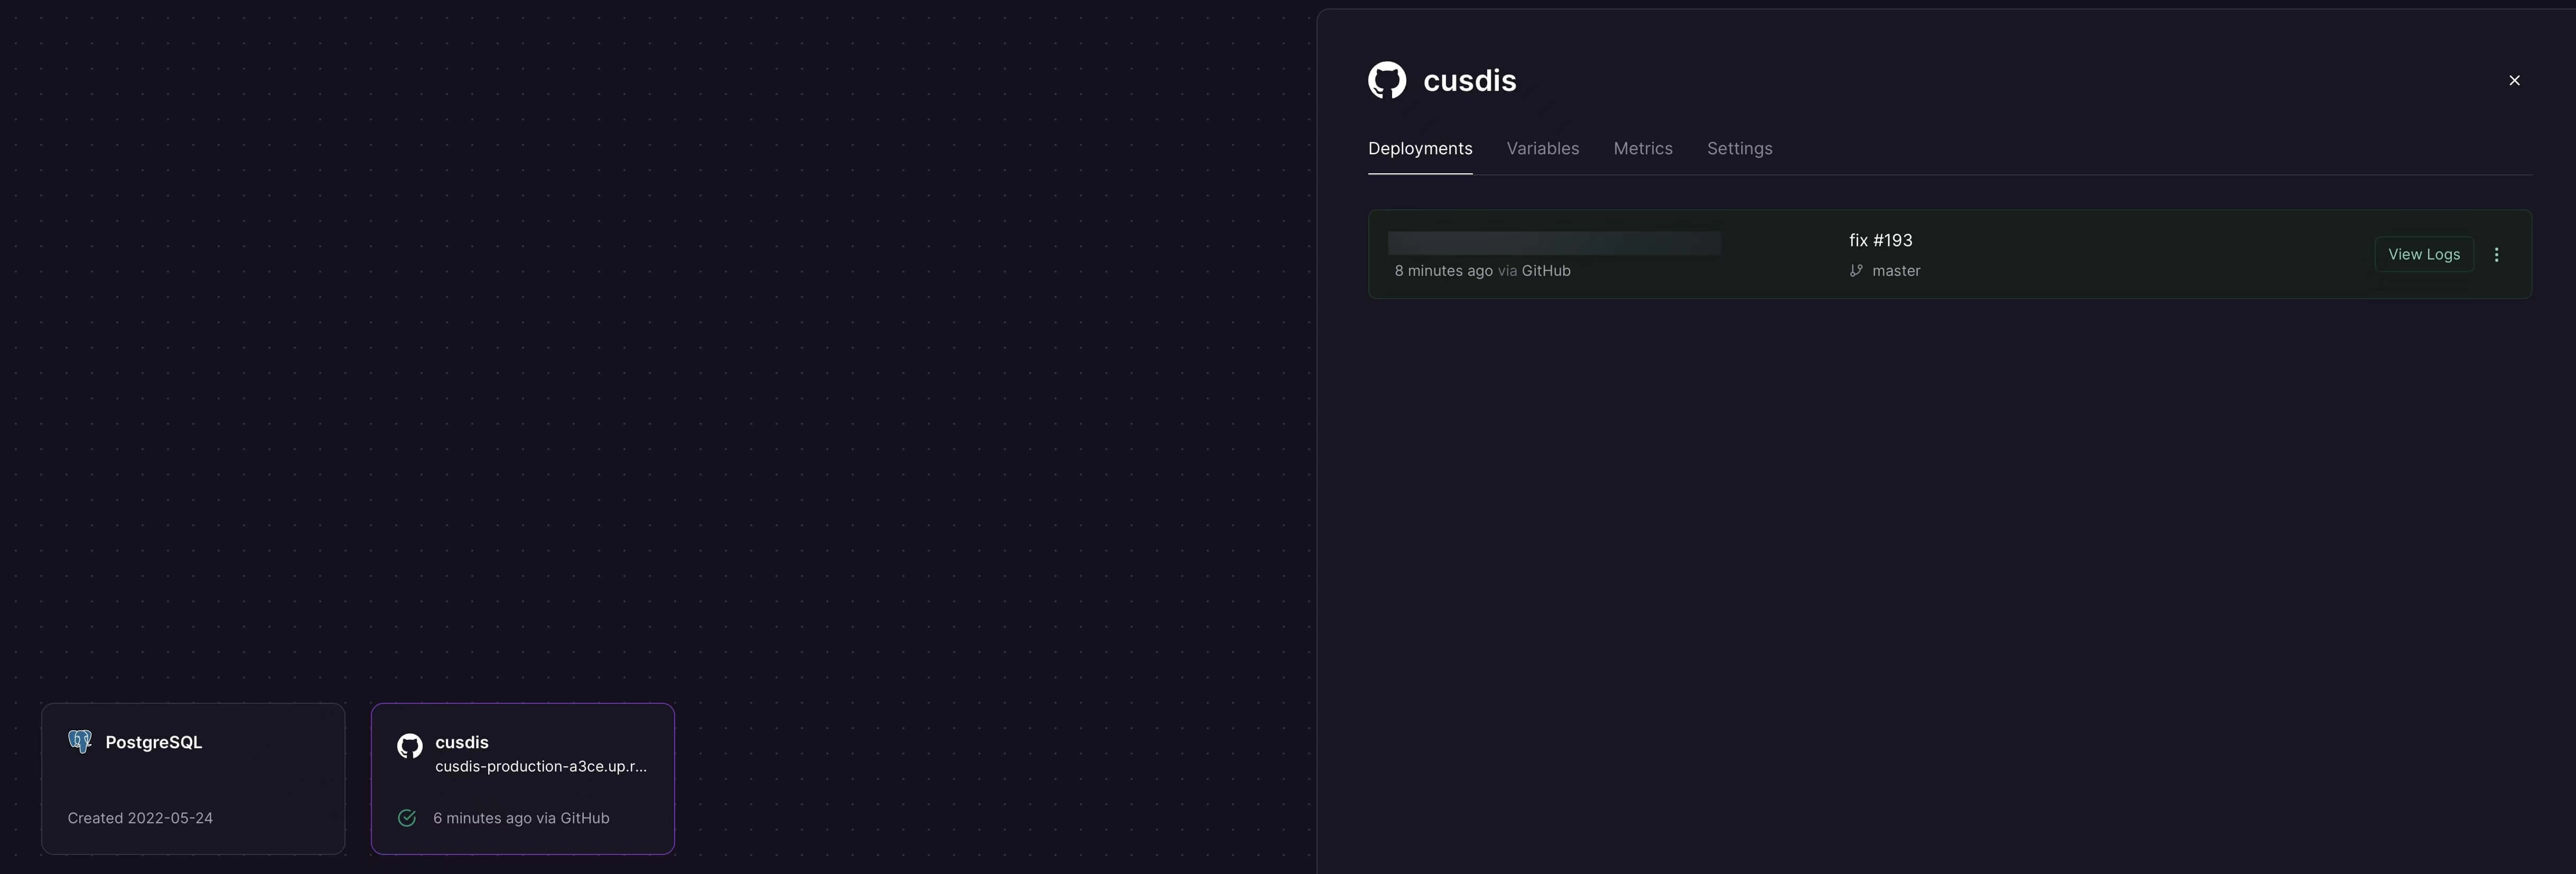
Configuring Cusdis Script for Personal Blog
After deployment, click on the link generated by the cusdis service to access the service Dashboard.
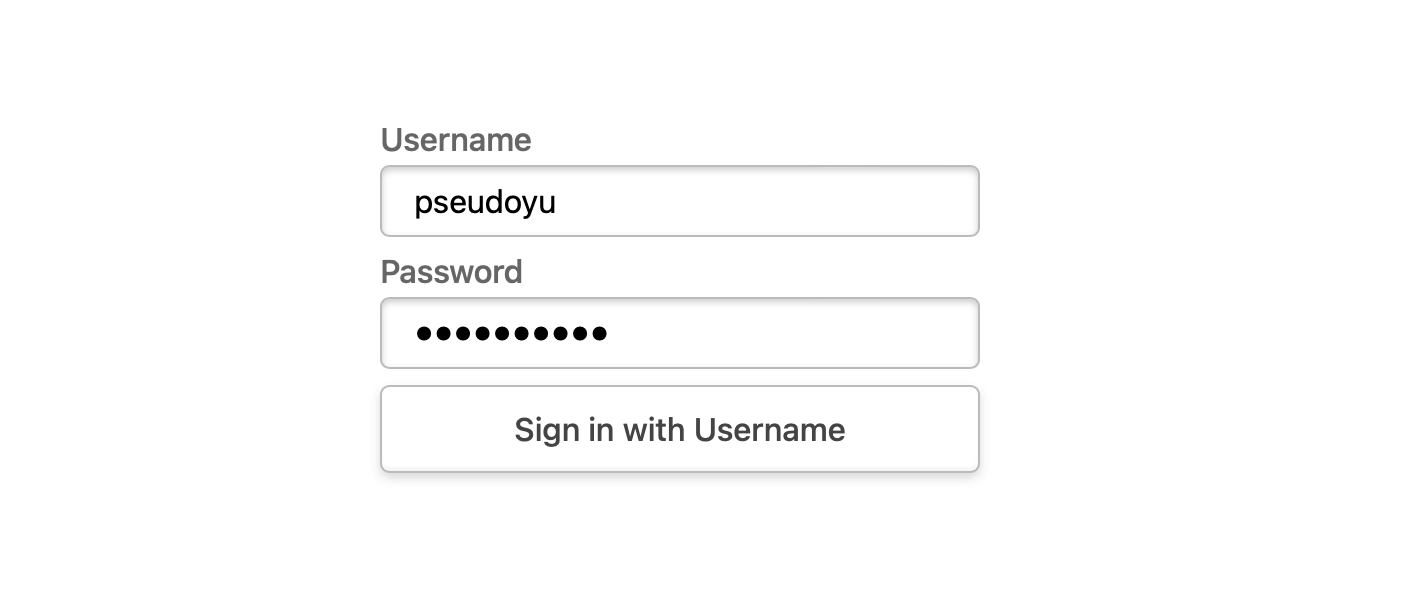
Enter the username and password configured before deployment and click login. After logging in, click Dashboard to enter the project configuration page.
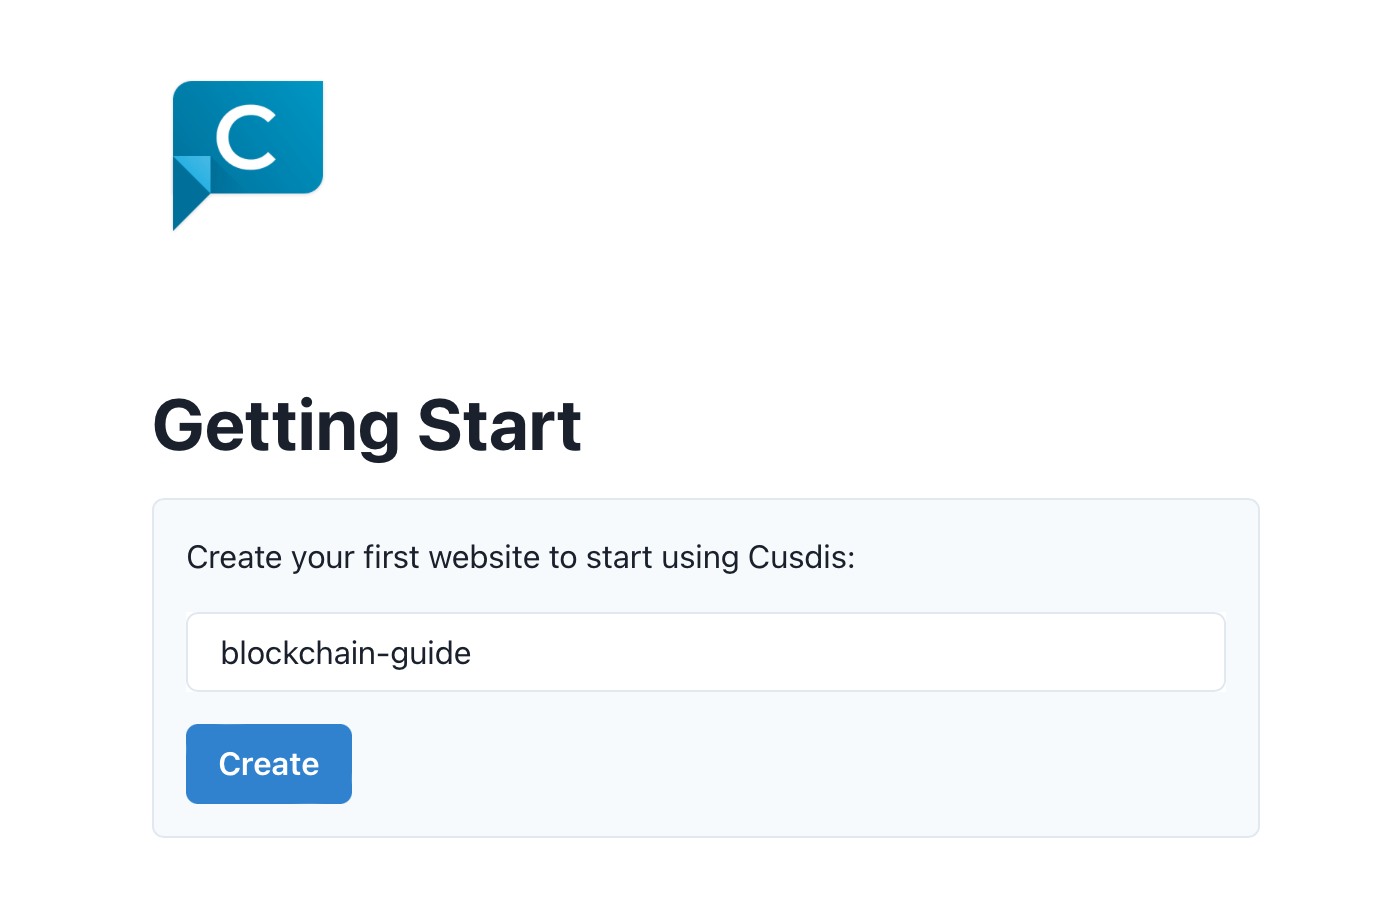
On first login, a pop-up will prompt you to configure the first website. Enter the website name to complete the addition. In the future, when we need to add a website, click New Website in the sidebar and fill in the website name to complete the addition.
Since I have already configured my own website, the interface will show previous comment records.
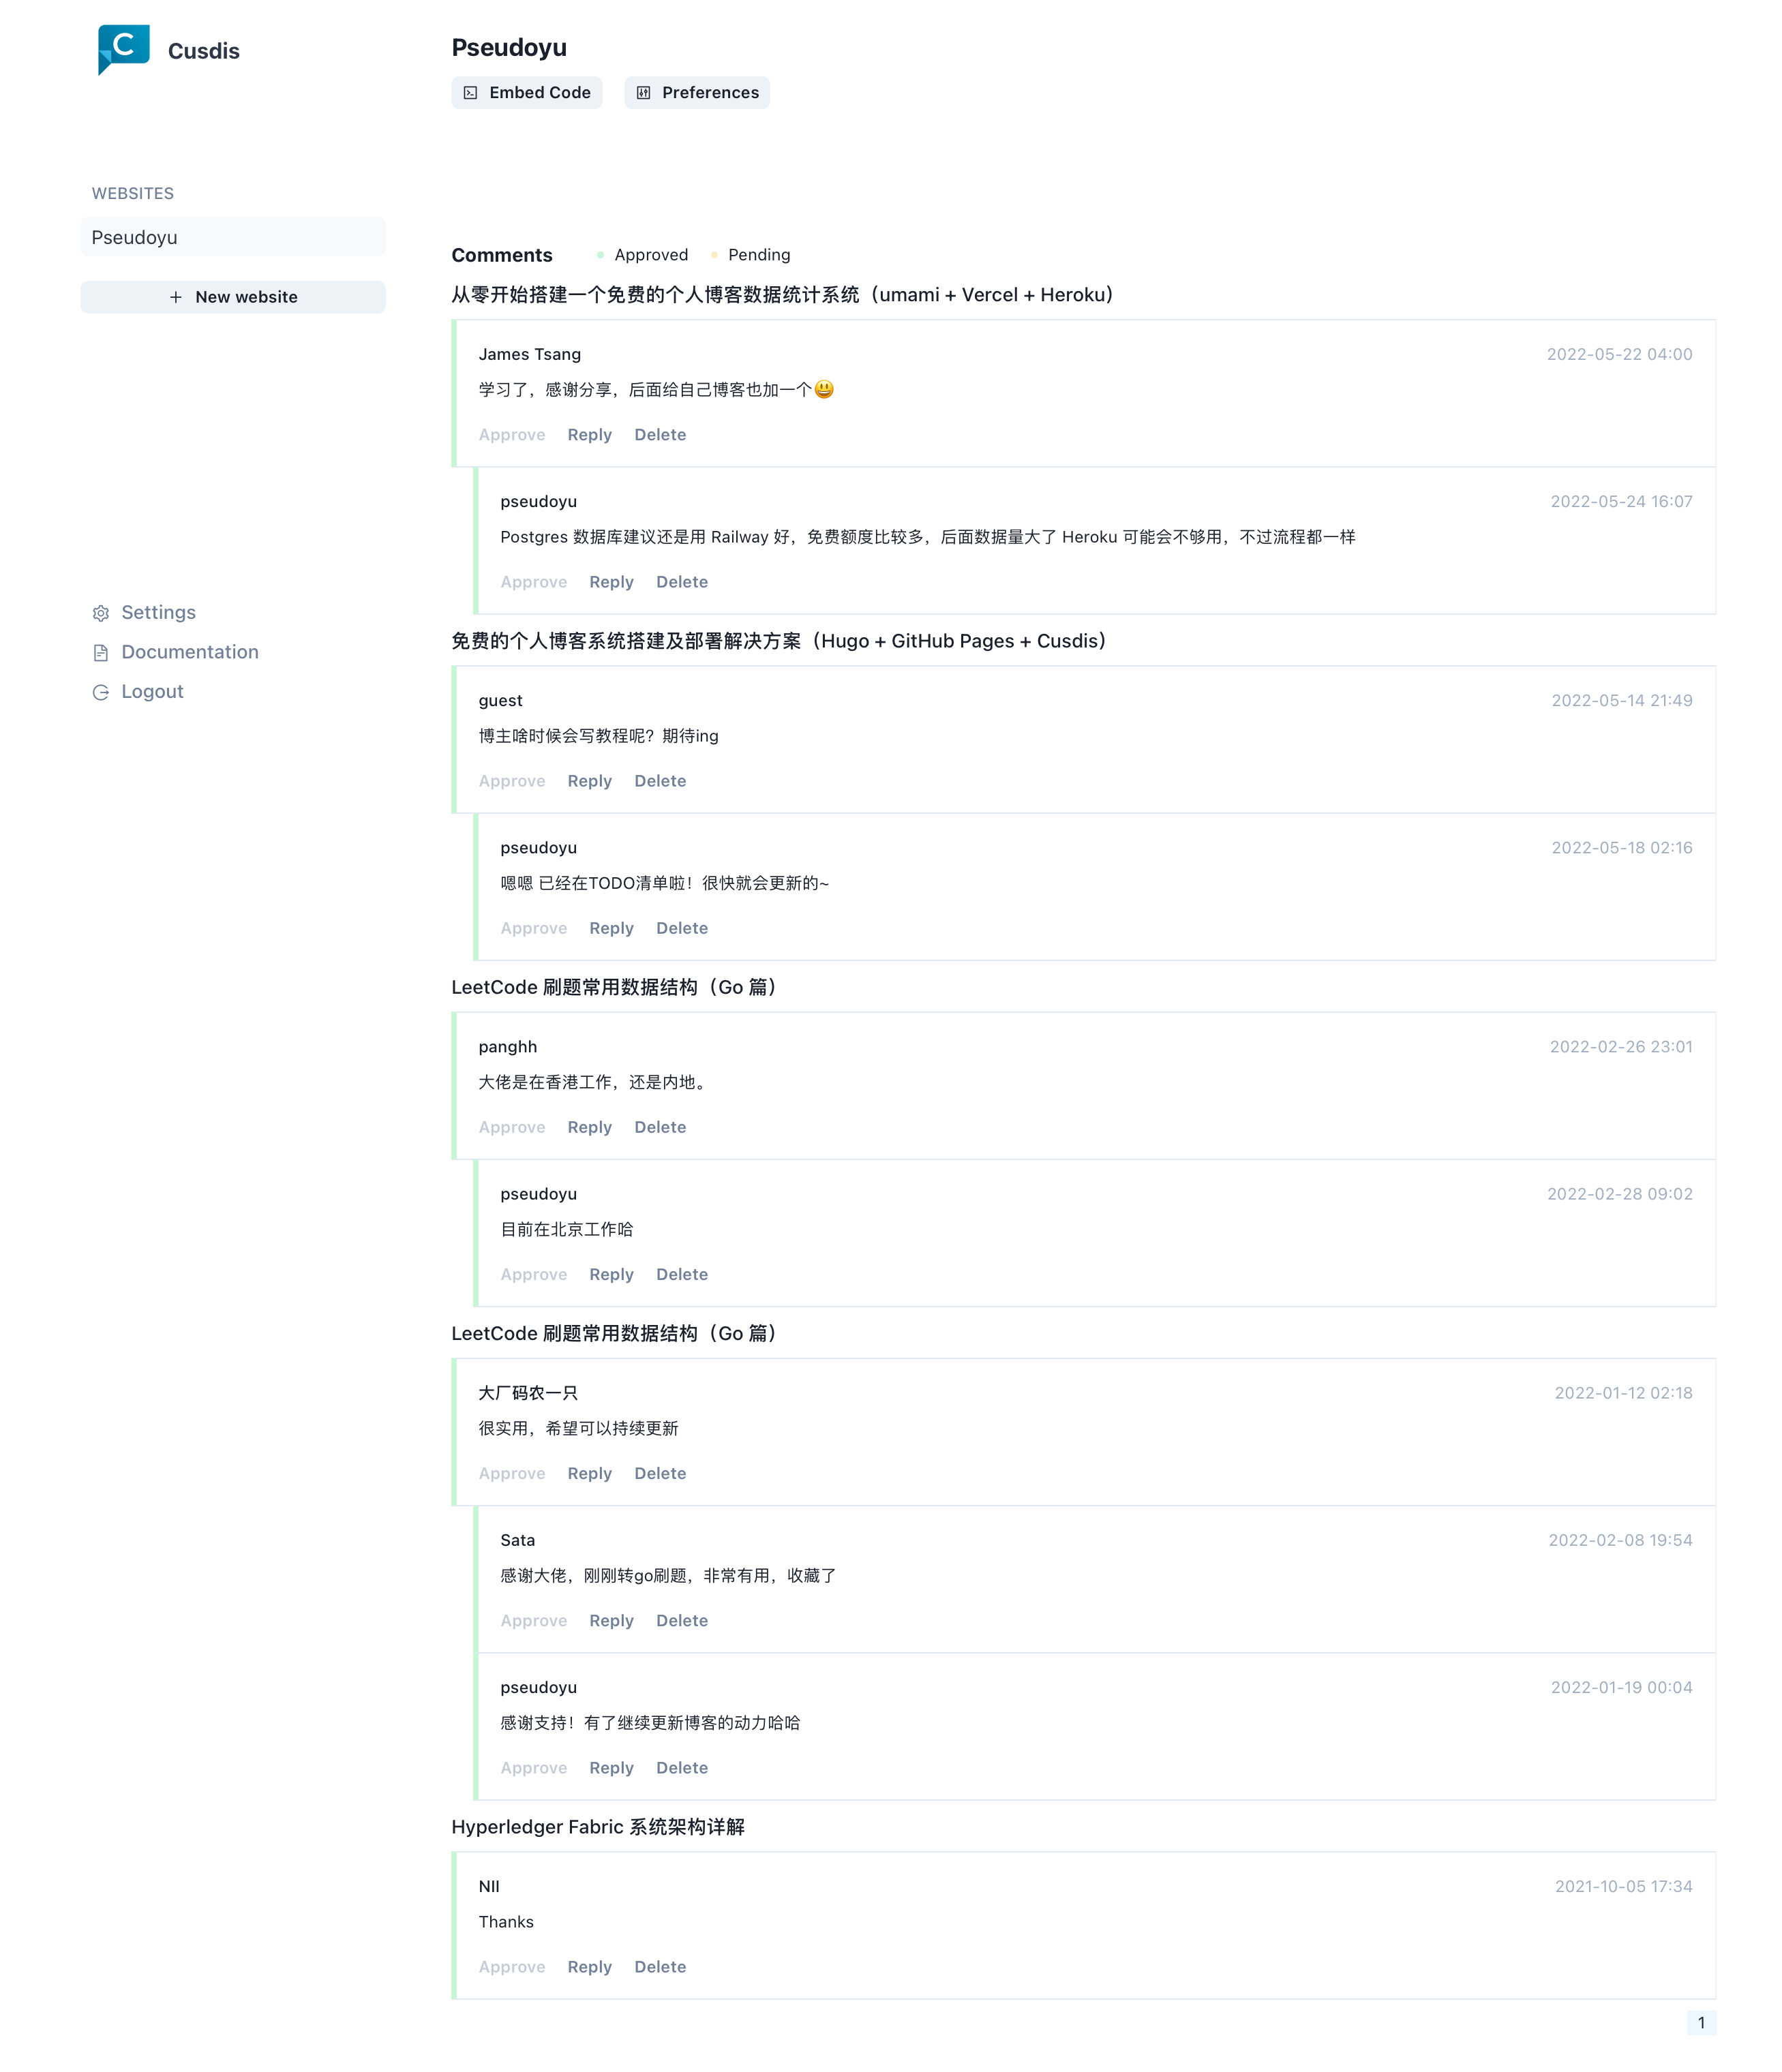
Next, click on Embed Code at the top and copy the code in the pop-up window.
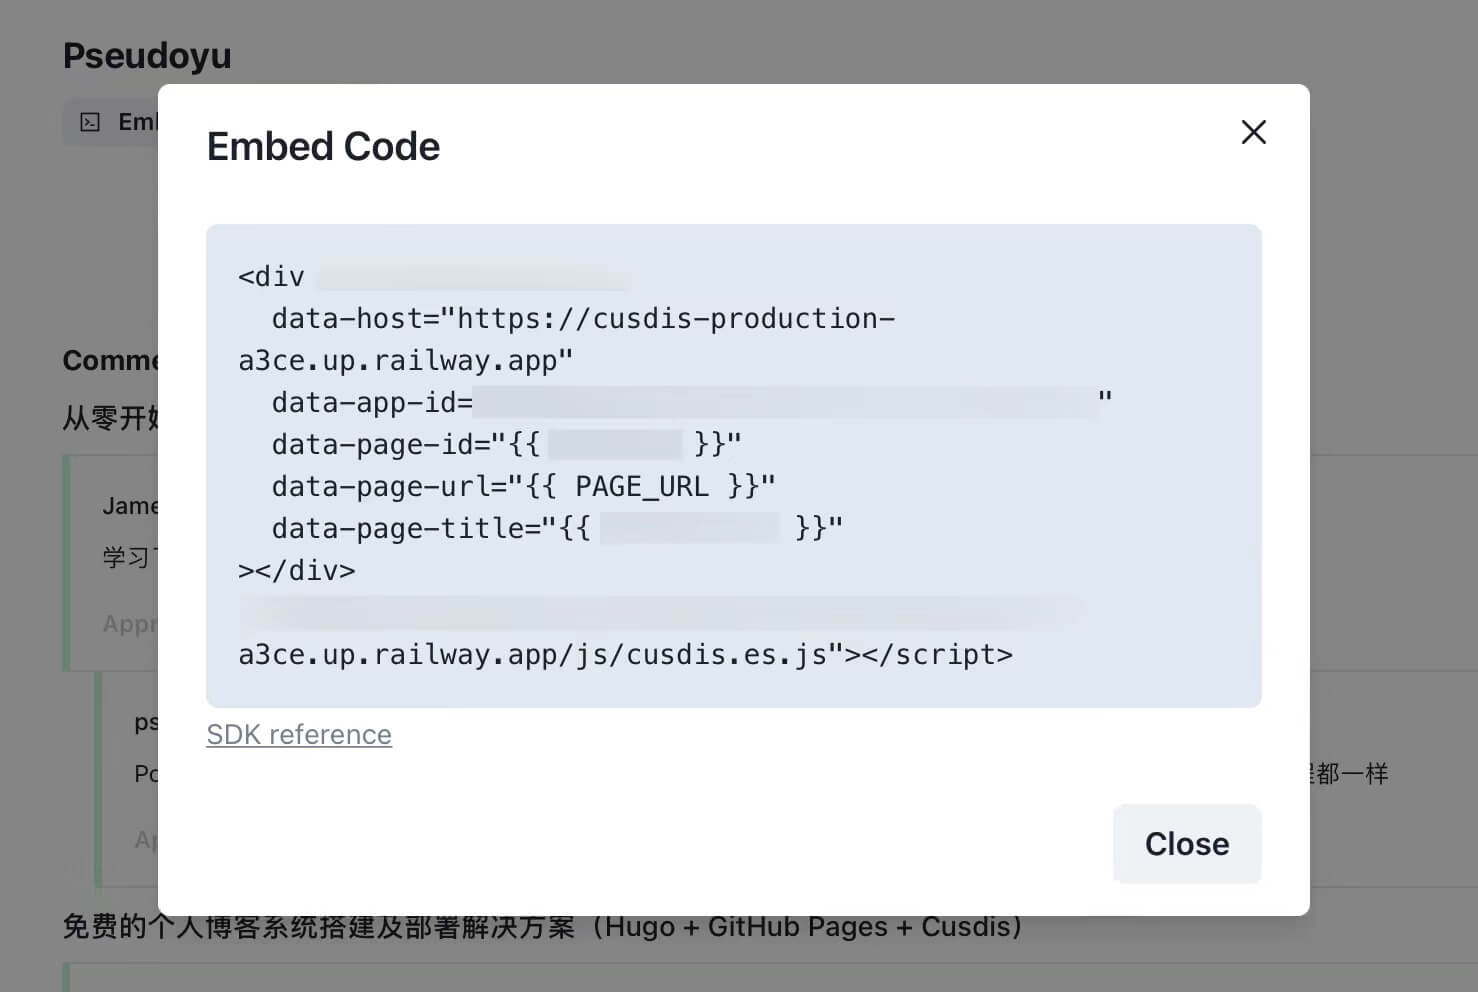
This part of the code needs to be modified partially according to the type of blog website you use. Refer to the Integration module in the official documentation for specific configuration.
I use Hugo, and the configuration is as follows:
<div id="cusdis_thread"
  data-host="xxx"
  data-app-id="xxx"
  data-page-id="{{ .File.UniqueID }}"
  data-page-url="{{ .Permalink }}"
  data-page-title="{{ .Title }}"
>
</div>

<script defer src="https://cusdis.com/js/widget/lang/zh-cn.js"></script>
<script async defer src="xxx"></script>
The data-host, data-app-id, etc., need to be based on the content of the Embed Code just copied. The <script defer src="https://cusdis.com/js/widget/lang/zh-cn.js"></script> mainly implements Chinese localization. For support of different languages, see the documentation i18n module.
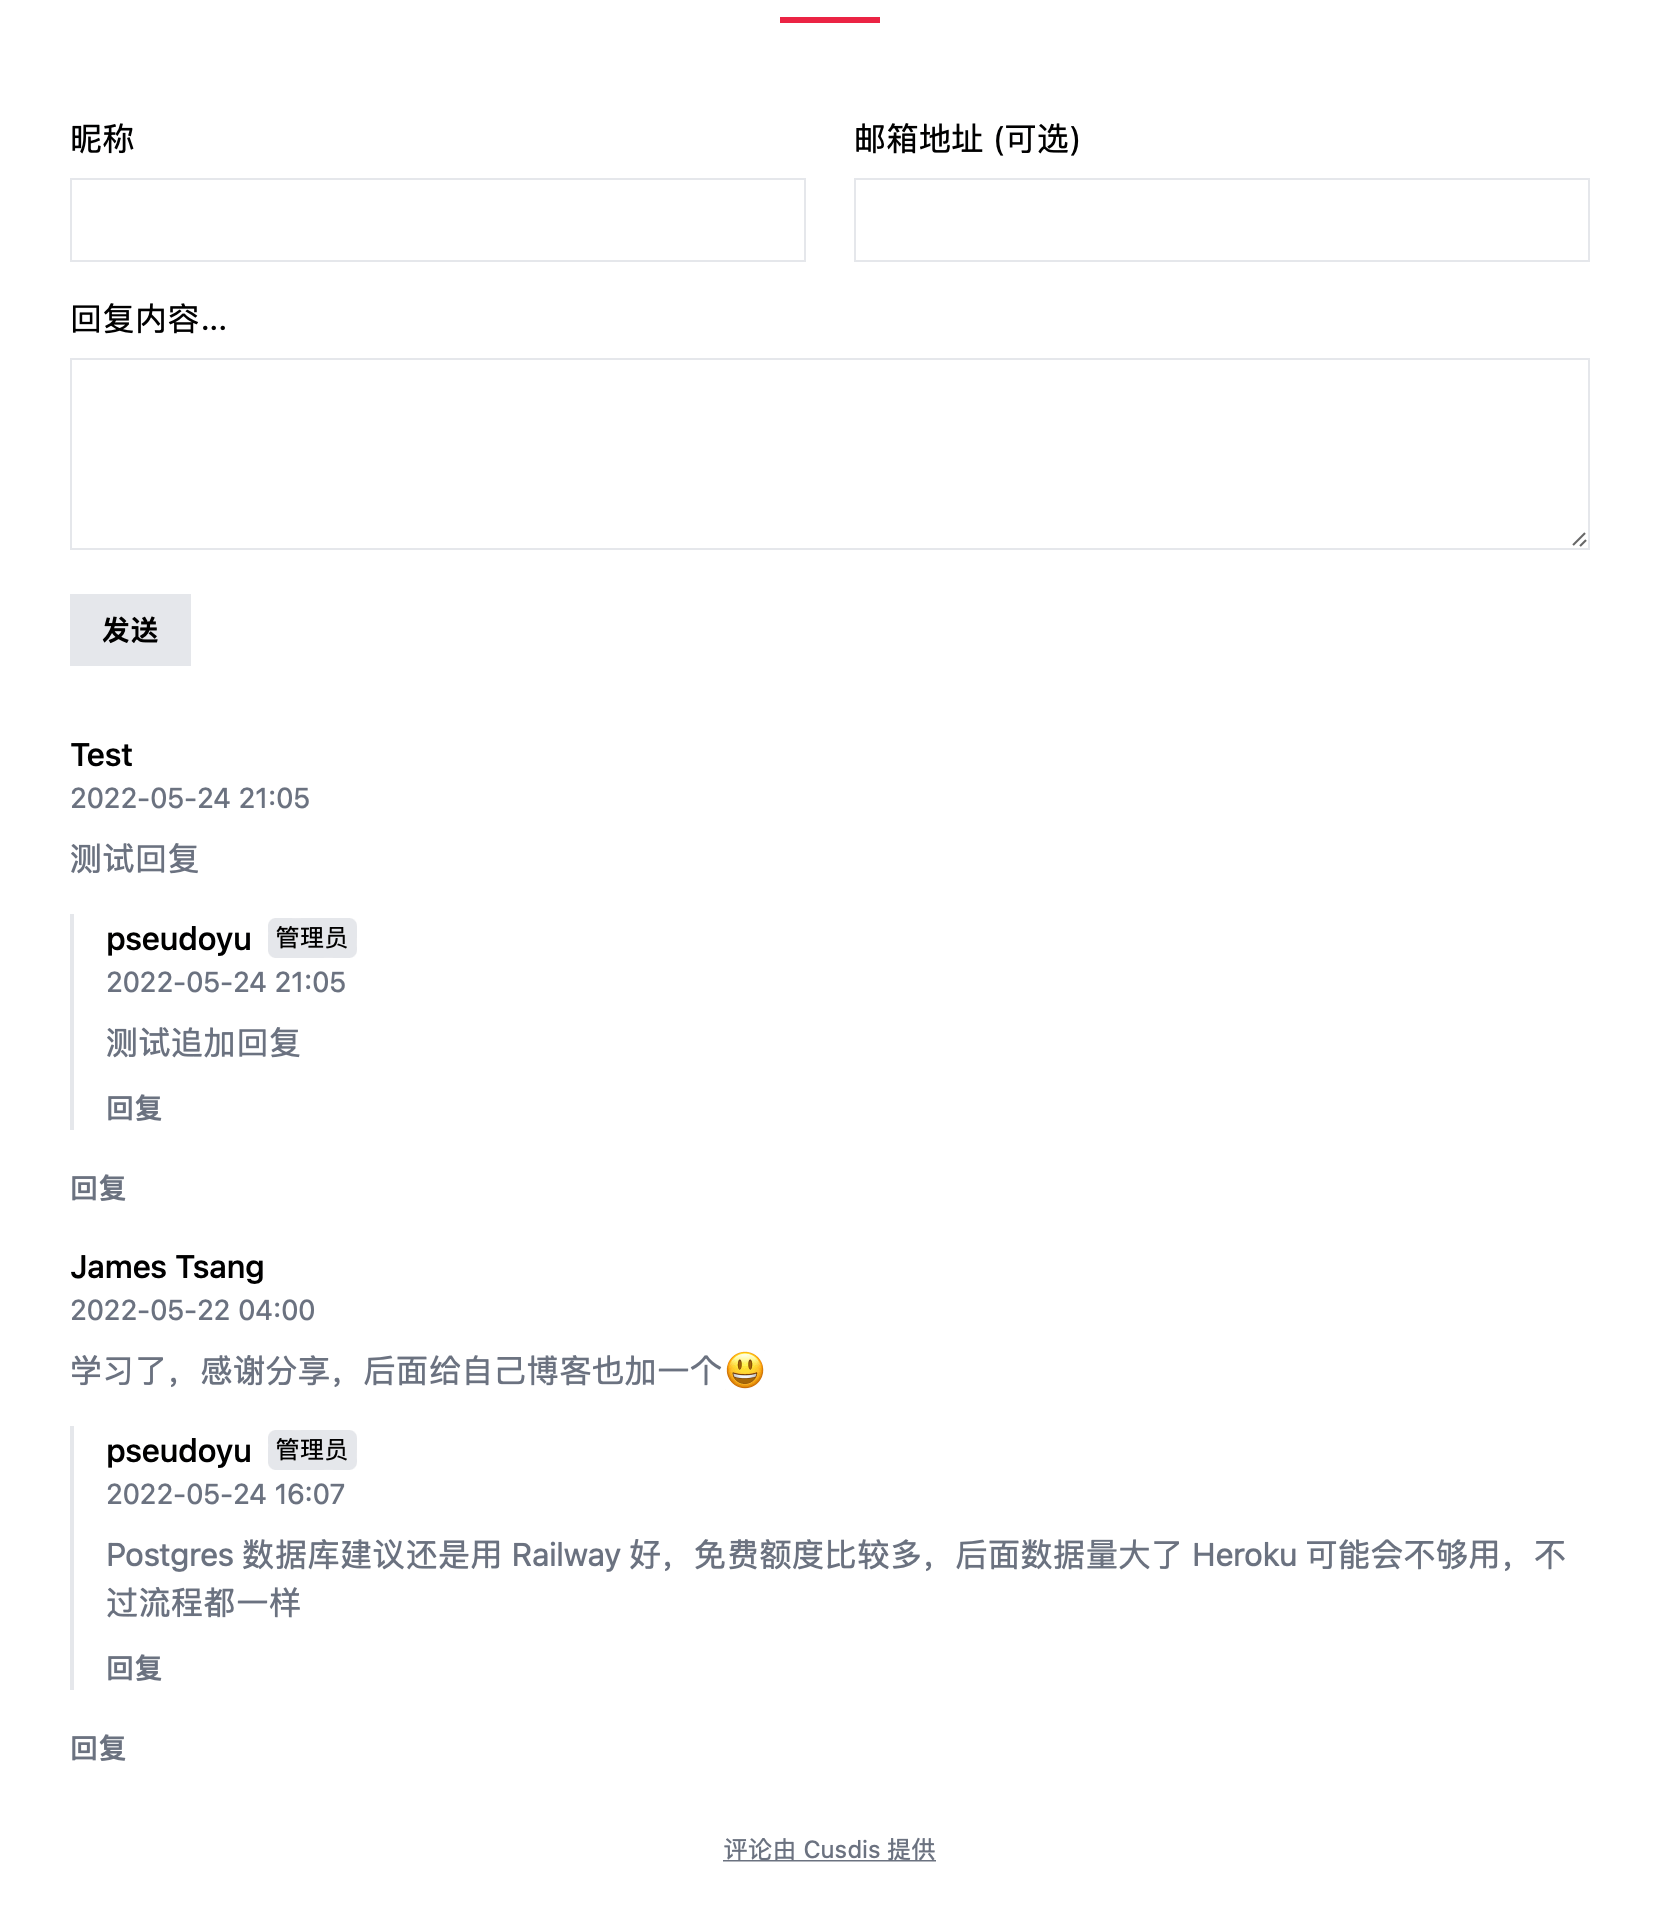
After modification, add it to the appropriate position of your blog (usually at the bottom). After configuration and deployment, you can see the comment box. The presentation effect is as follows:
Configuring Custom Domain
The domain automatically generated by Railway deployment is quite long and contains some characters, making it difficult to remember. We can configure a custom domain for the project in Railway.
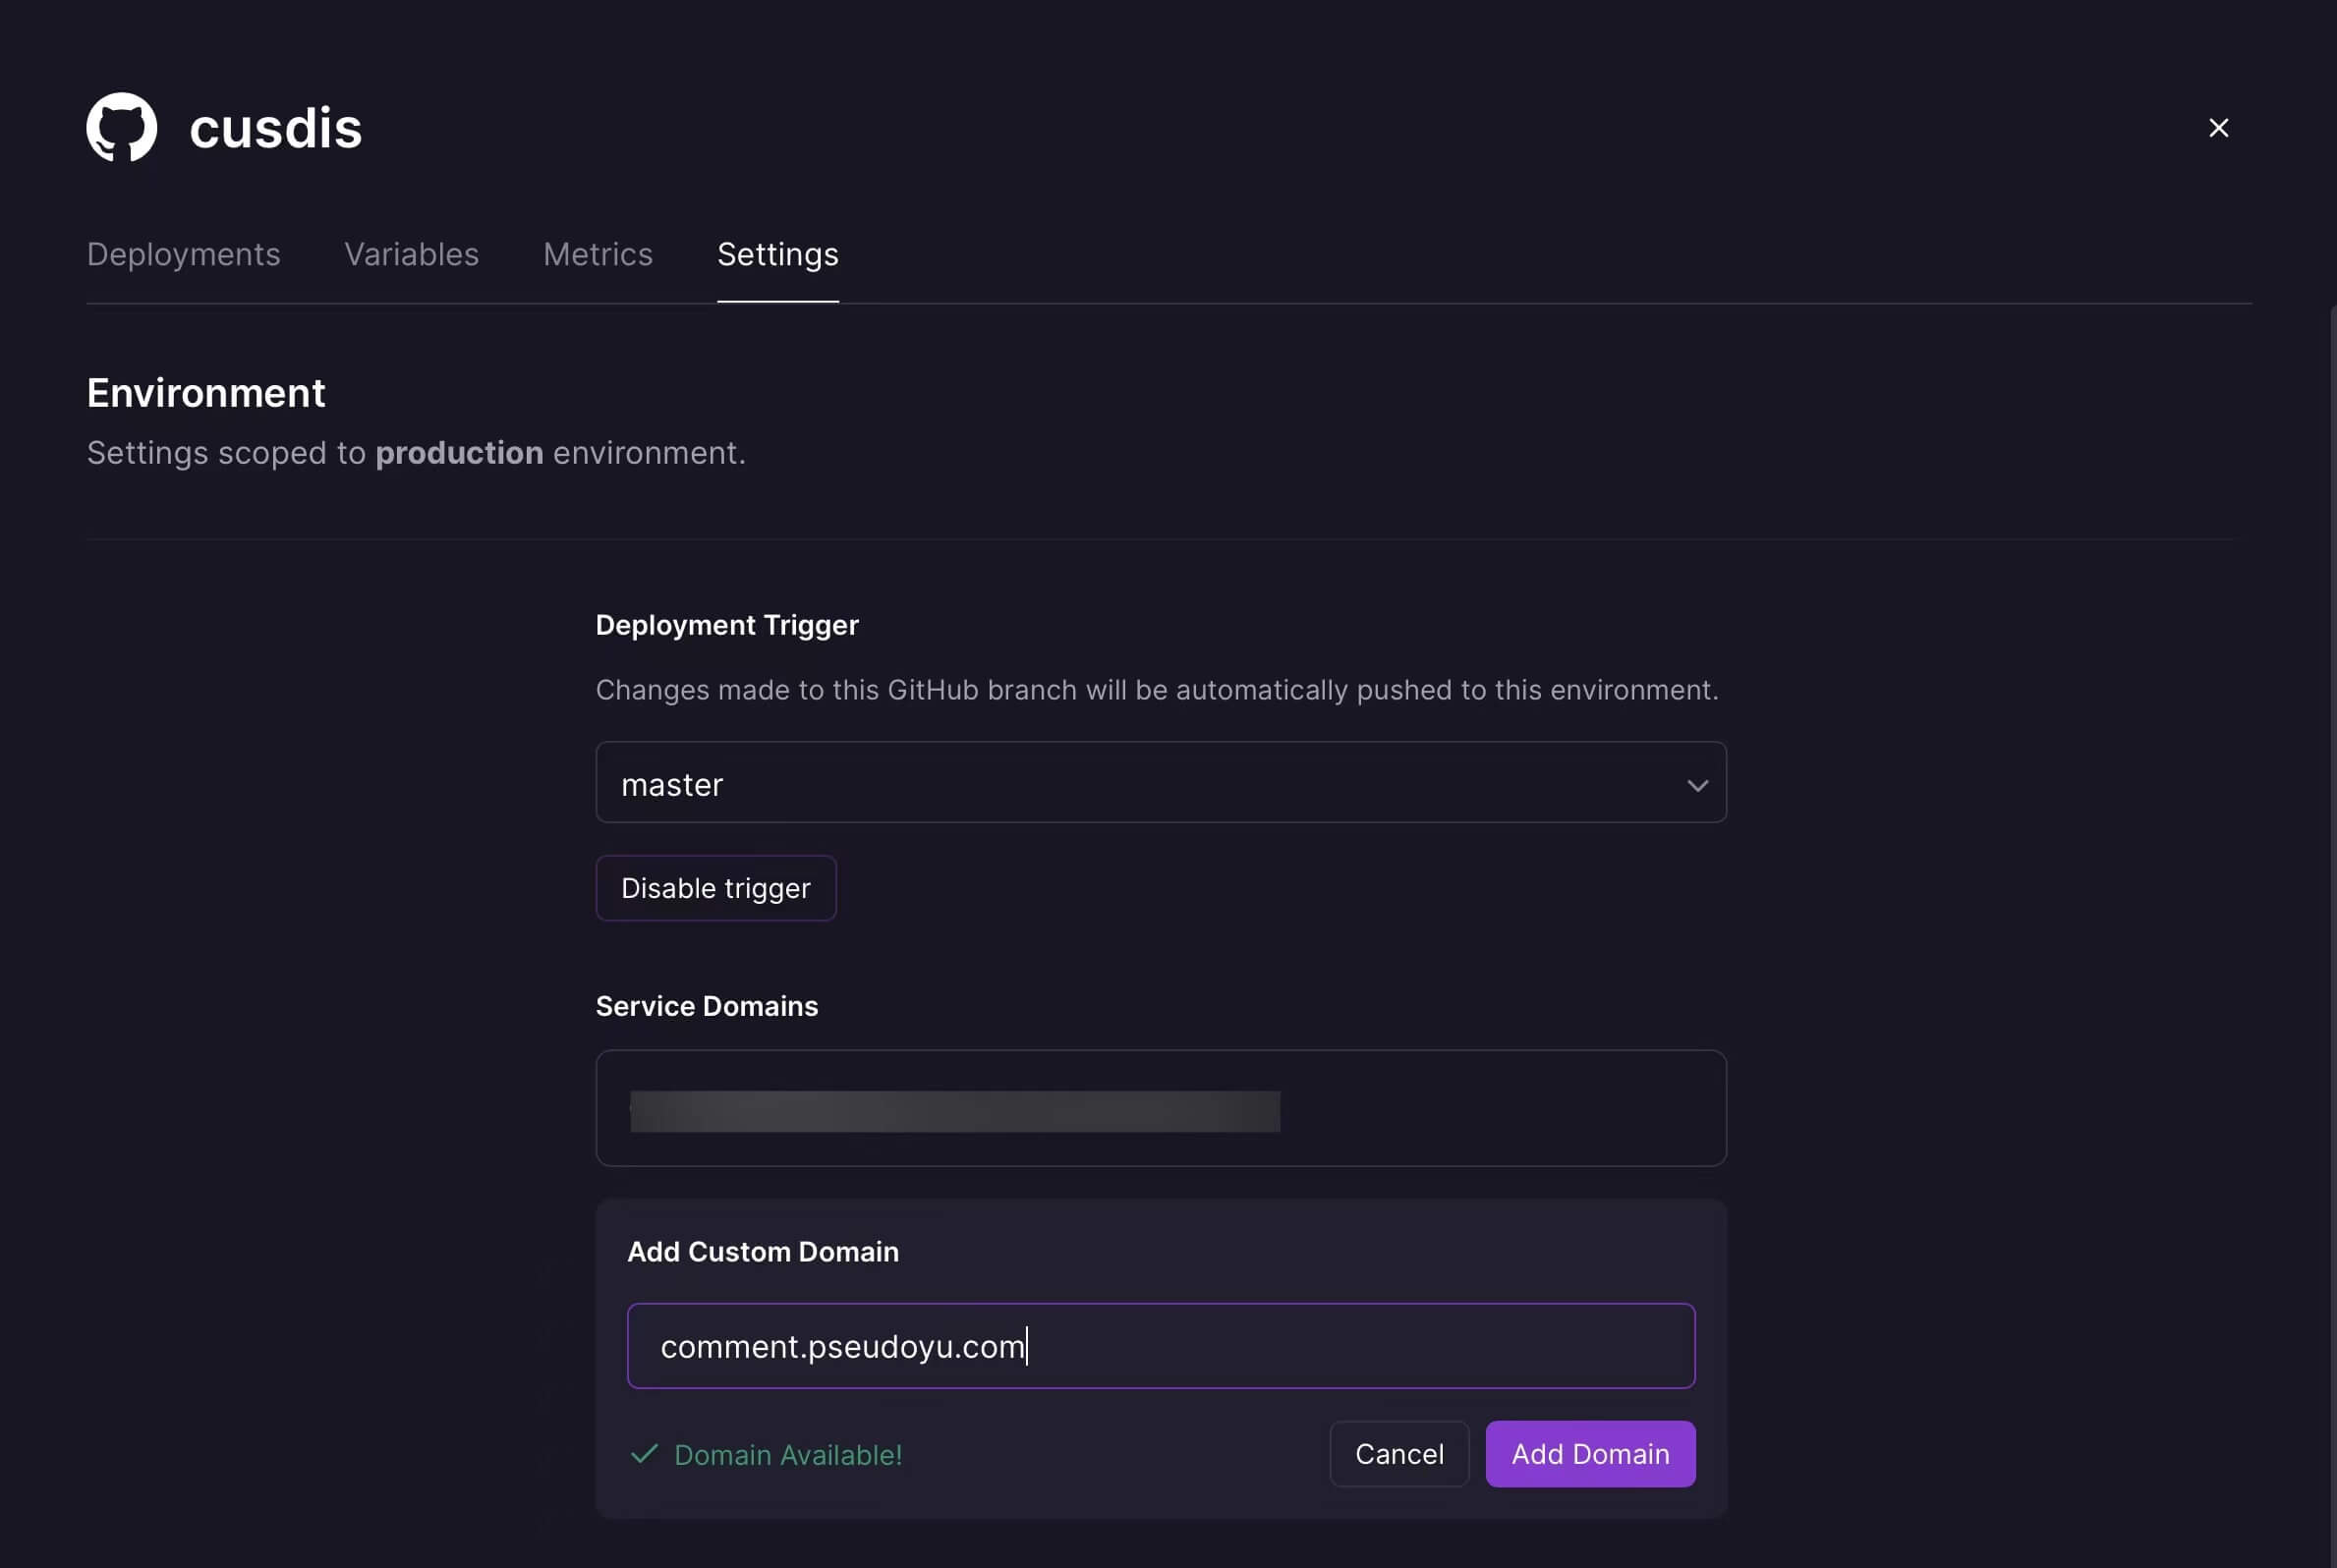
After entering the desired domain/subdomain, add DNS resolution according to the official instructions.

For example, I use a domain hosted by Cloudflare, so I need to add a CNAME DNS record for the domain first.
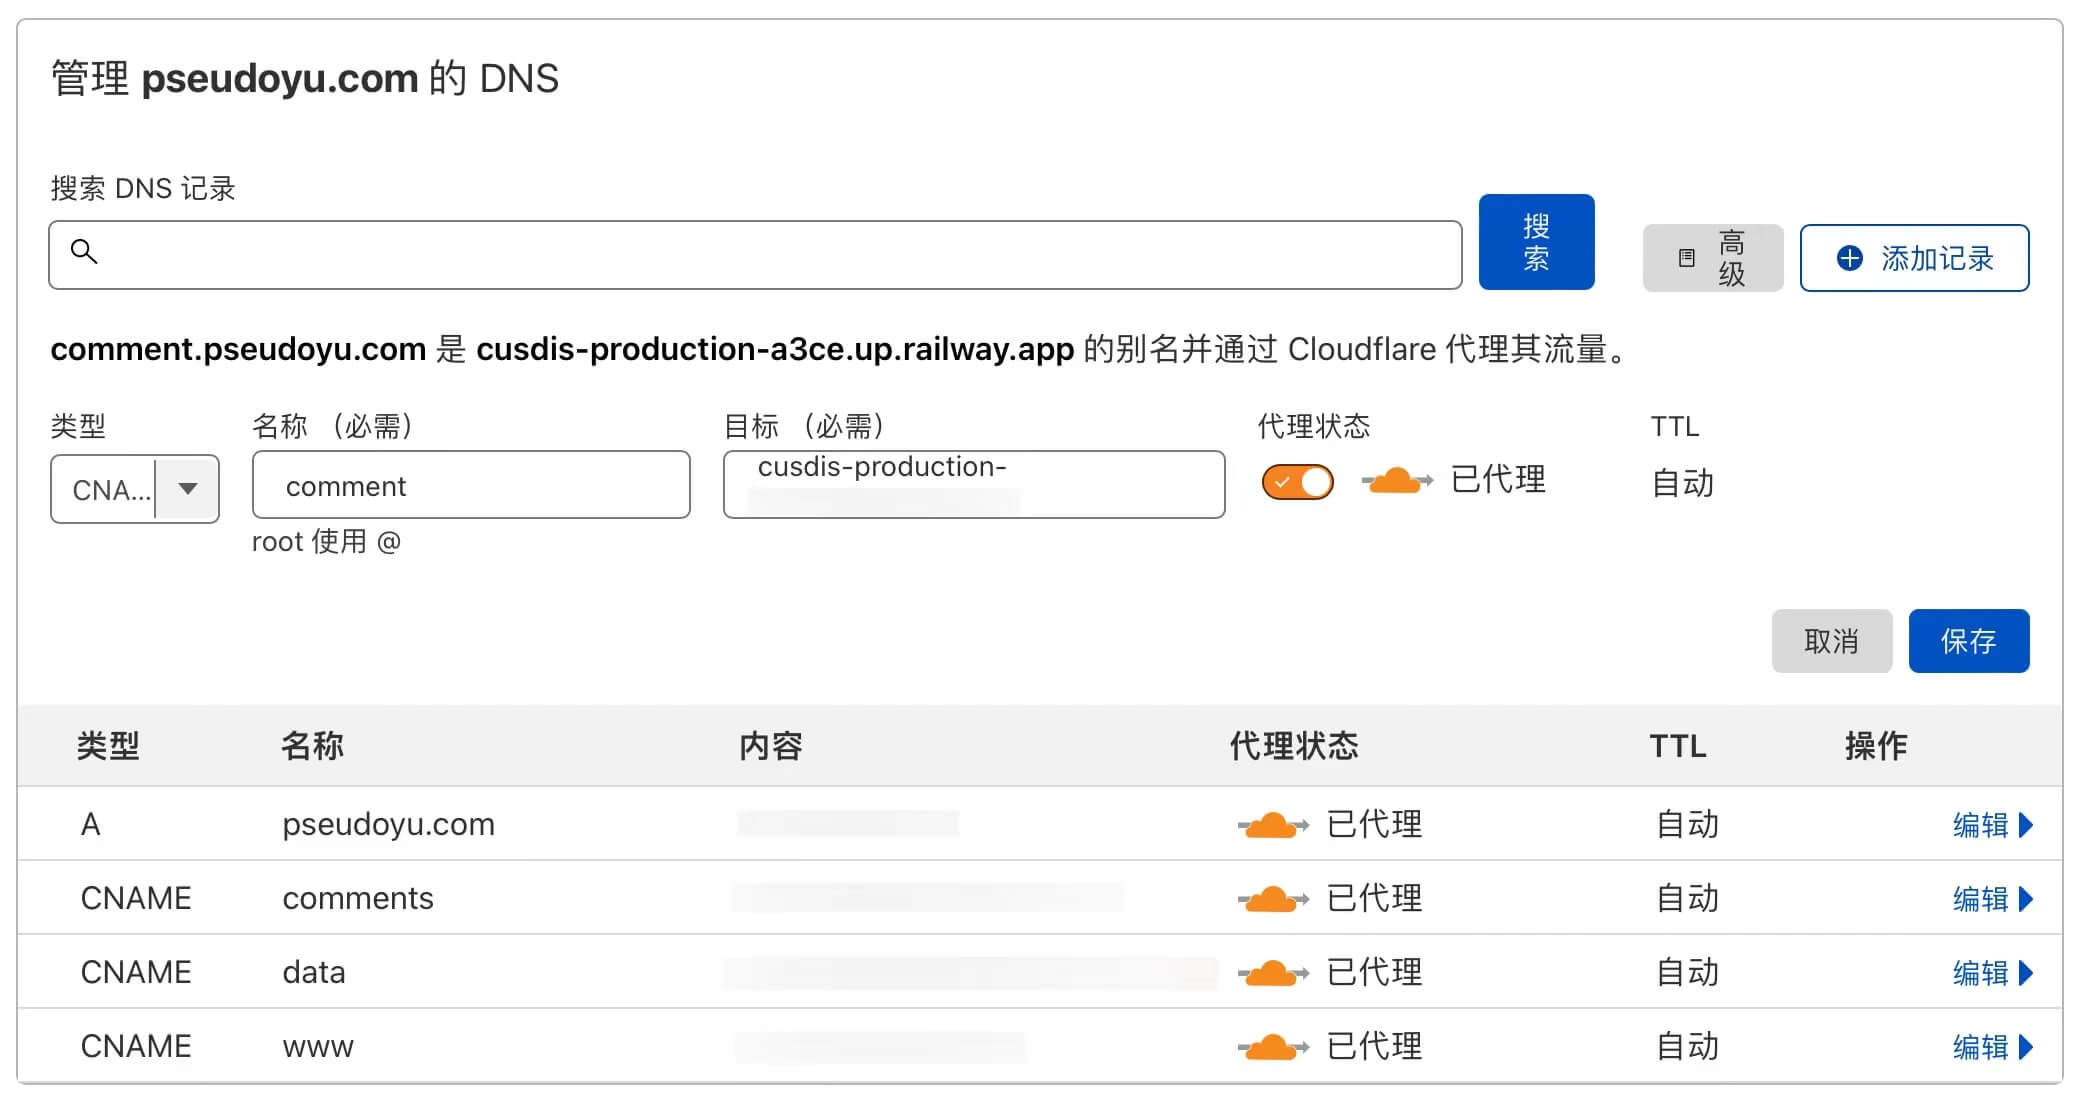
At this point, our deployment is complete, and we can access the management backend through the domain to perform comment review and management.
Updating the Project
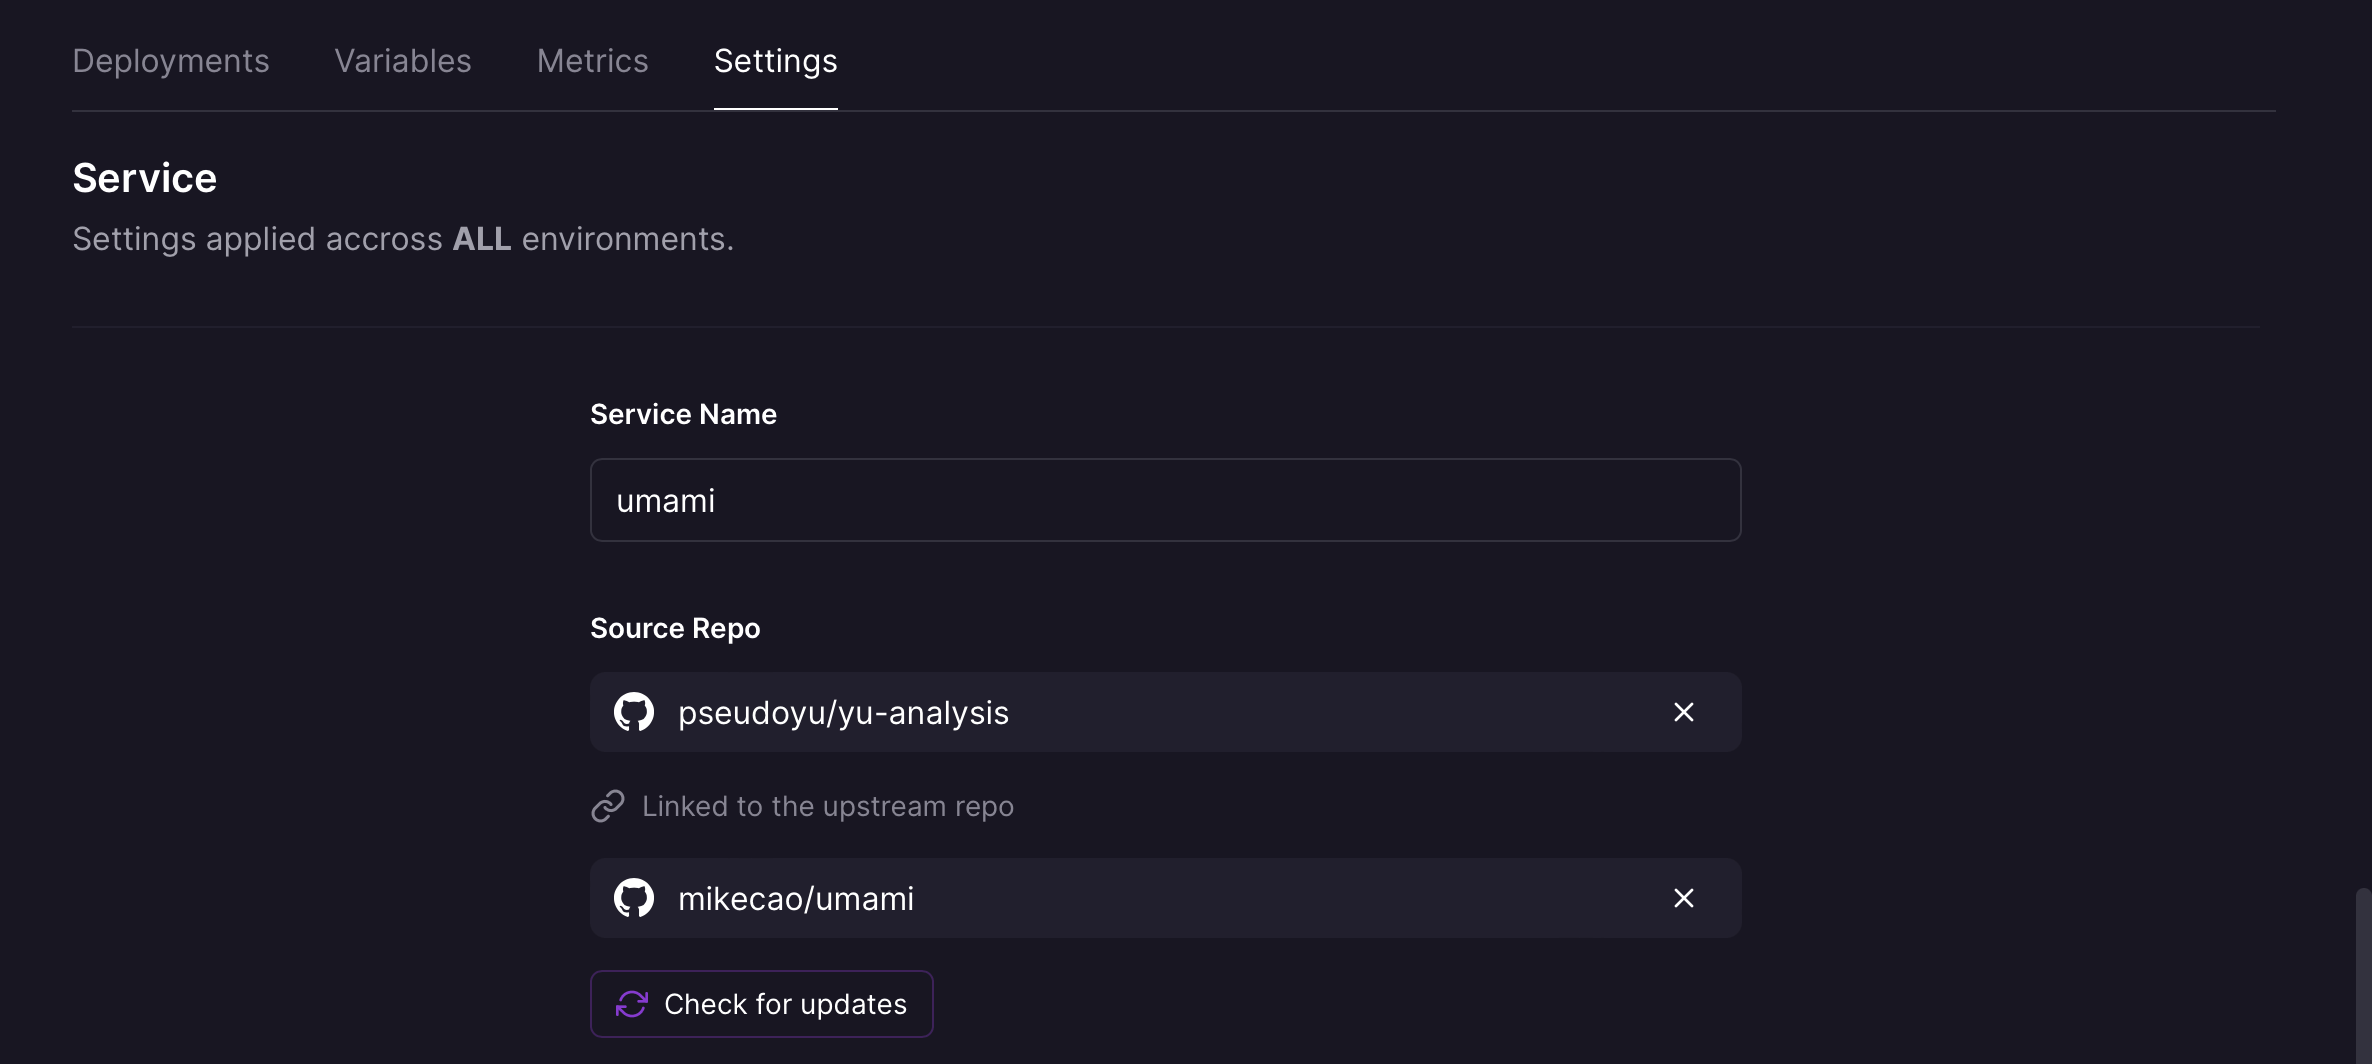
As mentioned earlier, Cusdis is still a developing project, and we want to update the new features released by the author as soon as possible. Railway provides a very convenient upstream branch management function, allowing you to set the parent project for the project and click to pull the latest updates, which is very convenient.
Conclusion
The above is the complete process of adding the Cusdis comment system to our website. After configuration, no subsequent maintenance is required. You can conveniently manage your website and review comments through the dashboard. The data is stored in a PostgreSQL database instance, making it easy to export, backup, and migrate. This is one of my blog setup and deployment series tutorials. Please stay tuned, and I hope it can be of reference to everyone.
