前言 #
从 2017 年暑假攒钱买了第一台 MacBook Pro 开始,我使用 macOS 已经五年了。随着工作学习需要,也逐渐开始使用多屏工作流。因为随时都需要开很多窗口,如 IDE、文本编辑工具、终端、IM 软件、邮件客户端等,稍没注意就很乱,得不停地切换来找到需要的窗口,很不方便,于是我开始了自己的窗口管理方案探索之路。
窗口管理方案需求 #
首先,我梳理了一下自己的窗口管理需求,列出了以下几个核心要点:
- 每次打开一个新窗口后会在当前桌面自动进行智能分屏,如只有单窗口就全屏,两个窗口就二等分,以此类推
- 通过快捷键对分屏布局进行调整或恢复初始化布局
- 通过快捷键在不同窗口之间跳转
- 通过快捷键移动/交换不同窗口位置
- 通过快捷键便捷地对当前窗口作一些操作,如全屏、居中、发送到某个特定的桌面等
- 切换速度快
针对这些需求,我开始调研目前比较流行的几款窗口管理工具。
窗口管理工具 #
市面上已经有很多相对成熟的窗口管理工具解决方案,比如 Magnet、BetterTouchTool 附带的窗口吸附功能等,我都有购买使用,总体来说还是觉得不太适合自己的工作流。
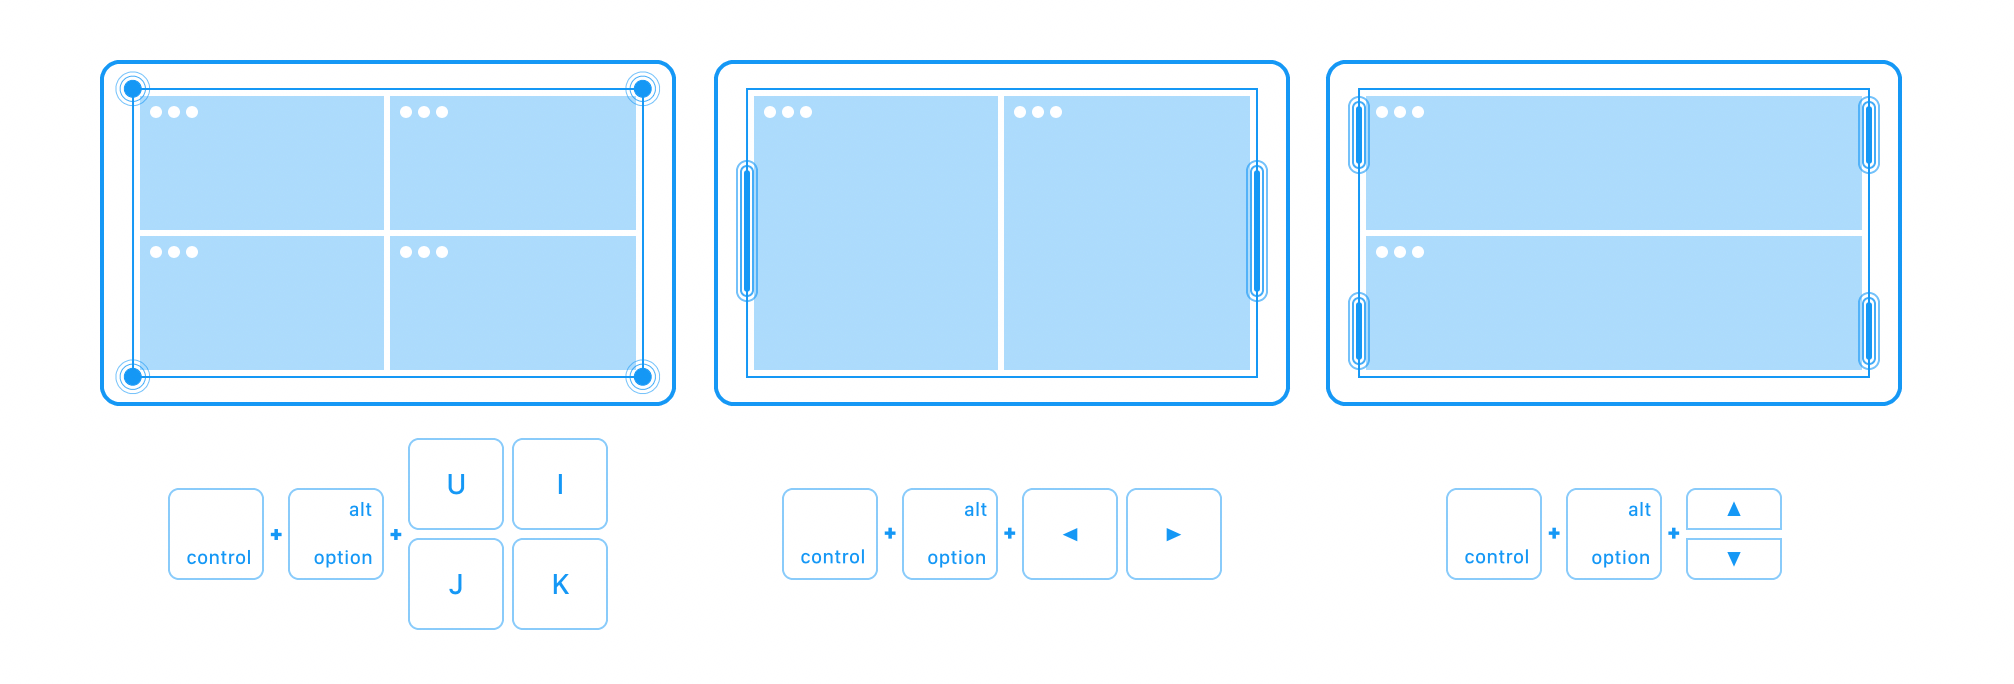
Magnet 主要依赖于快捷键,尽管可以自己定制符合习惯的快捷键,但记忆成本很高,且如果有多台设备也需要用自己的帐号下载后重新配置才可以继续使用,并不方便。
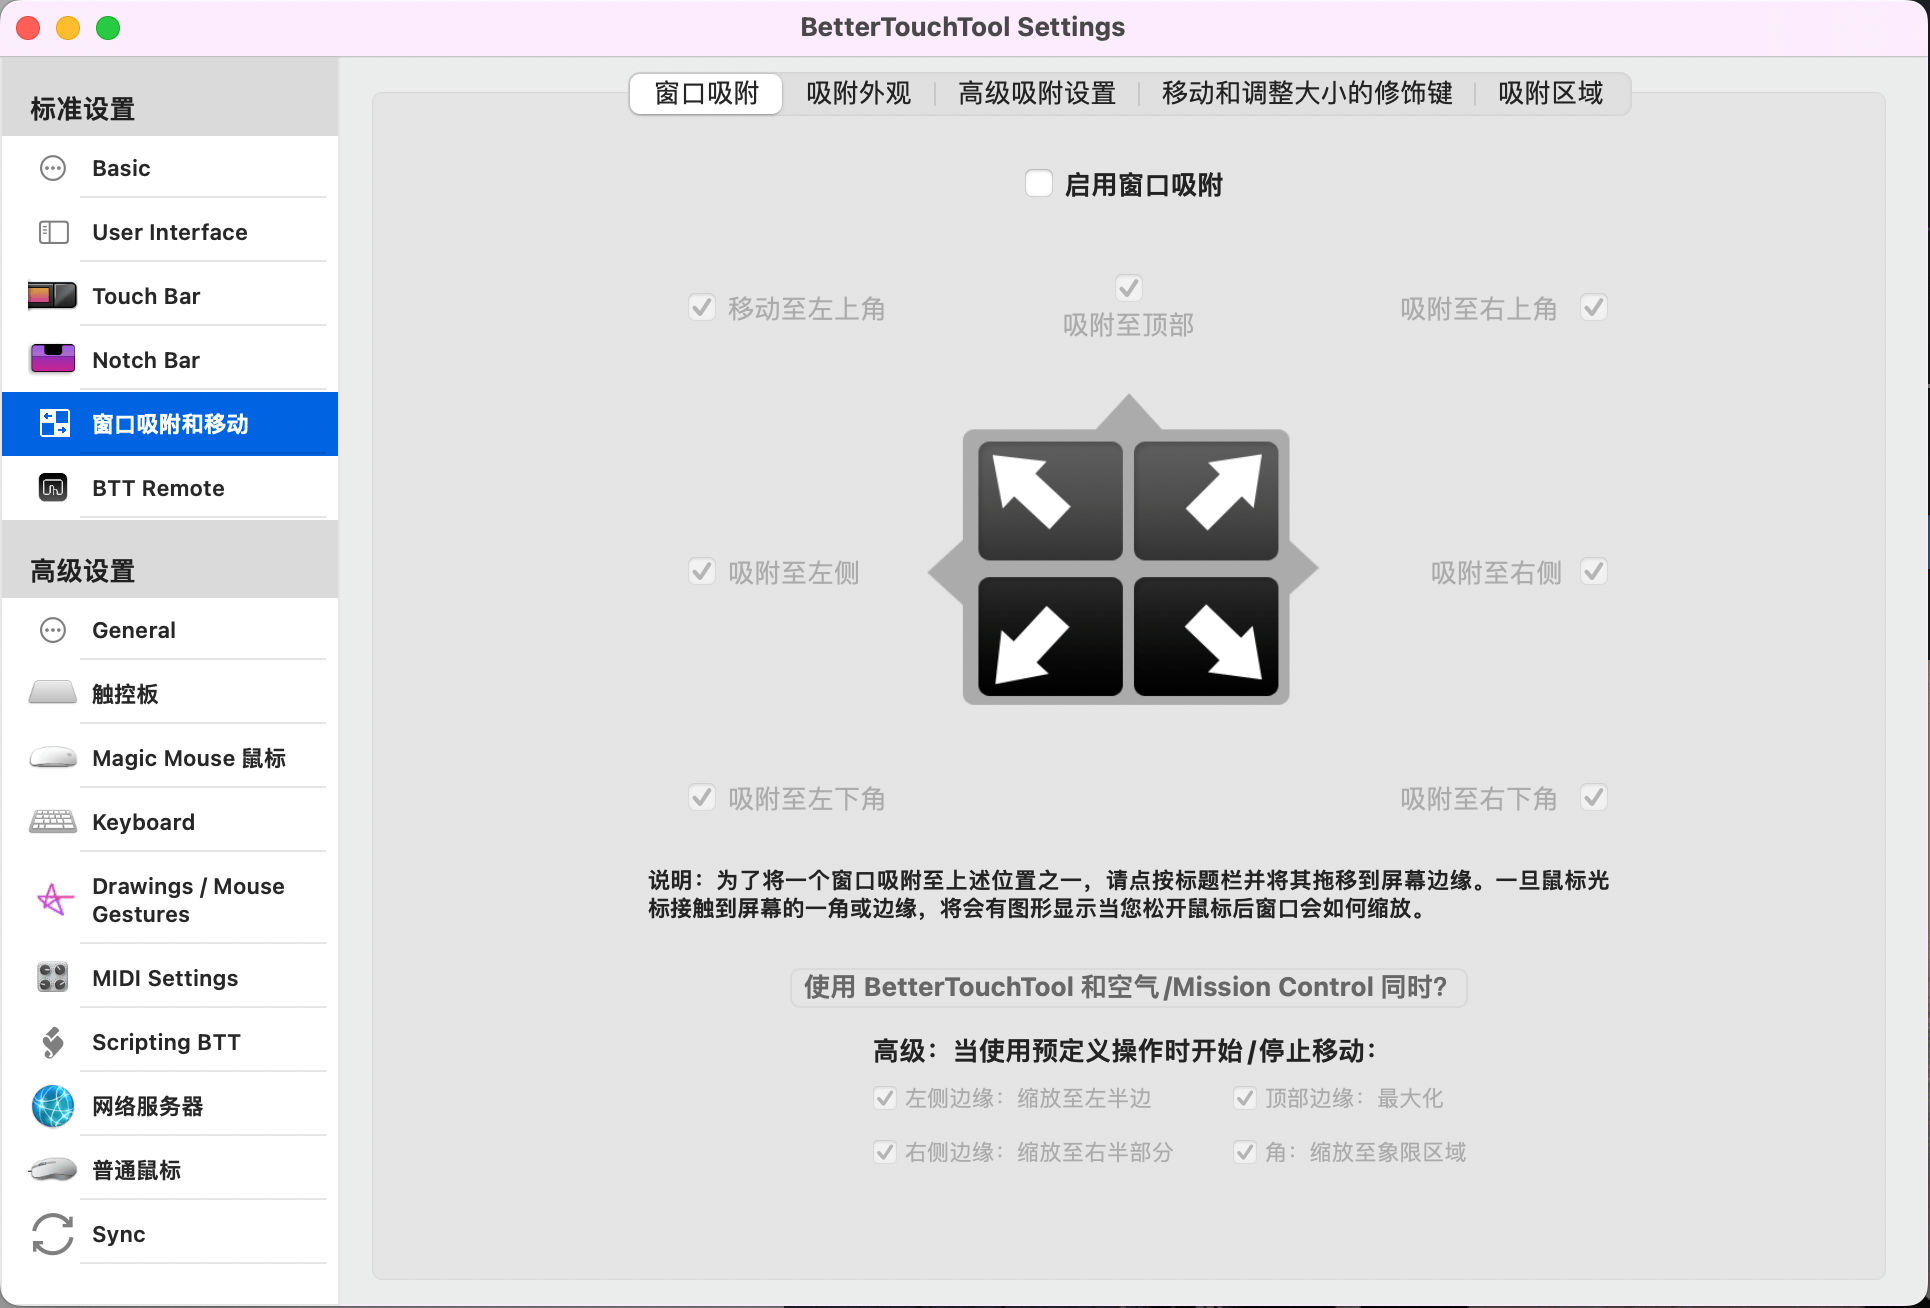
BetterTouchTool 则是依赖于鼠标移动到窗口各个触发角,优势是不需要自己设置快捷键,仅需将鼠标移动到窗口边缘即可实现分屏。但与 Magnet 有着同样的弊端是,每次打开一个新窗口后还是需要自己手动去实现分屏,在很忙或者窗口很多的时候也常常会忘记,不便于管理。
既然现有的软件都无法完全满足我的需求,作为一个爱折腾的程序员,目标转向了开源社区一些可高度定制化的解决方案。
开源解决方案 #
Hammerspoon #
Hammerspoon 是一个强大的 macOS 自动化工具,可以通过自己编写一些 lua 脚本实现窗口管理功能,并且可以自定义快捷键,除了窗口管理外,还可以实现例如休眠控制、剪贴板工具等丰富的功能。我配置使用了一阵子后,发现和 Magnet 类似,也没办法很好地实现智能分屏(或许有写好的脚本,但需要对很多软件进行单独配置,实现起来比较麻烦),于是也弃用了。
yabai + skhd #
经过一番调研,从 YouTuber Josh Medeski 的 <Blazing Fast Window Management on macOS> 视频中找到了一个解决方案,开源、免费、定制化强,仅需一个配置文件就可以完美实现我的所有需求。
yabai #
yabai 是 macOS 内置窗口管理工具的一个开源拓展,可以通过命令行工具实现自由控制窗口和多显示器。它最主要的特色是使用 binary space partitioning 算法自动修改窗口布局,使我们能够专注于窗口内容,不需要主动进行管理,仅需打开对应软件窗口,实现自动编排,工作流不会受到干扰。
skhd #
skhd 是一个 macOS 快捷键管理工具,能够通过配置文件来调用绑定其他程序/命令,如 yabai 的窗口管理命令,实现高度定制化的窗口操作。skhd 的实现很注重性能,响应速度很快。
我的窗口管理配置 #
yabai #
安装与基础配置 #
yabai 的安装很容易,按照其官方 wiki 说明安装即可。
个人推荐通过 brew 进行安装,如果没有安装过 brew 可以先通过官方一键脚本进行安装。
/bin/bash -c "$(curl -fsSL https://raw.githubusercontent.com/Homebrew/install/HEAD/install.sh)"安装完 brew 后,即可继续通过命令进行安装与基本配置。打开终端,输入以下命令:
brew install koekeishiya/formulae/yabai安装脚本插件:
sudo yabai --install-sa
sudo yabai --load-sa
启动 yabai 服务:
brew services start yabai注:如果是 macOS Big Sur 或 Monterey 系统,因为需要通过 API 注入的方式来调用脚本,需要配置一下 root 权限与开机自启,官方也提供了详细的操作方法:
编辑 /private/etc/sudoers.d/yabai 文件:
sudo visudo -f /private/etc/sudoers.d/yabai在打开的文件中添加以下内容:
<user> ALL = (root) NOPASSWD: <path> --load-sa上述 <> 内的 user 和 path 可以通过 whoami 和 which yabai 命令获取。
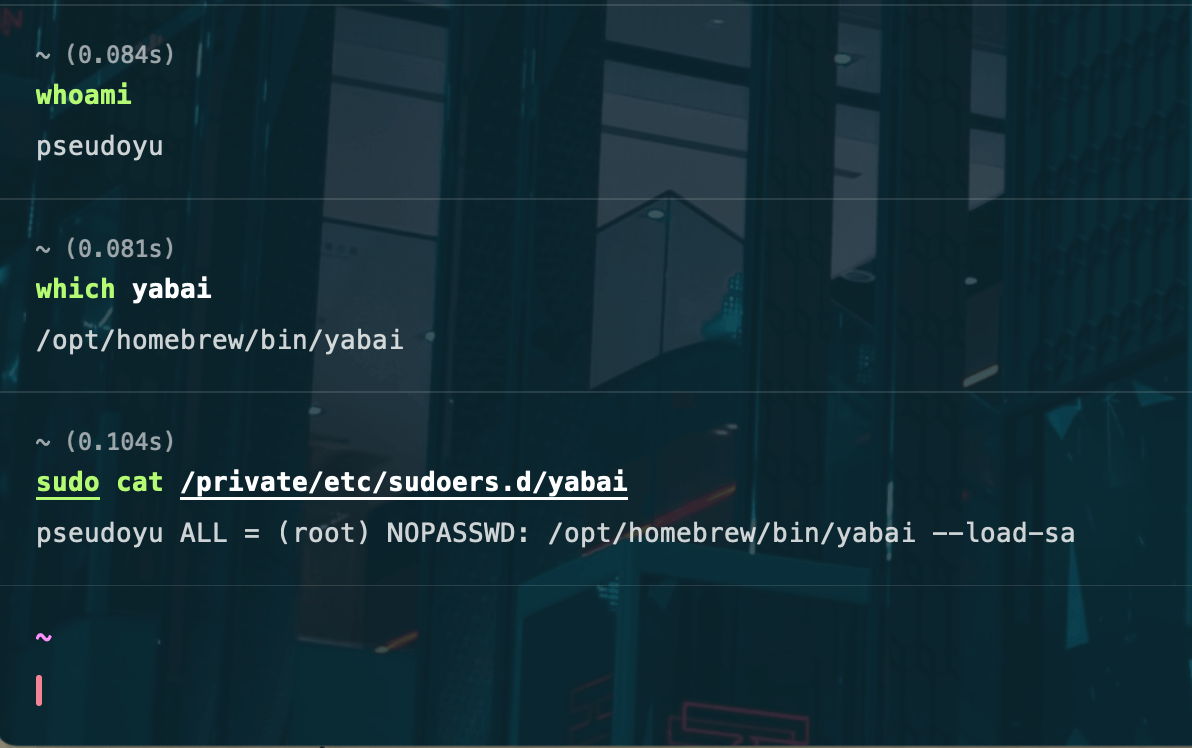
完成以上配置后,后续在 yabai 的 .yabairc 配置文件中加入下述两行:
sudo yabai --load-sa
yabai -m signal --add event=dock_did_restart action="sudo yabai --load-sa"
自定义配置 #
yabai 的配置文件由用户在 $HOME 目录下的 .yabairc 文件进行管理,通过编辑器或命令行工具进行编辑:
vi ~/.yabairc以下是我的个人配置,可以复制之后自己进行定制化修改。我已经将我的个人配置放在了 GitHub 代码托管平台,可以点击这里查看。
# !/usr/bin/env sh

sudo yabai --load-sa
yabai -m signal --add event=dock_did_restart action="sudo yabai --load-sa"

# 全局配置
yabai -m config mouse_follows_focus          off
yabai -m config focus_follows_mouse          off
yabai -m config window_origin_display        default
yabai -m config window_placement             second_child
yabai -m config window_topmost               off
yabai -m config window_shadow                on
yabai -m config window_opacity               off
yabai -m config active_window_opacity        1.0
yabai -m config normal_window_opacity        0.90
yabai -m config window_border                off
yabai -m config window_border_width          6
yabai -m config active_window_border_color   0xff775759
yabai -m config normal_window_border_color   0xff555555
yabai -m config insert_feedback_color        0xffd75f5f
yabai -m config split_ratio                  0.50
yabai -m config auto_balance                 off
yabai -m config mouse_modifier               fn
yabai -m config mouse_action1                move
yabai -m config mouse_action2                resize
yabai -m config mouse_drop_action            swap

# space 配置
yabai -m config layout                       bsp
yabai -m config top_padding                  15
yabai -m config bottom_padding               15
yabai -m config left_padding                 15
yabai -m config right_padding                15
yabai -m config window_gap                   15

# 忽略的 app
yabai -m rule --add app="^System Preferences$" manage=off
yabai -m rule --add app="^Archive Utility$" manage=off
yabai -m rule --add app="^Logi Options+$" manage=off
yabai -m rule --add app="^Alfred Preferences$" manage=off
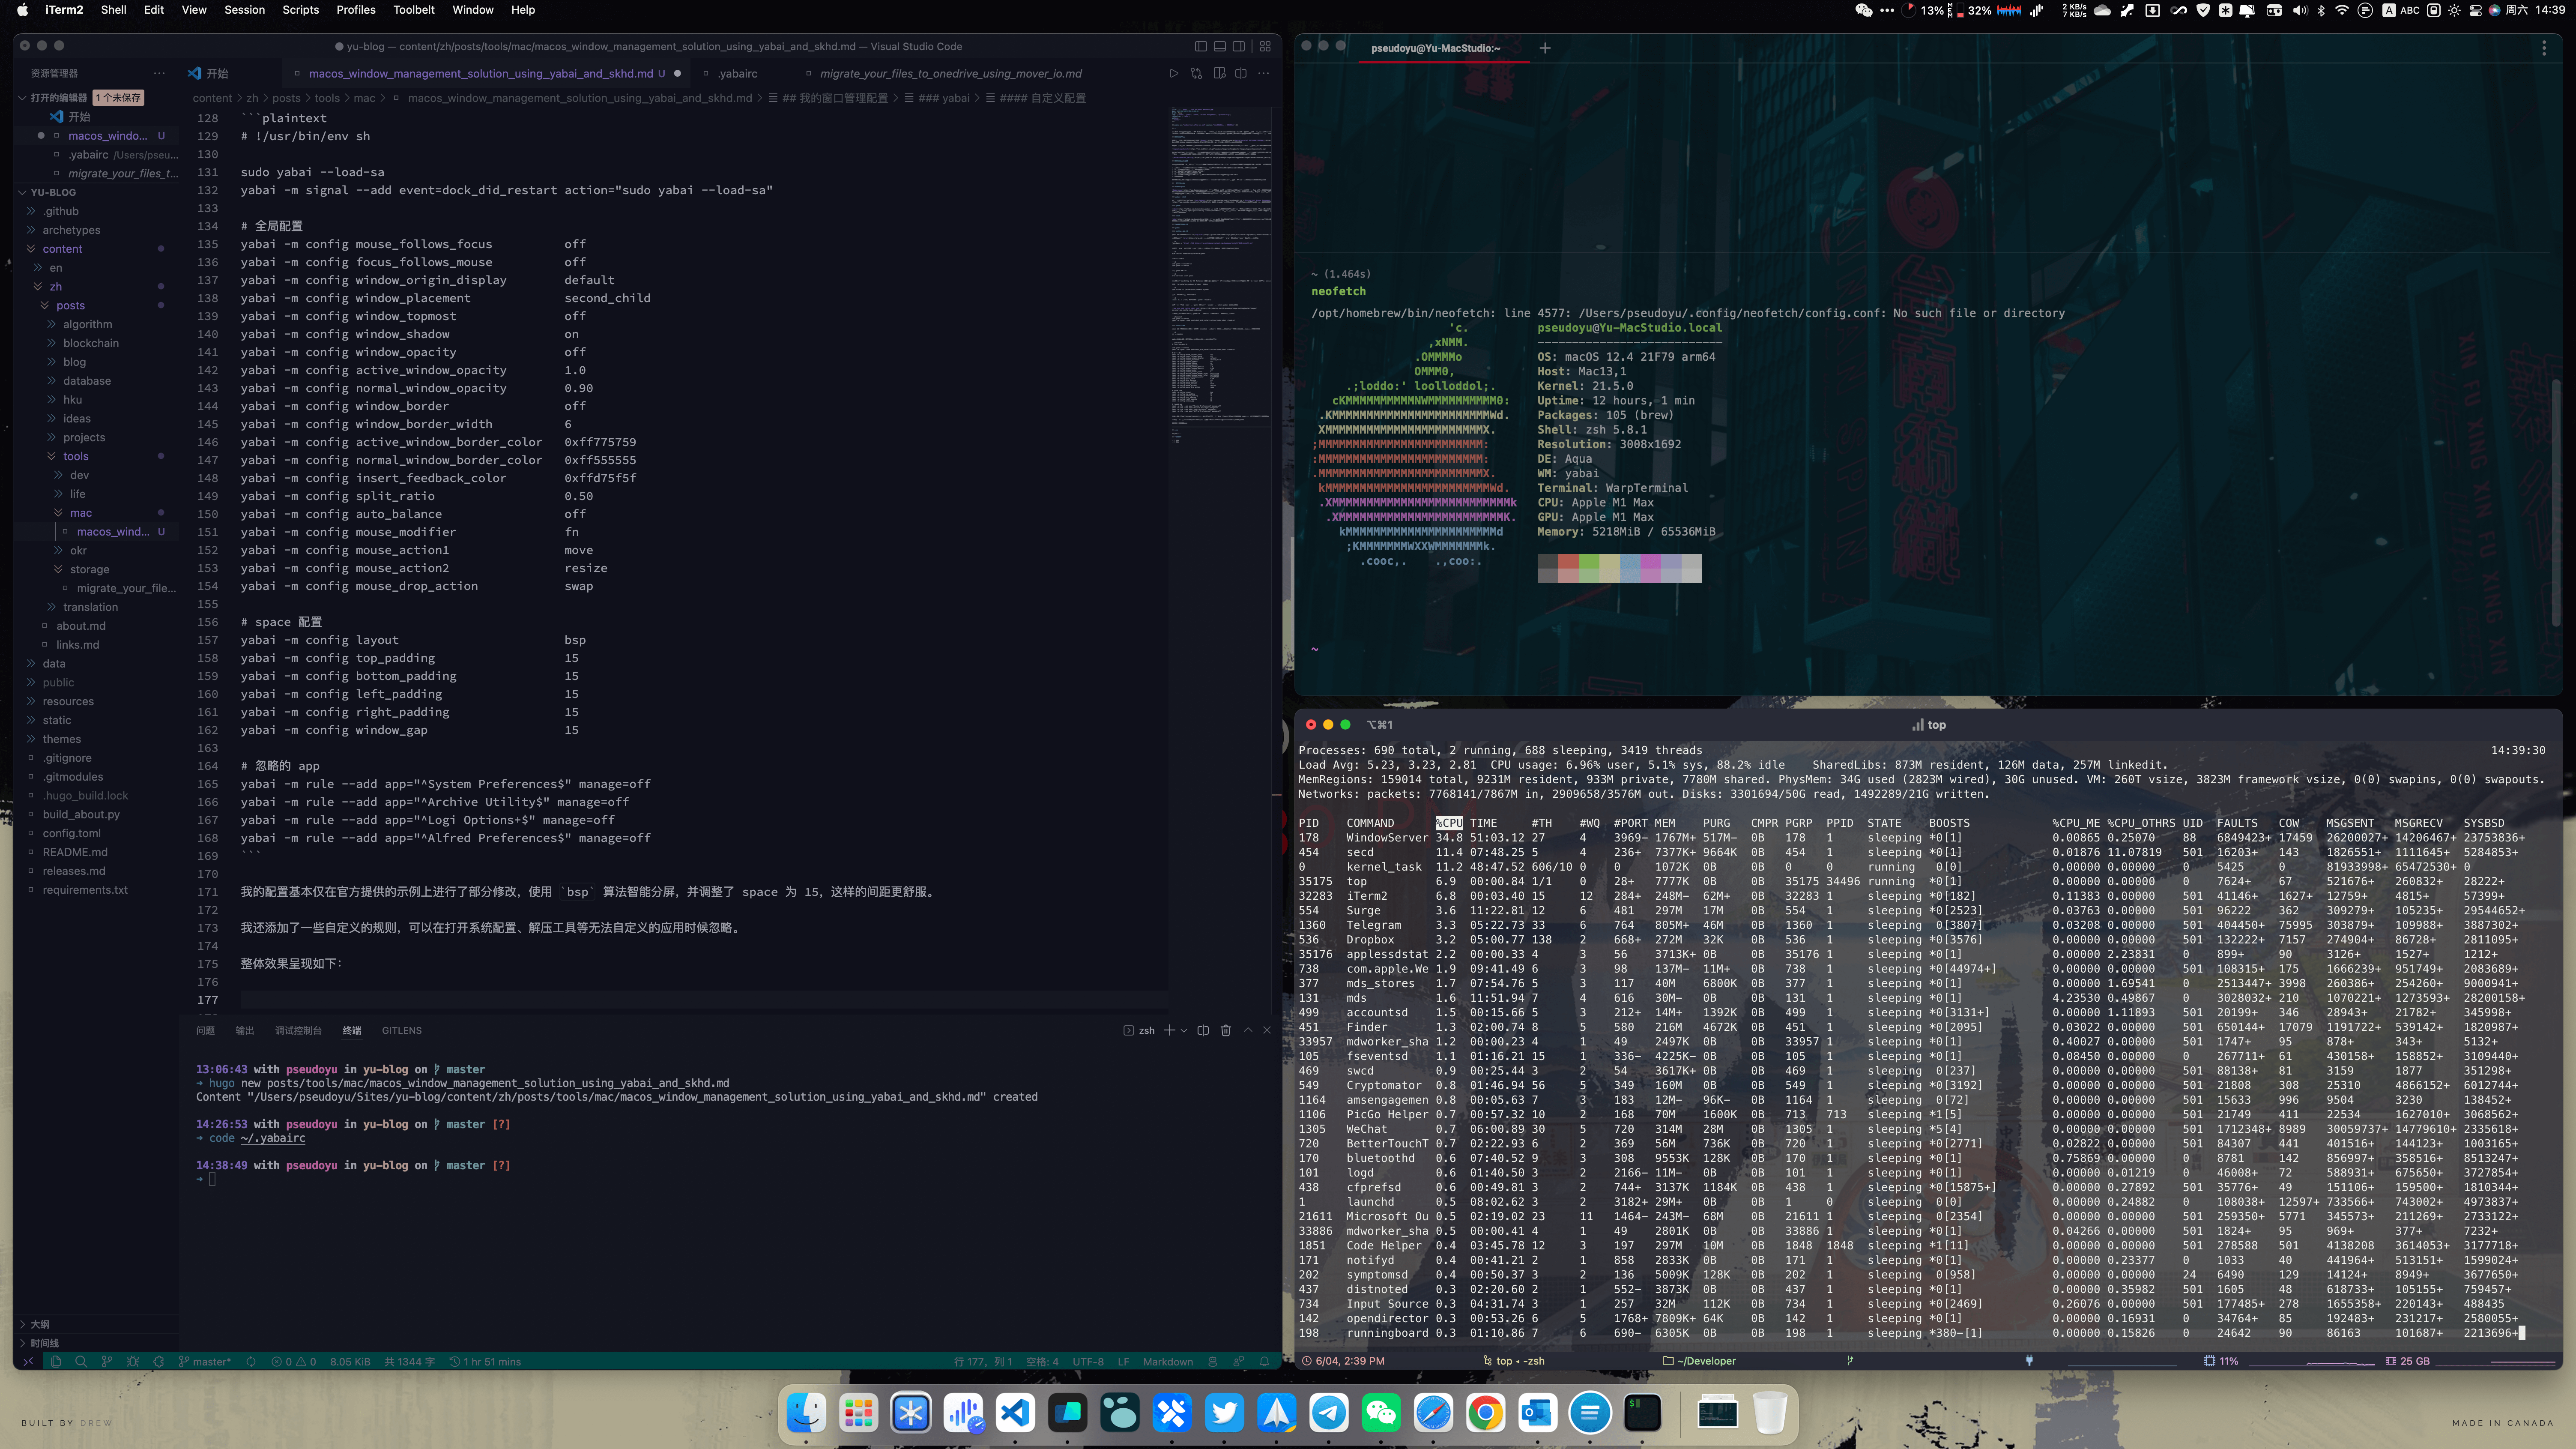
我的配置基本仅在官方提供的示例上进行了部分修改,使用 bsp 算法智能分屏,并调整了 space 为 15,这样的间距更舒服。
我还添加了一些自定义的规则,可以在打开系统配置、解压工具等无法自定义窗口的应用时候忽略。
整体呈现如下(以下效果为打开应用窗口后算法自动编排,且新增窗口会自动重排):
skhd #
配置好了 yabai 后,我们已经实现了智能分屏,但是有时候算法提供的窗口位置不满足我们的需求,或是我们需要频繁在各个窗口之间切换/调整,那就需要用到 skhd 工具来定制一些快捷键配置。
安装 #
skhd 也可以通过 brew 包管理工具进行安装,很方便:
brew install koekeishiya/formulae/skhd安装完成后启动即可:
brew services start skhd自定义配置 #
与 yabai 类似,skhd 的配置是通过 $HOME/.skhdrc 配置文件进行管理的,通过编辑器或命令行工具进行编辑即可。
vi ~/.skhdrc以下是我的个人配置,可以复制之后自己进行定制化修改。我已经将我的个人配置放在了 GitHub 代码托管平台,可以点击这里查看。
# 窗口聚焦
alt - h : yabai -m window --focus west
alt - j : yabai -m window --focus south
alt - k : yabai -m window --focus north
alt - l : yabai -m window --focus east

# 交换窗口
shift + alt - h : yabai -m window --swap west
shift + alt - j : yabai -m window --swap south
shift + alt - k : yabai -m window --swap north
shift + alt - l : yabai -m window --swap east

# 移动窗口
shift + alt + ctrl - h : yabai -m window --warp west
shift + alt + ctrl - h : yabai -m window --warp south
shift + alt + ctrl - h : yabai -m window --warp north
shift + alt + ctrl - h : yabai -m window --warp east

# 旋转窗口布局
alt - r : yabai -m space --rotate 90

# 全屏
alt -f : yabai -m window --toggle zoom-fullscreen

# 设置/取消窗口 space
alt - g : yabai -m space --toggle padding; yabai -m space --toggle gap

# 挂起窗口至屏幕中央/取消挂起窗口
alt - t : yabai -m window --toggle float;\
          yabai -m window --grid 4:4:1:1:2:2

# 修改窗口切分方式
alt - e : yabai -m window --toggle split

# 重置窗口布局
shift + alt - 0 : yabai -m space --balance

# 移动窗口至特定桌面
shift + alt - 1 : yabai -m window --space 1; yabai -m space --focus 1
shift + alt - 2 : yabai -m window --space 2; yabai -m space --focus 2
shift + alt - 3 : yabai -m window --space 3; yabai -m space --focus 3
shift + alt - 4 : yabai -m window --space 4; yabai -m space --focus 4
shift + alt - 5 : yabai -m window --space 5; yabai -m space --focus 5
shift + alt - 6 : yabai -m window --space 6; yabai -m space --focus 6
shift + alt - 7 : yabai -m window --space 7; yabai -m space --focus 7
shift + alt - 8 : yabai -m window --space 8; yabai -m space --focus 8
shift + alt - 9 : yabai -m window --space 9; yabai -m space --focus 9

# 增加窗口大小
shift + alt - w : yabai -m window --resize top:0:-20
shift + alt - d : yabai -m window --resize left:-20:0

# 减少窗口大小
shift + alt - s : yabai -m window --resize bottom:0:-20
shift + alt - a : yabai -m window --resize top:0:20
简单来说,我配置了与 vim 快捷键操作逻辑类似的配置,实现了以下常用功能:
<Option> + hjkl在不同的窗口之间聚焦<Option> + <Shift> + hjkl交换不同窗口<Option> + <Shift> + 0重置窗口布局<Option> + <Shift> + <1~9>快速将当前窗口移动到特定桌面<Option> + f全屏<Option> + t挂起窗口至屏幕中央/取消挂起窗口<Option> + g设置/取消窗口 space<Option> + r旋转窗口布局<Option> + e修改窗口切分方式
其中 hjkl 是 vim 编辑器常用的操作,大家也可以修改为上下左右或其他自己喜欢的键位。
完成以上配置后,我们就实现了 yabai 智能窗口管理以及通过简单的快捷键进行窗口操作,接下来我们对 macOS 系统进行一些配置,来优化一下我们的窗口管理系统吧。
macOS 桌面管理 #
macOS 提供了多桌面管理的强大功能,可以理解为每个桌面区域都是一个工作区,可以独立摆放不同的窗口,如下图所示:
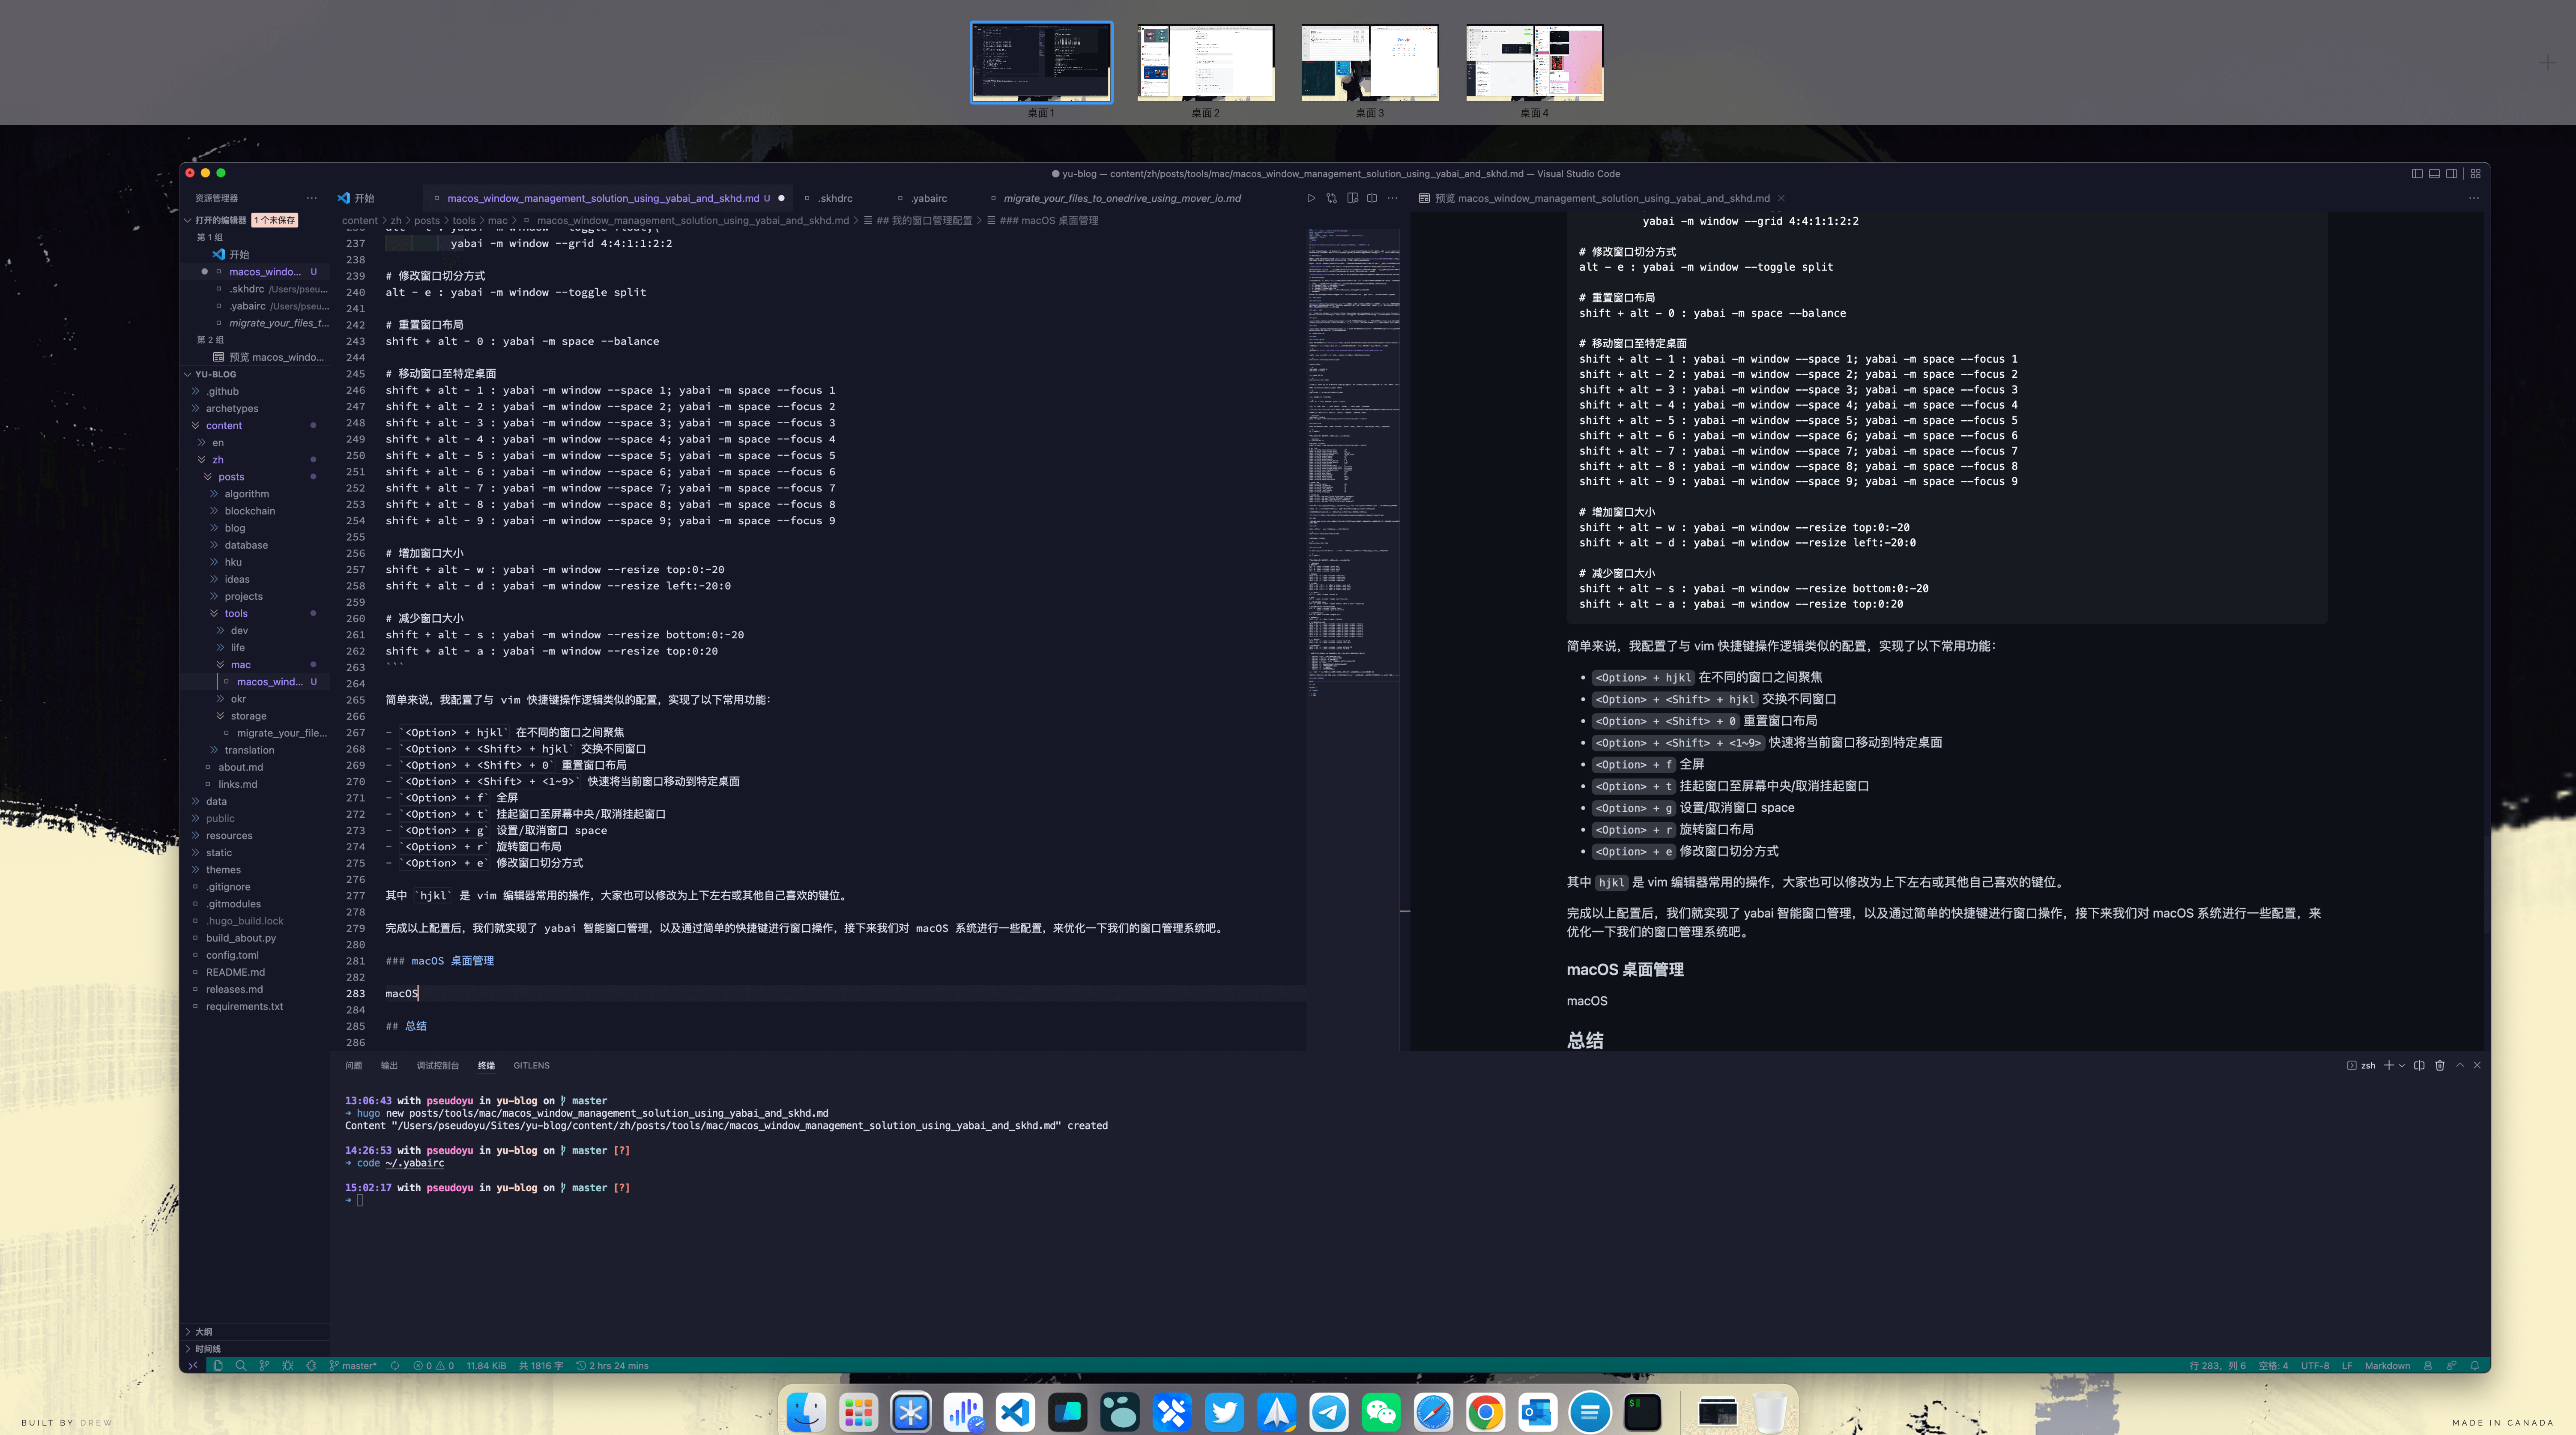
我们可以通过桌面来区分自己的工作区,如桌面 1 作为自己开发 IDE、终端,桌面 2 作为浏览器查询、写文档,桌面 3 用于处理微信、邮件等通讯工具,桌面 4 作为休闲娱乐、视频播放等,这样我们仅需在几个桌面间切换,实现自己的工作流逻辑,而不需要担心窗口聚焦问题。
为了进一步优化,更快速地完成桌面之间的切换,我们可以通过 Alfred、Raycast 等启动器来快速启动/聚焦应用,也可以通过 AltTab 或 Manico 等窗口切换软件提供的快捷键对已开启的应用进行快速切换。
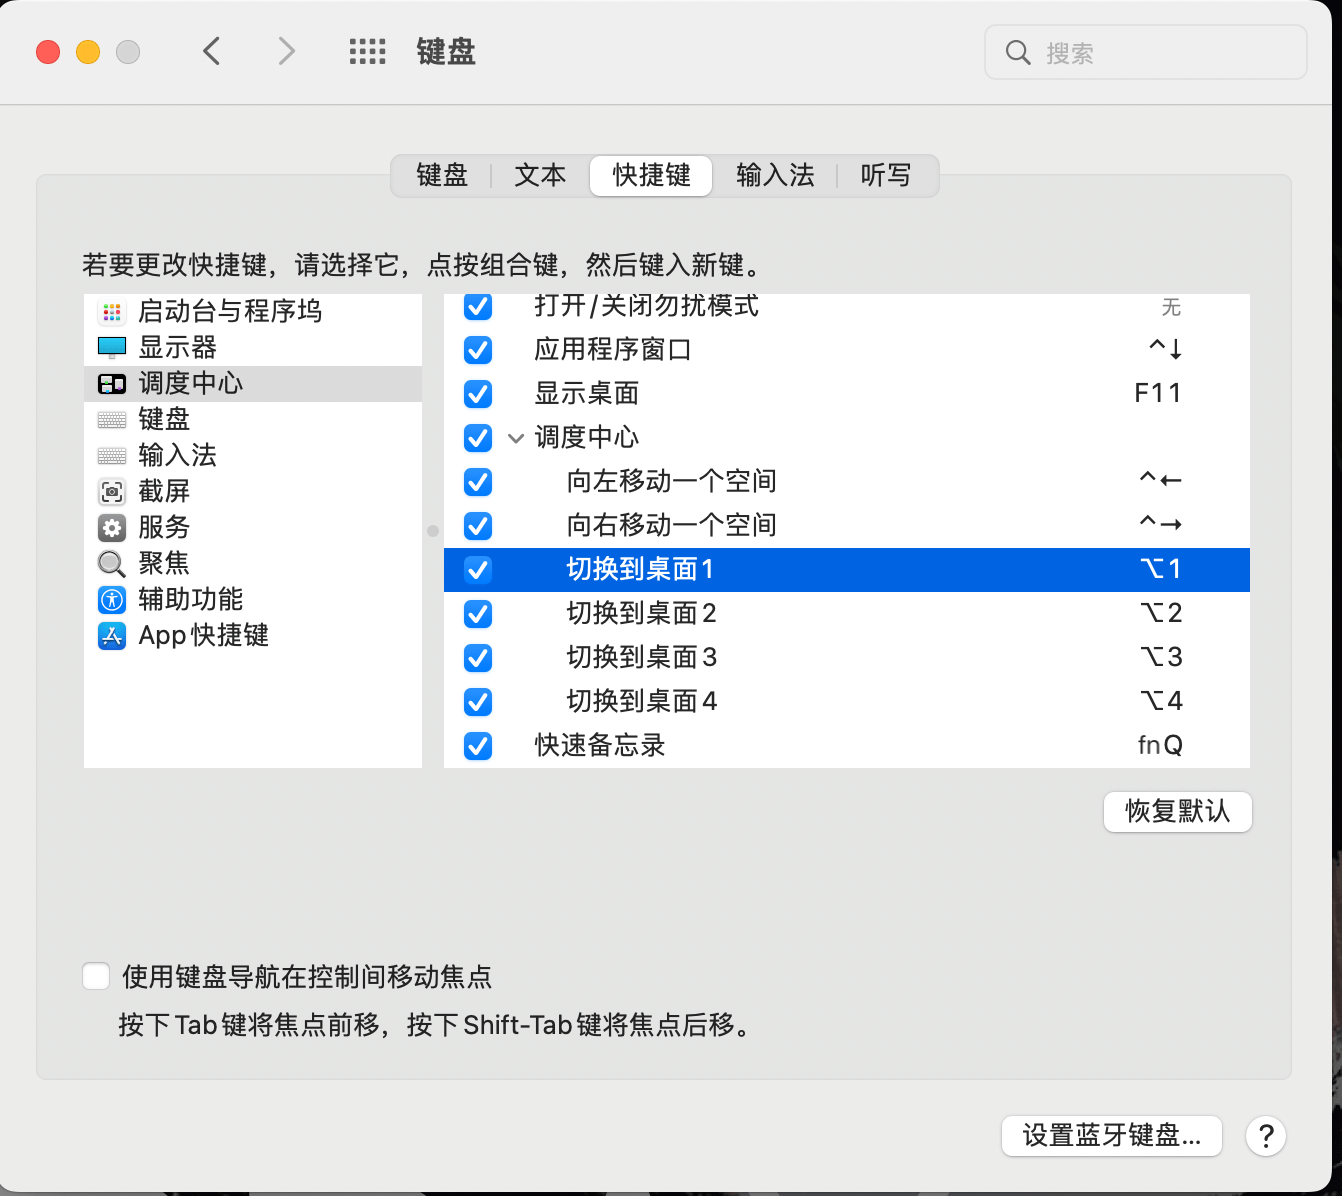
除此之外,macOS 系统设置里也提供了自定义切换的快捷方式,我把 <Option> + <1~9> 修改为了特定的桌面,这样平时工作的时候按对应快捷键就可以迅速到对应的工作区,很快就能形成肌肉记忆。
打开 系统偏好设置 - 键盘 - 快捷键 - 调度中心,我们可以为不同的桌面设置对应快捷键,如果没有显示,则可以先打开 9 个空桌面进行配置,之后关闭桌面后仍会保留配置。
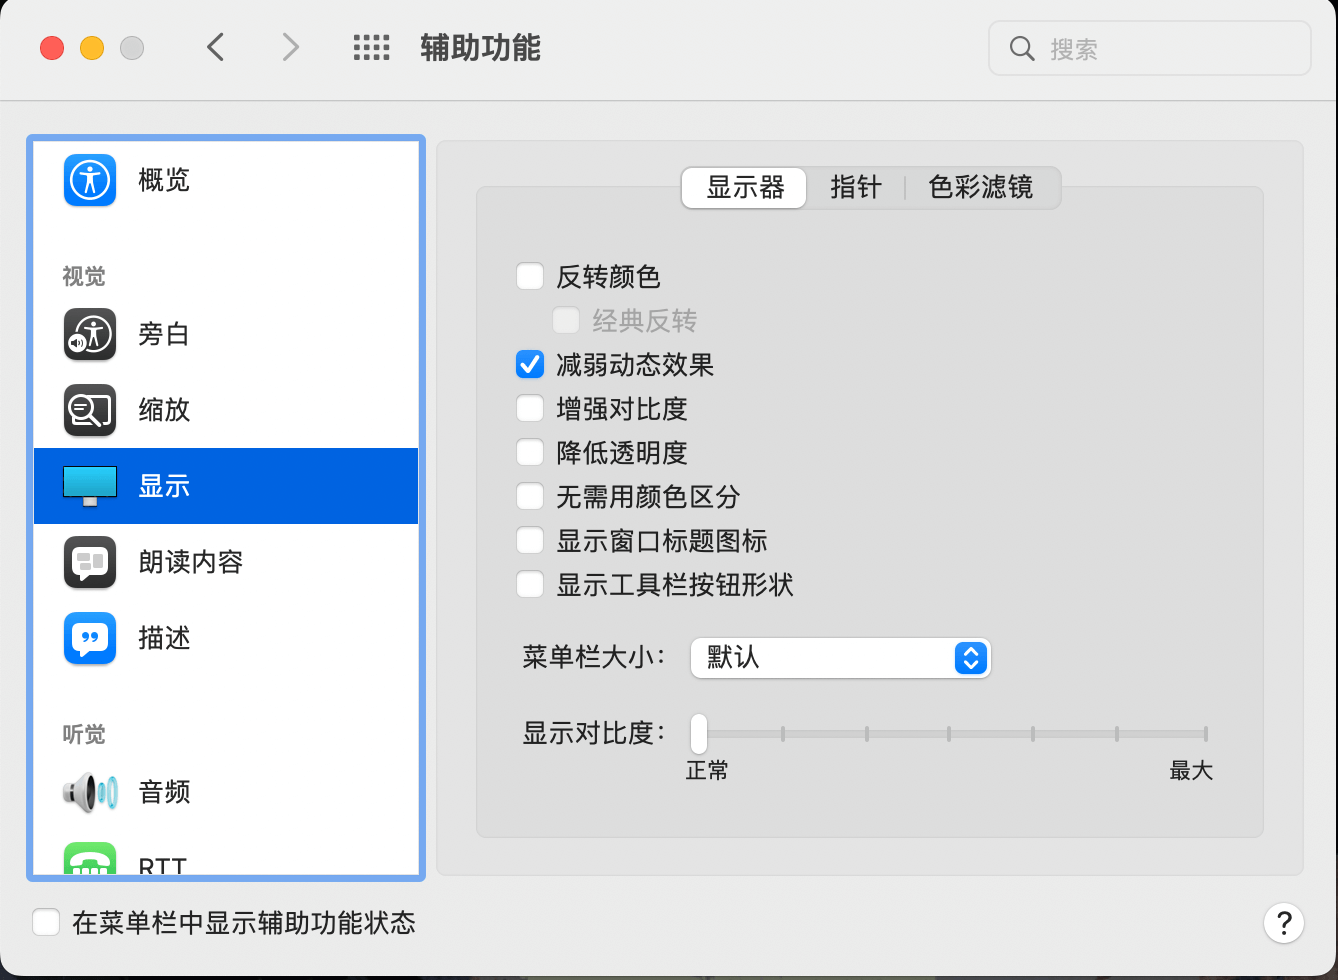
除此之外,还有一个我喜欢的小设置,打开 系统偏好设置 - 辅助功能 - 显示 - 显示器 - 减弱动态效果,这样会把不同桌面之间的窗口切换动画效果减弱,提高切换速度,配合我们的自动分屏和快捷键,实现快速强大的多工作区切换。我是速度效率优先,喜欢 macOS 动效的这一步可以不进行设置。
总结 #
以上就是我当前的 macOS 窗口管理解决方案,我是一个很爱折腾软件和各项配置的人,有时候常常为了一个小小的需求折腾好几天,一直追求自己的最佳实践。
也许很多配置并不能为我在之后的工作中节省非常多的时间,窗口整理切换也就是几秒钟的差异,但当我在日常工作学习中使用自己当初花了很多心思调研和优化的系统后,或当一个突发的需求使用到了我之前的一个折腾过的软件/配置时,会莫名地很开心、很有成就感,这大概就是折腾的意义吧,也希望大家都能享受到这样的快乐。
我在 GitHub 上维护了一个工具箱项目 『GitHub - pseudoyu/yu-tools』,记录了很多其他软硬件的选择,也在不断更新优化,有感兴趣的也欢迎交流,我也会逐步出一些对应的配置/使用教程。
注:本文由本人授权首发于『少数派』,原文地址为:『让窗口管理也能自动化,基于 yabai+skhd 的 macOS 窗口管理系统』。