前言 #
经过了前几篇对智能合约基础、Web3.py、ethers.js 的学习,我们已经掌握了通过程序与区块链网络直接交互的基础知识,不熟悉的同学可以回顾一下:
但是在真正的复杂业务场景中,我们往往会使用一些进一步封装的框架,如 HardHat、Brownie、Truffle 等,HardHat 是其中应用最广泛、插件拓展最为强大的。本系列将从这篇开始专注于 Hardhat 框架的使用与最佳实践,而本篇则会通过一个简单的例子完成其安装、配置与使用。
本文是对 Patrick Collins 的 『Learn Blockchain, Solidity, and Full Stack Web3 Development with JavaScript』 教程的学习整理,强烈建议看原教程视频了解更多细节。
可以点击这里访问本测试 Demo 代码仓库。
Hardhat 介绍 #

Hardhat 是一个基于 JavaScript 的智能合约开发环境,可以用于灵活地编译、部署、测试和调试基于 EVM 的智能合约,并且提供了一系列工具链来整合代码与外部工具,还提供了丰富的插件生态,提升开发效率。此外,它还提供了模拟以太坊的本地 Hardhat 网络节点,提供强大的本地调试功能。
其 GitHub 地址为 NomicFoundation/hardhat,可以访问其官方文档了解更多。
Hardhat 使用 #
初始化项目 #
从零开始搭建一个 Hardhat 项目,我们需要预先安装好 node.js 与 yarn 环境,这部份参照官方说明根据自己的系统环境按照即可。
首先,我们需要初始化项目并安装 hardhat 依赖包。
yarn init
yarn add --dev hardhat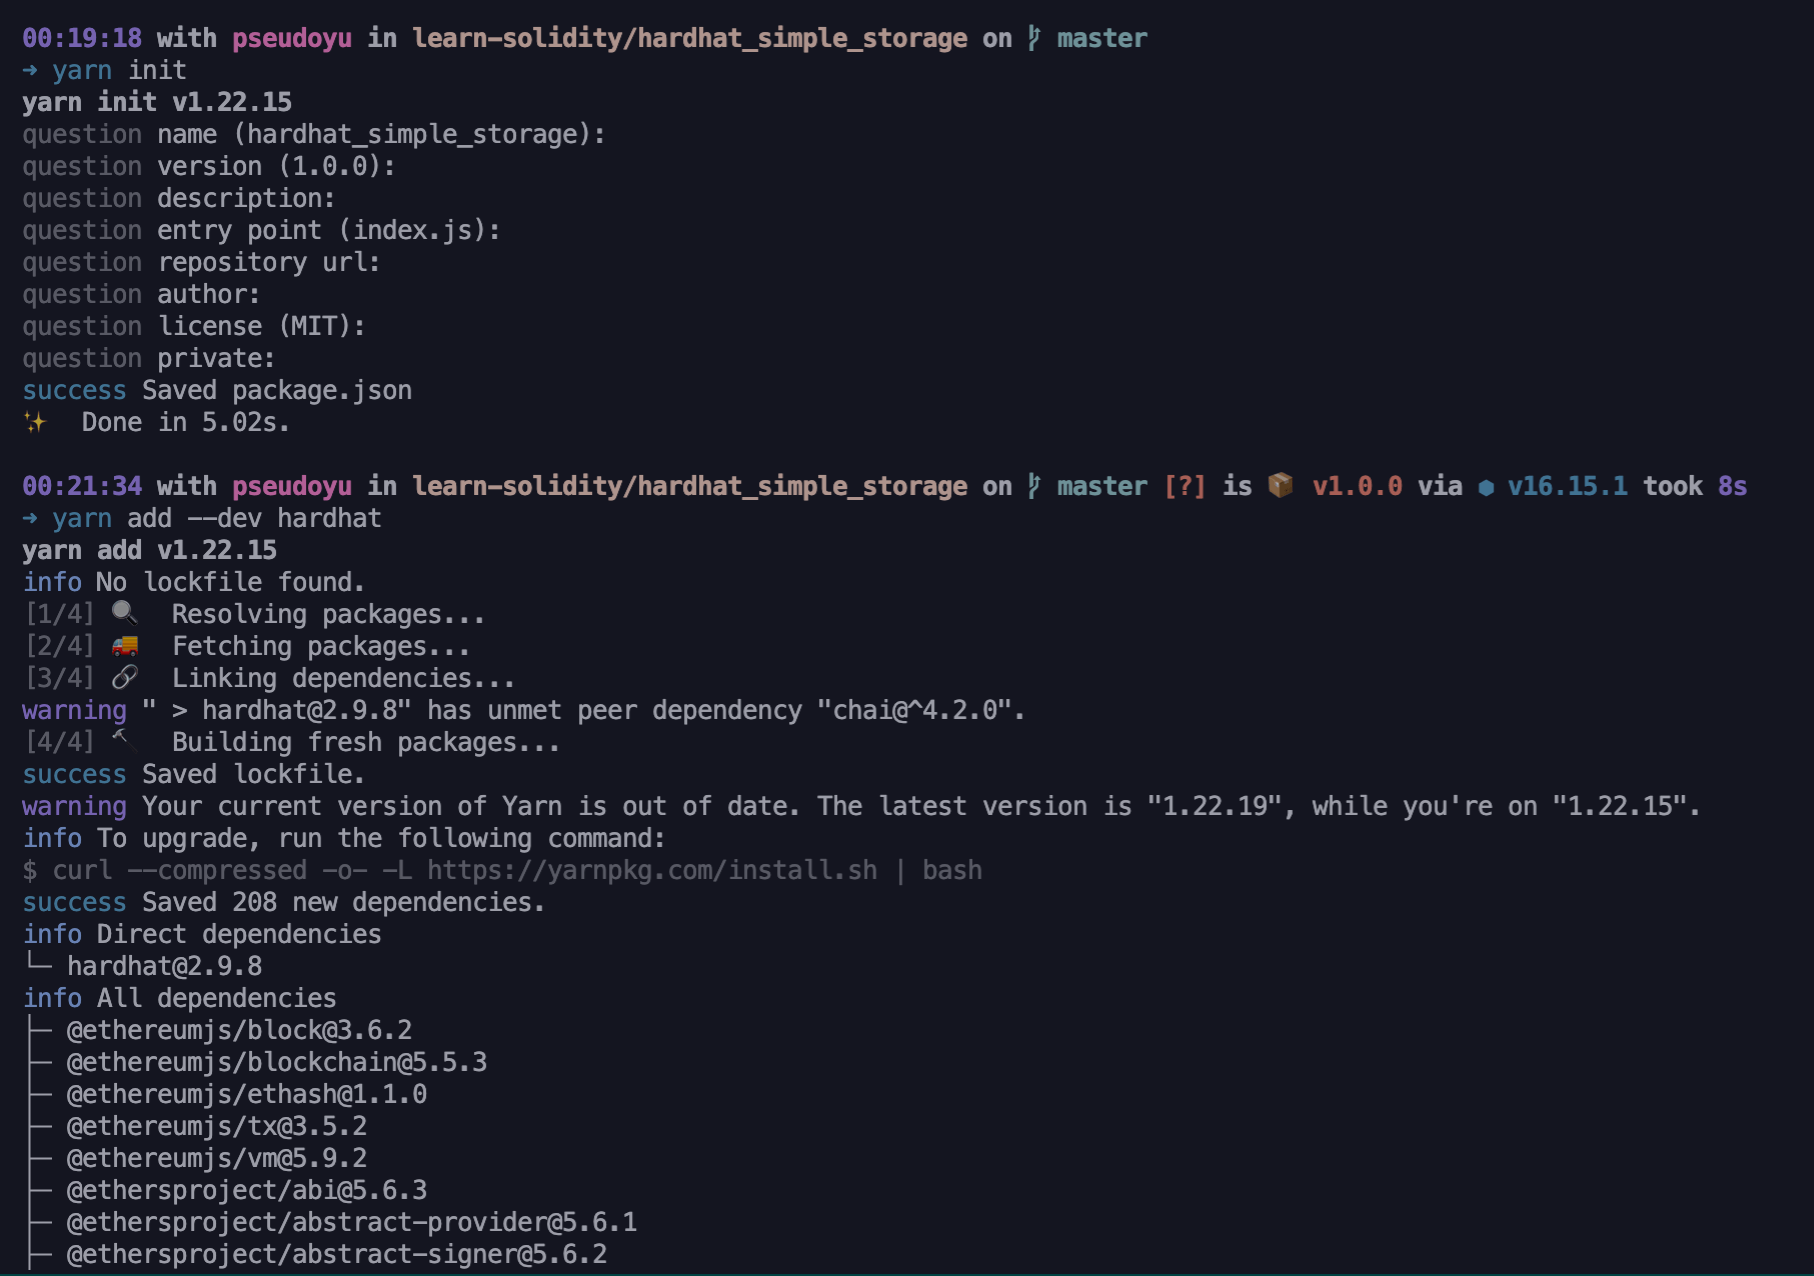
初始化 Hardhat #
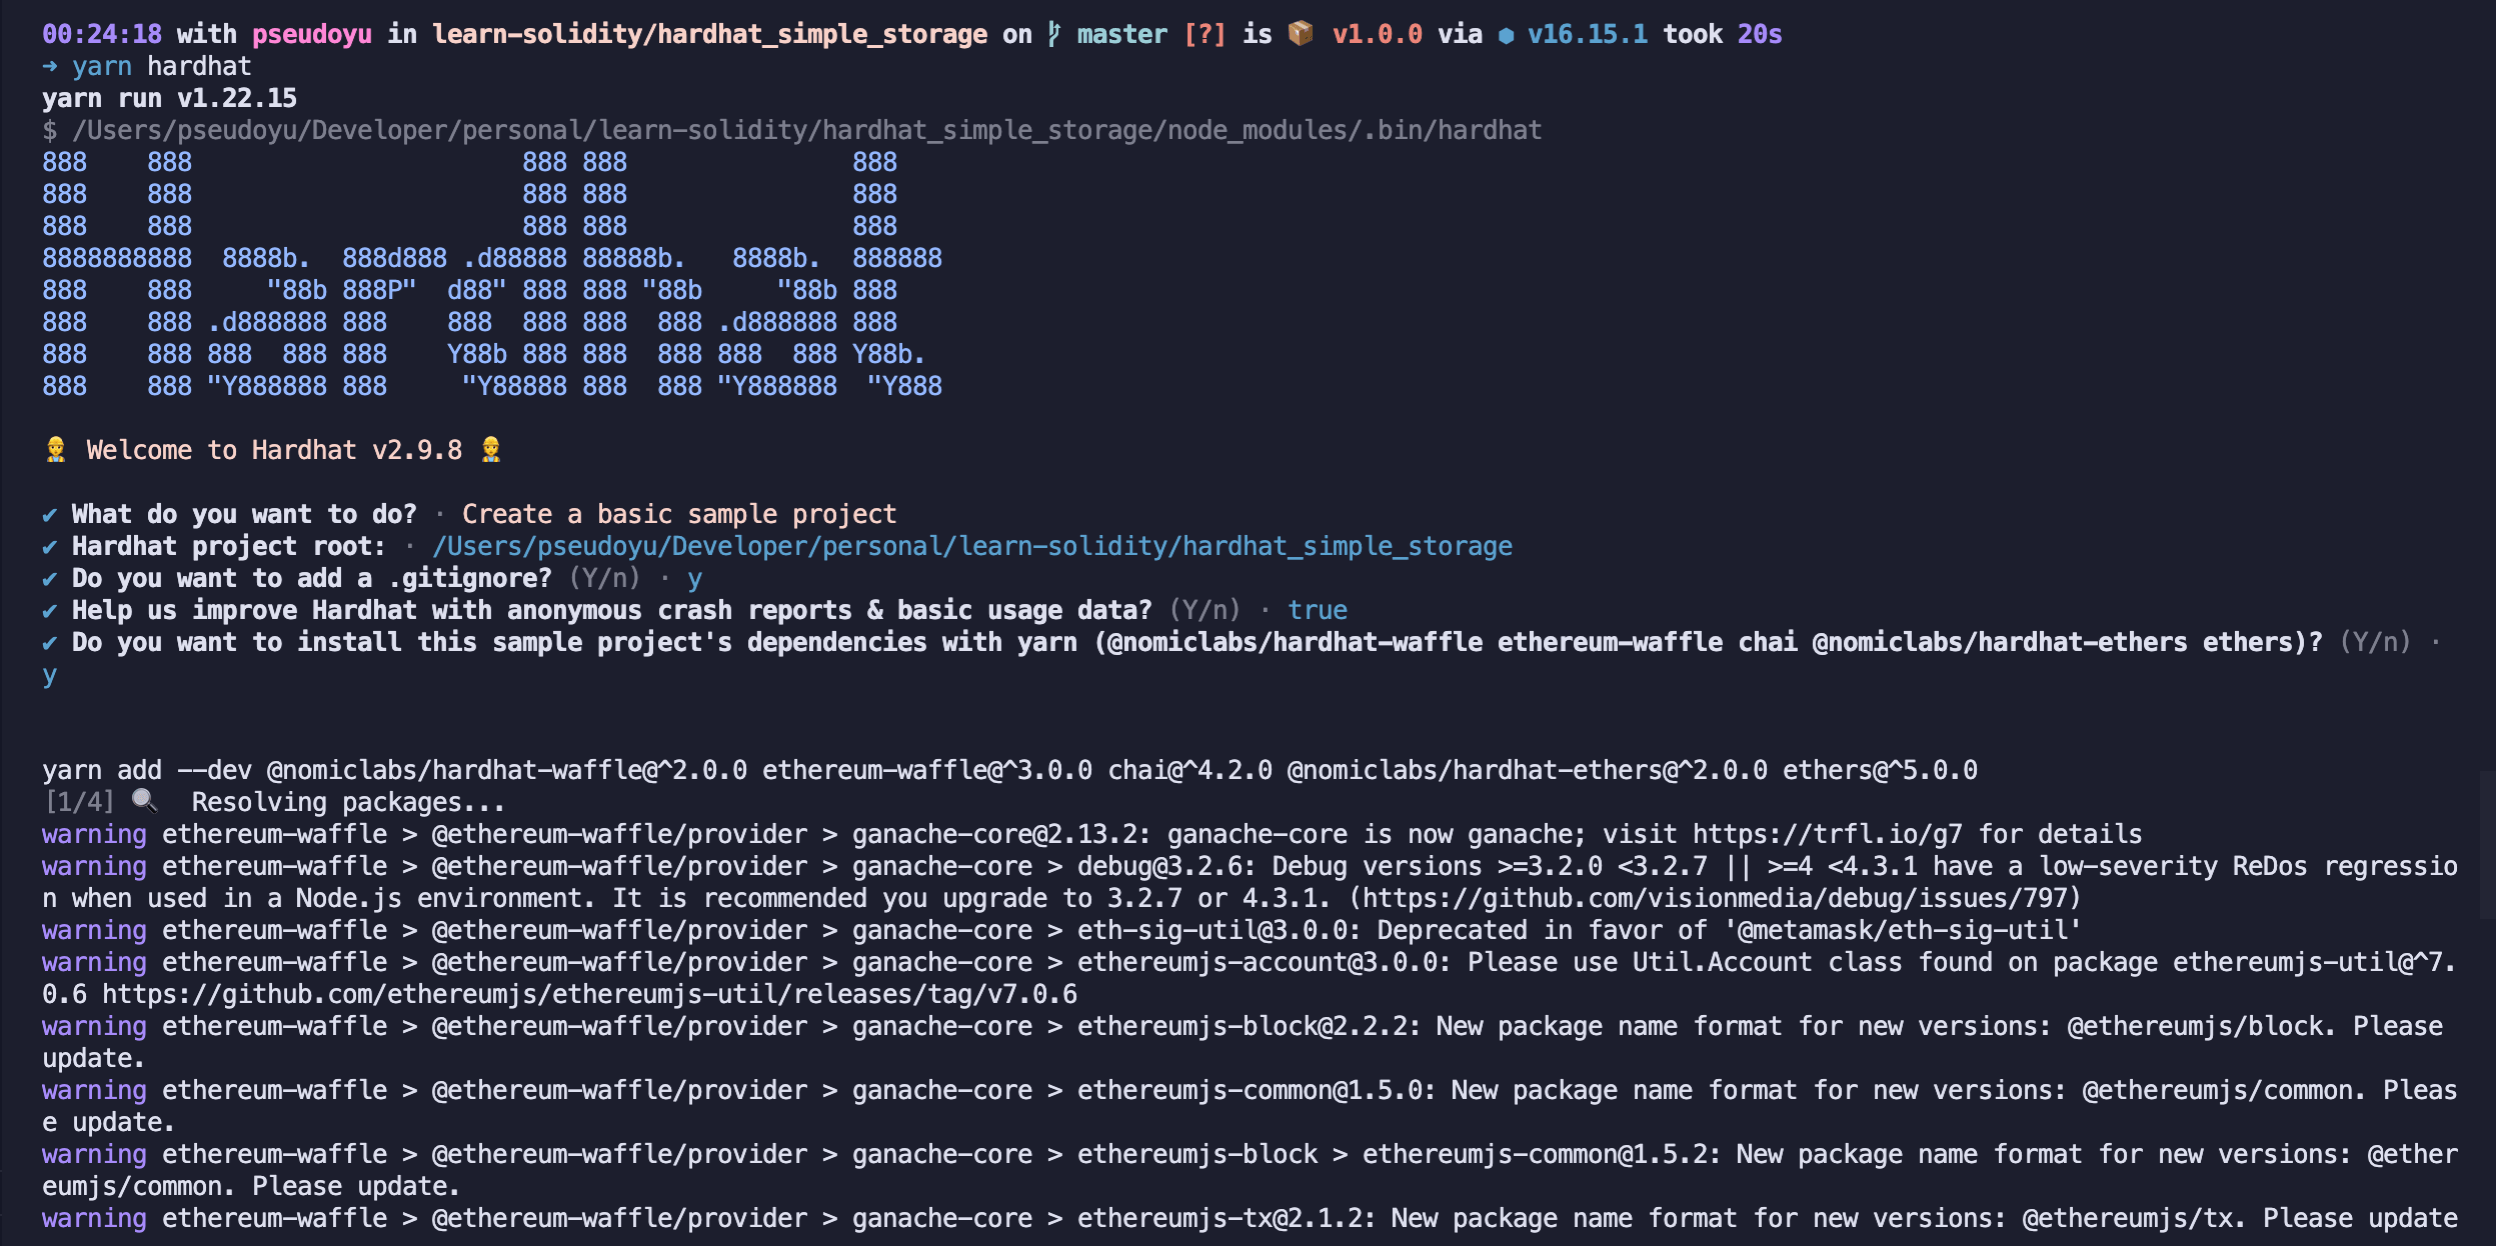
然后需要运行 yarn hardhat,通过交互式命令来进行初始化,根据项目需要进行配置,我们的测试 Demo 选择默认值。
优化代码格式化 #
VS Code 配置 #
我本地是通过 VS Code 进行代码开发的,可以通过安装 Solidity + Hardhat 与 Prettier 两个插件来进行代码格式化,可以使用打开 VS Code 设置,在 settings.json 中增加如下格式化配置:
{
  // ...

  "[solidity]": {
    "editor.defaultFormatter": "NomicFoundation.hardhat-solidity"
  },
  "[javascript]": {
    "editor.defaultFormatter": "esbenp.prettier-vscode"
  }
}
项目配置 #
为了统一各个使用项目的开发人员的代码格式化样式,我们还可以为项目配置 prettier 与 prettier-plugin-solidity 插件支持:
yarn add --dev prettier prettier-plugin-solidity
添加依赖后,可以在项目目录增加 .prettierrc 与 .prettierignore 配置文件来进行格式化统一:
我的 .prettierrc 配置为:
{
  "tabWidth": 4,
  "useTabs": false,
  "semi": false,
  "singleQuote": false
}
我的 .prettierignore 配置为:
node_modules
package.json
img
artifacts
cache
coverage
.env
.*
README.md
coverage.json
编译合约 #
无需像 ethers.js 一样自定义 compile 命令,HardHat 预置了 compile 命令,可以将合约放在 contracts 目录下,然后通过 yarn hardhat compile 命令来编译合约:

添加 dotenv 支持 #
在开始编写部署脚本之前,我们先配置一下 dotenv 插件,这样我们就可以使用 dotenv 来获取环境变量。我们在开发过程中,会牵扯到很多隐私信息,如私钥等,我们会希望将其存储在 .env 文件或直接设置在终端中,比如我们的 RINKEBY_PRIVATE_TOKEN,这样我们就可以在部署脚本中使用 process.env.RINKEBY_PRIVATE_TOKEN 获取到值,无需在代码中显式写入,减少隐私泄漏风险。
安装 dotenv #
yarn add --dev dotenv
设置环境变量 #
在 .env 文件中,我们可以设置环境变量,比如:
RINKEBY_RPC_URL=url
RINKEBY_PRIVATE_KEY=0xkey
ETHERSCAN_API_KEY=key
COINMARKETCAP_API_KEY=key
我们就可以在 hardhat.config.js 中读取环境变量了:
require('dotenv').config()

const RINKEBY_RPC_URL
    = process.env.RINKEBY_RPC_URL || 'https://eth-rinkeby/example'
const RINKEBY_PRIVATE_KEY = process.env.RINKEBY_PRIVATE_KEY || '0xkey'
const ETHERSCAN_API_KEY = process.env.ETHERSCAN_API_KEY || 'key'
const COINMARKETCAP_API_KEY = process.env.COINMARKETCAP_API_KEY || 'key'
配置网络环境 #
往往我们的合约需要运行在不同的区块链网络上,如本地测试、开发、上线环境等等,Hardhat 也提供了便捷的方式来配置网络环境。
启动网络 #
我们可以直接运行脚本来启动一个 Hardhat 自带的网络,但该网络仅仅存活于脚本运行期间,想要启动一个本地可持续的网络,需要运行 yarn hardhat node 命令:
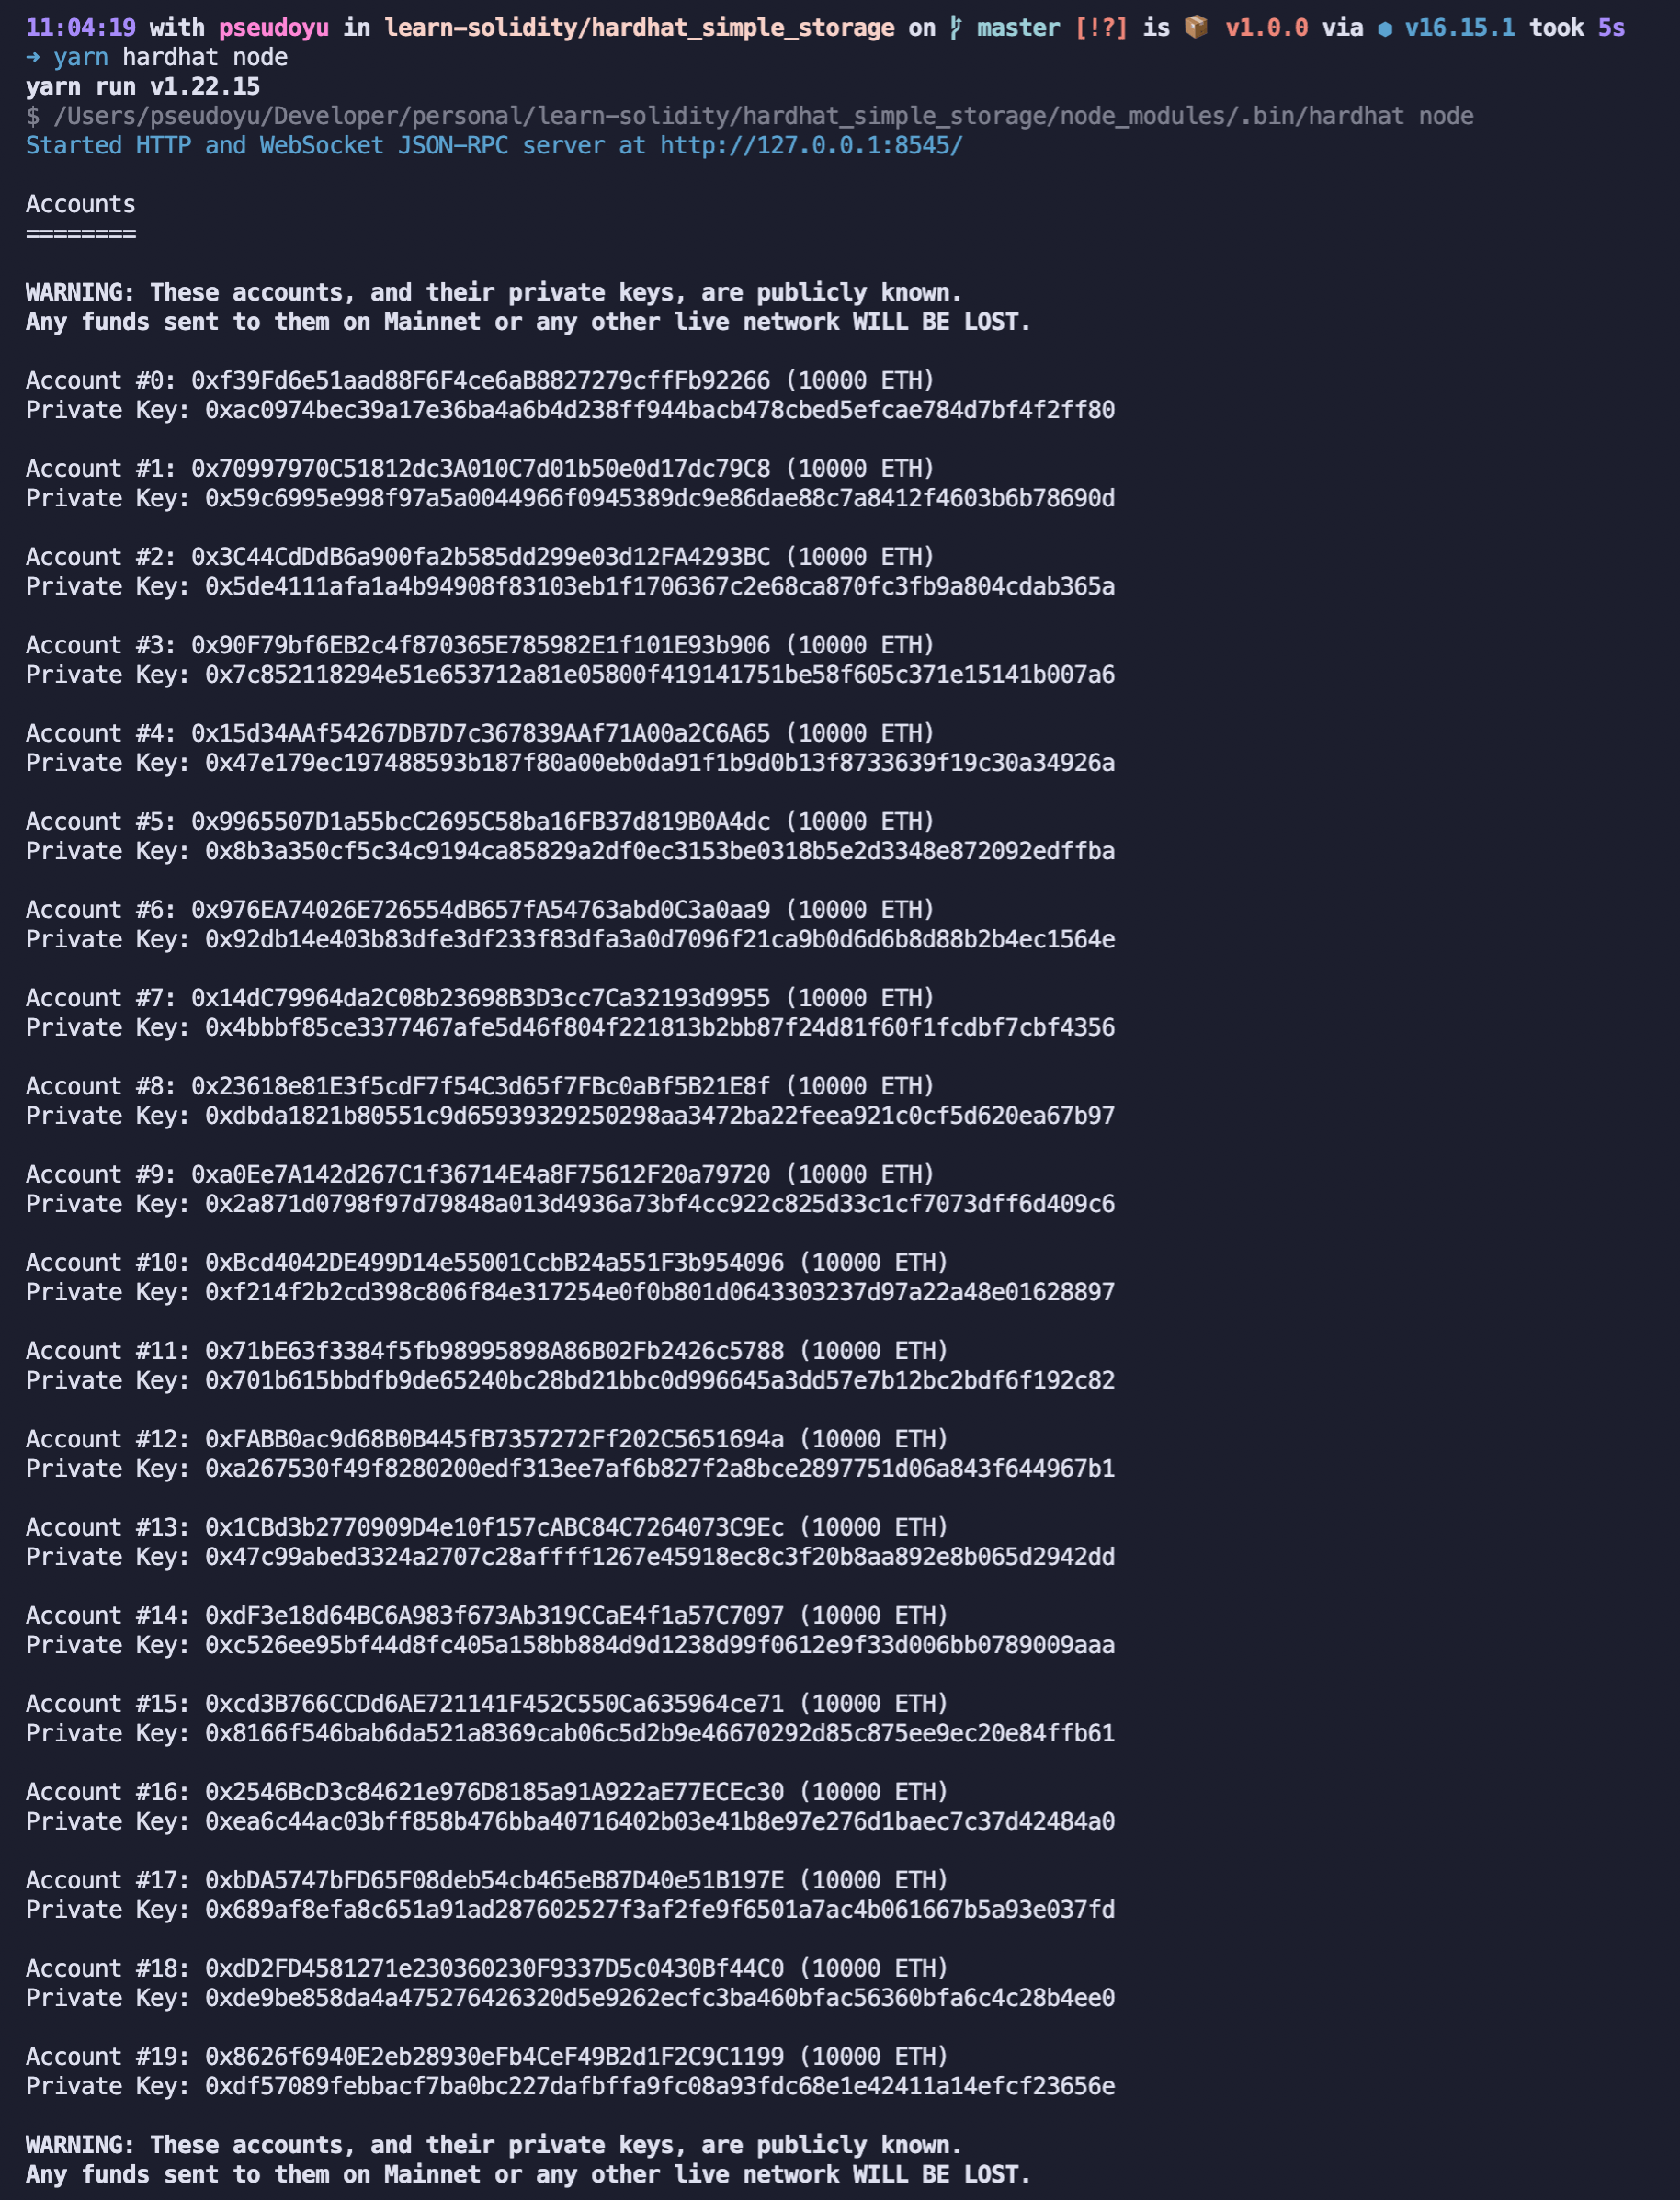
执行完成后,就生成了测试网络与测试账户,供后续开发调试使用。
我们还可以通过 Alchemy 或 Infura 等平台生成自己的测试网节点,记录其 RPC_URL 供程序连接使用。
定义网络 #
完成网络环境准备后,我们可以在项目配置 hardhat.config.js 中定义网络:
const RINKEBY_RPC_URL
    = process.env.RINKEBY_RPC_URL || 'https://eth-rinkeby/example'
const RINKEBY_PRIVATE_KEY = process.env.RINKEBY_PRIVATE_KEY || '0xkey'

module.exports = {
  defaultNetwork: 'hardhat',
  networks: {
    locakhost: {
      url: 'http://localhost:8545',
      chainId: 31337,
    },
    rinkeby: {
      url: RINKEBY_RPC_URL,
      accounts: [RINKEBY_PRIVATE_KEY],
      chainId: 4,

    },
  },
  // ...,
}
脚本 #
在 Hardhat 项目中,我们可以通过在 scripts 目录中编写脚本来实现部署等功能,并且通过便捷的命令执行脚本。
编写部署脚本 #
接下来我们开始编写 deploy.js 脚本。
首先,我们需要从 hardhat 中导入必要包:
const { ethers, run, network } = require('hardhat')接着则编写 main 方法,包含我们的部署核心逻辑:
async function main() {
  const SimpleStorageFactory = await ethers.getContractFactory(
    'SimpleStorage'
  )
  console.log('Deploying SimpleStorage Contract...')
  const simpleStorage = await SimpleStorageFactory.deploy()
  await simpleStorage.deployed()
  console.log('SimpleStorage Contract deployed at:', simpleStorage.address)

  // 获取当前值
  const currentValue = await simpleStorage.retrieve()
  console.log('Current value:', currentValue)

  // 设置值
  const transactionResponse = await simpleStorage.store(7)
  await transactionResponse.wait(1)

  // 获取更新后的值
  const updatedValue = await await simpleStorage.retrieve()
  console.log('Updated value:', updatedValue)
}
最后运行我们的 main 方法:
main()
  .then(() => process.exit(0))
  .catch((error) => {
    console.error(error)
    process.exit(1)
  })
运行脚本 #
完成脚本编写后,可以通过 Hardhat 提供的 run 命令来运行脚本。
如不加网络参数,则默认使用 hardhat 网络,可以通过 --network 参数指定网络:
yarn hardhat run scripts/deploy.js --network rinkeby
增加 etherscan 合约验证支持 #
将合约部署至 Rinkeby 测试网络后可在 Etherscan 上查看合约的地址,并且进行验证。我们可以通过网站进行操作,但 Hardhat 提供了插件支持,更方便进行验证操作。
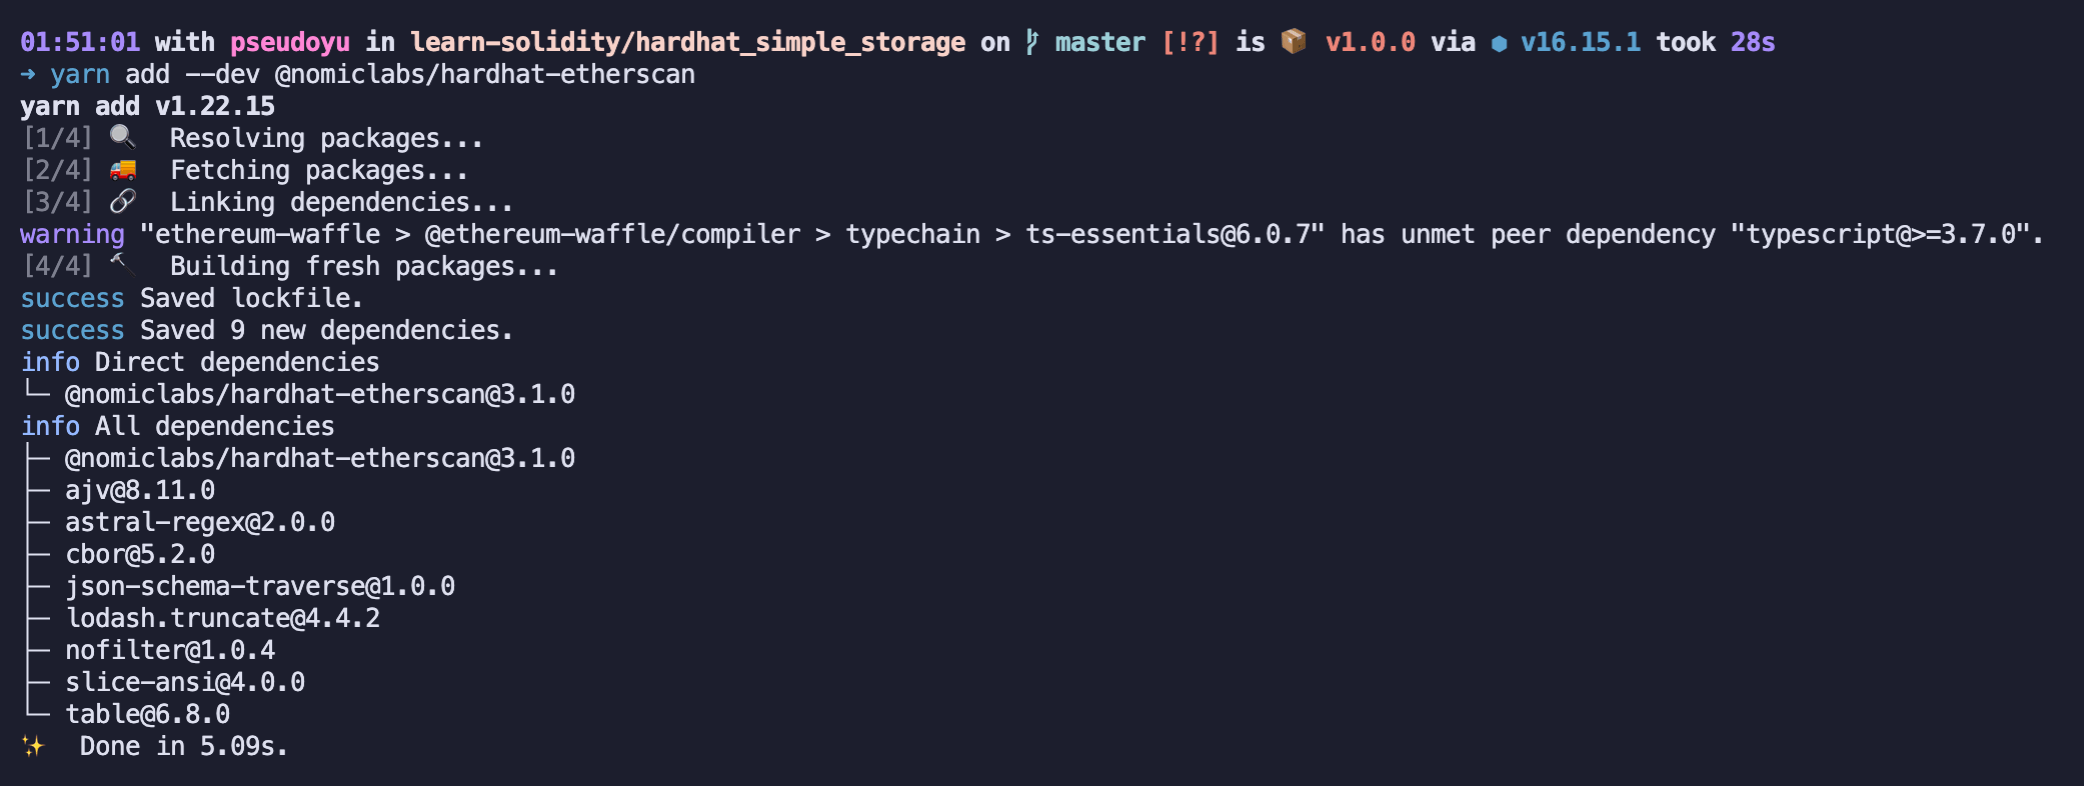
安装 hardhat-etherscan 插件 #
我们通过 yarn add --dev @nomiclabs/hardhat-etherscan 命令安装插件。
启用 etherscan 合约验证支持 #
完成安装后,我们需要在 hardhat.config.js 中进行配置:
require('@nomiclabs/hardhat-etherscan')

module.exports = {
  // ...,
  etherscan: {
    apiKey: ETHERSCAN_API_KEY,
  },
  // ...,
}
定义 verify 方法 #
接下来我们需要在部署脚本 deploy.js 中添加 verify 方法。
const { ethers, run, network } = require('hardhat')

async function verify(contractAddress, args) {
  console.log('Verifying SimpleStorage Contract...')
  try {
    await run('verify:verify', {
      address: contractAddress,
      constructorArguements: args,
    })
  }
  catch (e) {
    if (e.message.toLowerCase().includes('already verified!')) {
      console.log('Already Verified!')
    }
    else {
      console.log(e)
    }
  }
}
这个方法我们调用了 hardhat 包中的 run 方法,并且传递了一个 verify 命令,并且传递了一个参数 { address: contractAddress, constructorArguements: args }。因为可能我们的合约已经在 Etherscan 上验证过,所以我们做了一个 try...catch... 错误处理,如果验证过,则会抛出一个错误,并且输出一个提示信息,而不影响我们的部署流程。
设置部署后调用 #
定义好我们的 verify 方法后,我们可以在部署脚本中调用它:
async function main() {
  // ...

  if (network.config.chainId === 4 && process.env.ETHERSCAN_API_KEY) {
    await simpleStorage.deployTransaction.wait(6)
    await verify(simpleStorage.address, [])
  }

  // ...
}
在这里我们做了两个特殊处理。
首先,我们仅需要在 rinkeby 网络上验证合约,而不需要在本地或其他网络环境验证,因此,我们对 network.config.chainId 进行判断,如果是 4,则执行验证操作;否则,不执行验证操作,此外仅在有 ETHERSCAN_API_KEY 环境变量时执行验证操作。
另外,Etherscan 可能需要在部署后一段时间才能获取到合约地址,因此我们配置了 .wait(6) 等待 6 个区块后再进行验证。
执行效果如下:

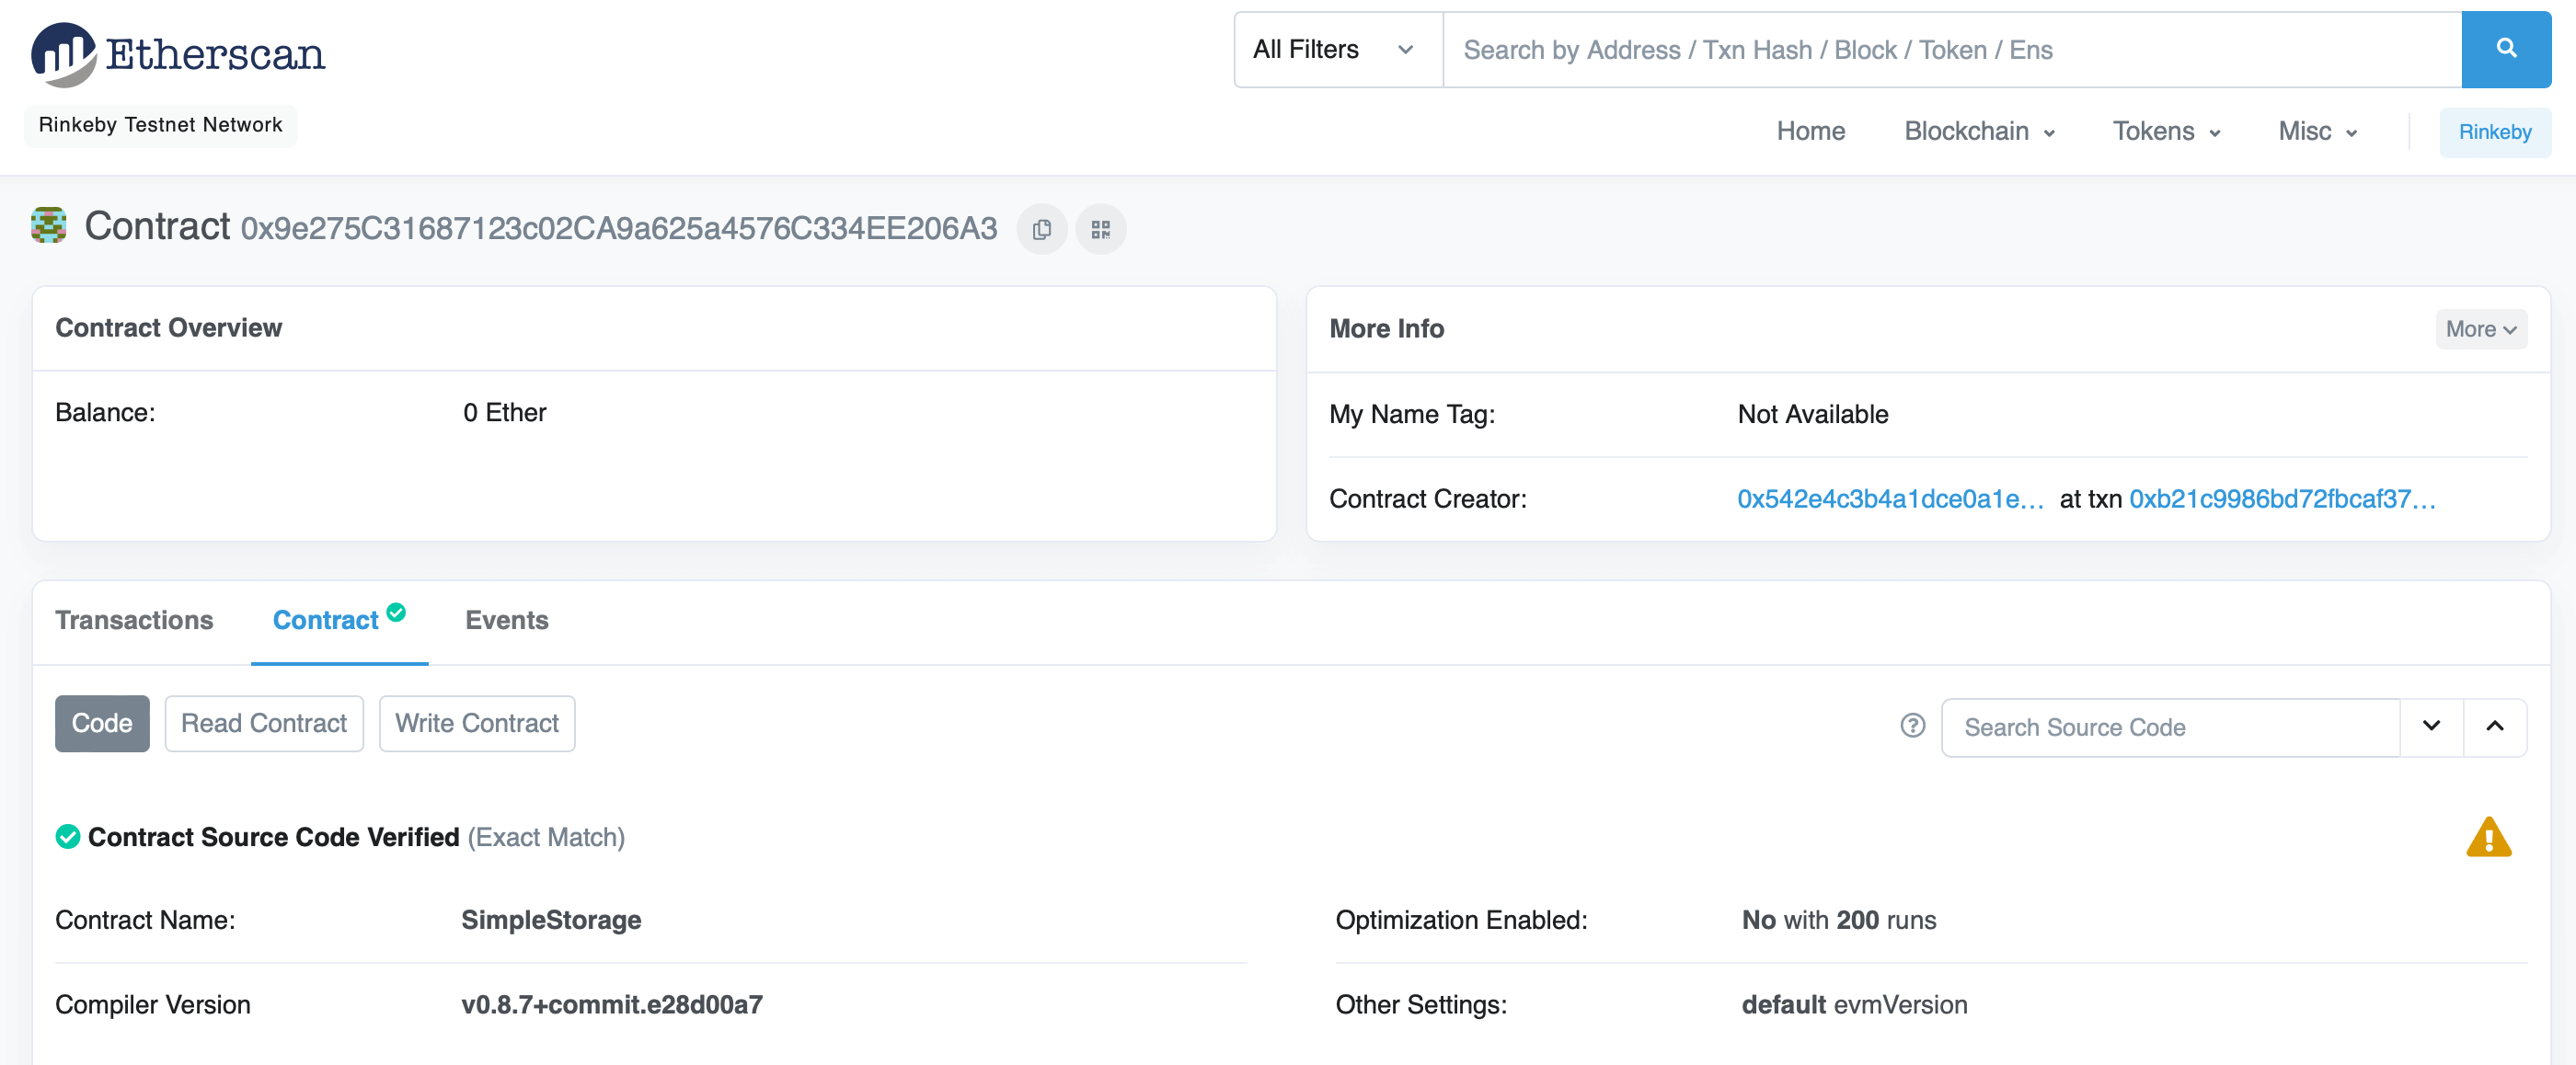
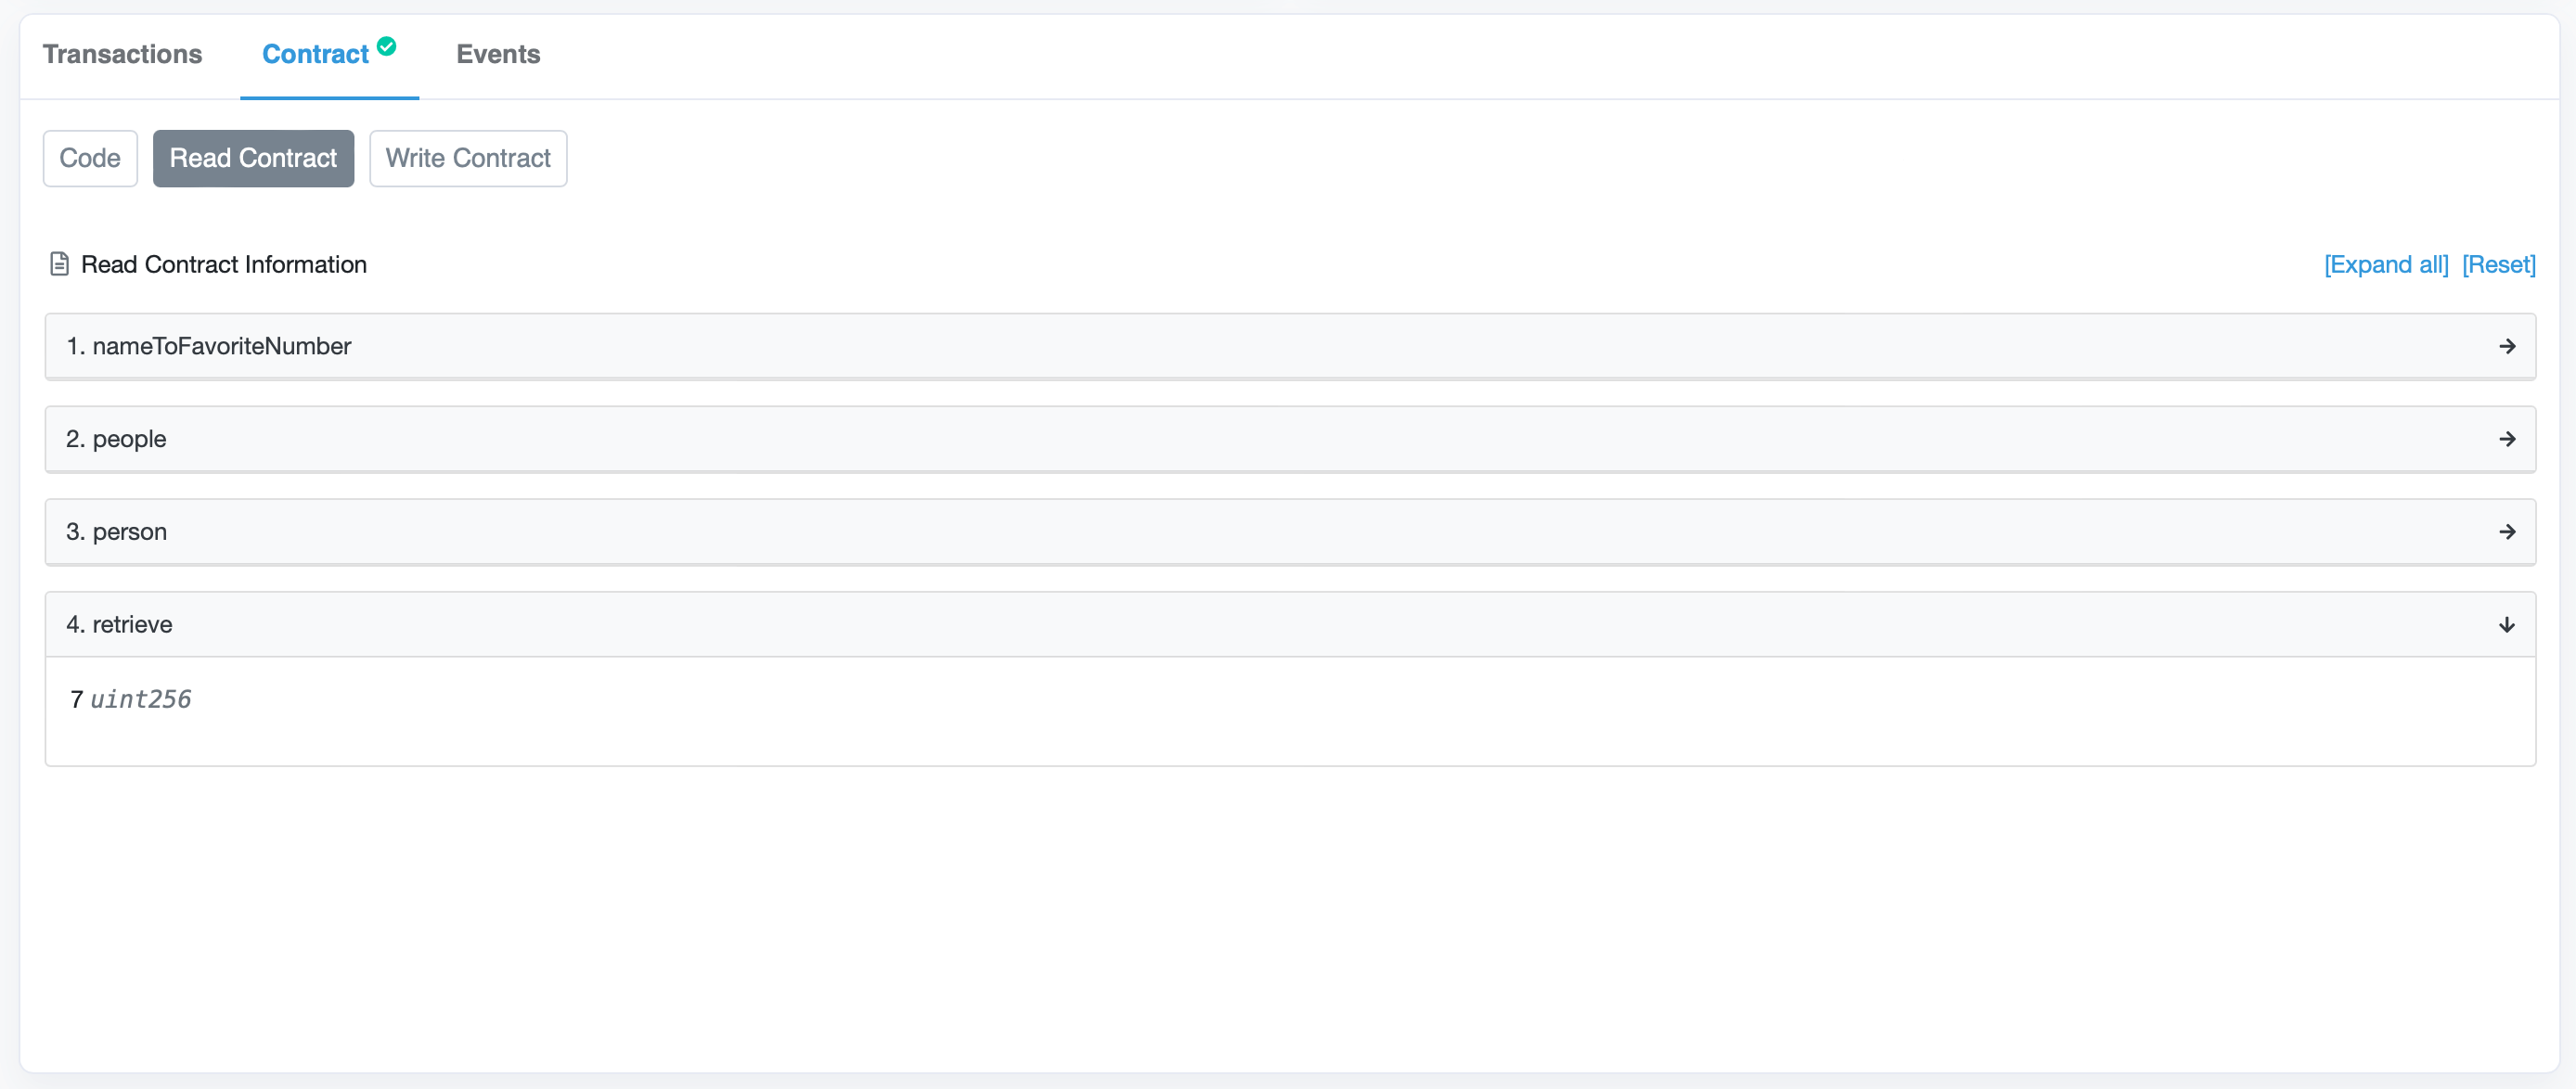
我们通过 Etherscan 验证后访问后可以直接查看合约源码并进行交互。
合约测试 #
对于智能合约来说,其大多数操作都需要部署上链,与资产交互,消耗 gas,且一旦有安全隐患会造成严重的后果。因此,我们需要对智能合约进行详细的测试。
Hardhat 提供了完备的测试调试工具,可以在 tests 目录中编写测试脚本,通过 yarn hardhat test 命令运行测试。
编写测试脚本 #
为我们的部署脚本编写 test-deploy.js 测试程序,首先需要导入必要包:
const { assert } = require('chai')
const { ethers } = require('hardhat')
然后编写测试逻辑:
describe('SimpleStorage', () => {
  let simpleStorageFactory, simpleStorage
  beforeEach(async () => {
    simpleStorageFactory = await ethers.getContractFactory('SimpleStorage')
    simpleStorage = await simpleStorageFactory.deploy()
  })

  it('Should start with a favorite number of 0', async () => {
    const currentValue = await simpleStorage.retrieve()
    const expectedValue = '0'

    assert.equal(currentValue.toString(), expectedValue)
    // expect(currentValue.toString()).to.equal(expectedValue)
  })

  it('Should update when we call store', async () => {
    const expectedValue = '7'
    const transactionRespense = await simpleStorage.store(expectedValue)
    await transactionRespense.wait(1)

    const currentValue = await simpleStorage.retrieve()

    assert.equal(currentValue.toString(), expectedValue)
    // expect(currentValue.toString()).to.equal(expectedValue)
  })
})
在 Hardhat 的测试脚本中,我们使用 describe 包裹测试类,并且使用 it 包裹测试方法。我们需要保证测试前合约已经部署,因此,我们通过 beforeEach 方法在每个测试方法执行前都会调用 simpleStorageFactory.deploy(),并且将返回的 simpleStorage 对象赋值给 simpleStorage 变量。
我们使用 assert.equal(currentValue.toString(), expectedValue) 来对执行结果与预期结果进行比照,可以用 expect(currentValue.toString()).to.equal(expectedValue) 替代,效果一样。
此外,我们还可以通过 it.only() 来指定仅执行其中一个测试方法。
执行测试脚本 #
我们通过 yarn hardhat test 运行测试,且可以通过 yarn hardhat test --grep store 来指定测试方法。

添加 gas-reporter 支持 #
如上文所述,gas 是我们在开发过程中需要特别关注的资源,尤其在 Ethereum 主网上尤其昂贵。因此,我们需要在测试过程中查看 gas 消耗情况。HardHat 也有一个 gas-reporter 插件,可以很方便地输出 gas 消耗情况。
安装 gas-reporter 插件 #
我们通过 yarn add --dev hardhat-gas-reporter 命令来安装插件:

启用 gas-reporter 支持 #
我们通过在 hardhat.config.js 中添加 gasReporter: true 及额外配置项来启用插件:
require('hardhat-gas-reporter')

const COINMARKETCAP_API_KEY = process.env.COINMARKETCAP_API_KEY || 'key'

module.exports = {
  // ...,
  gasReporter: {
    enabled: true,
    outputFile: 'gas-reporter.txt',
    noColors: true,
    currency: 'USD',
    coinmarketcap: COINMARKETCAP_API_KEY,
    token: 'MATIC',
  },
}
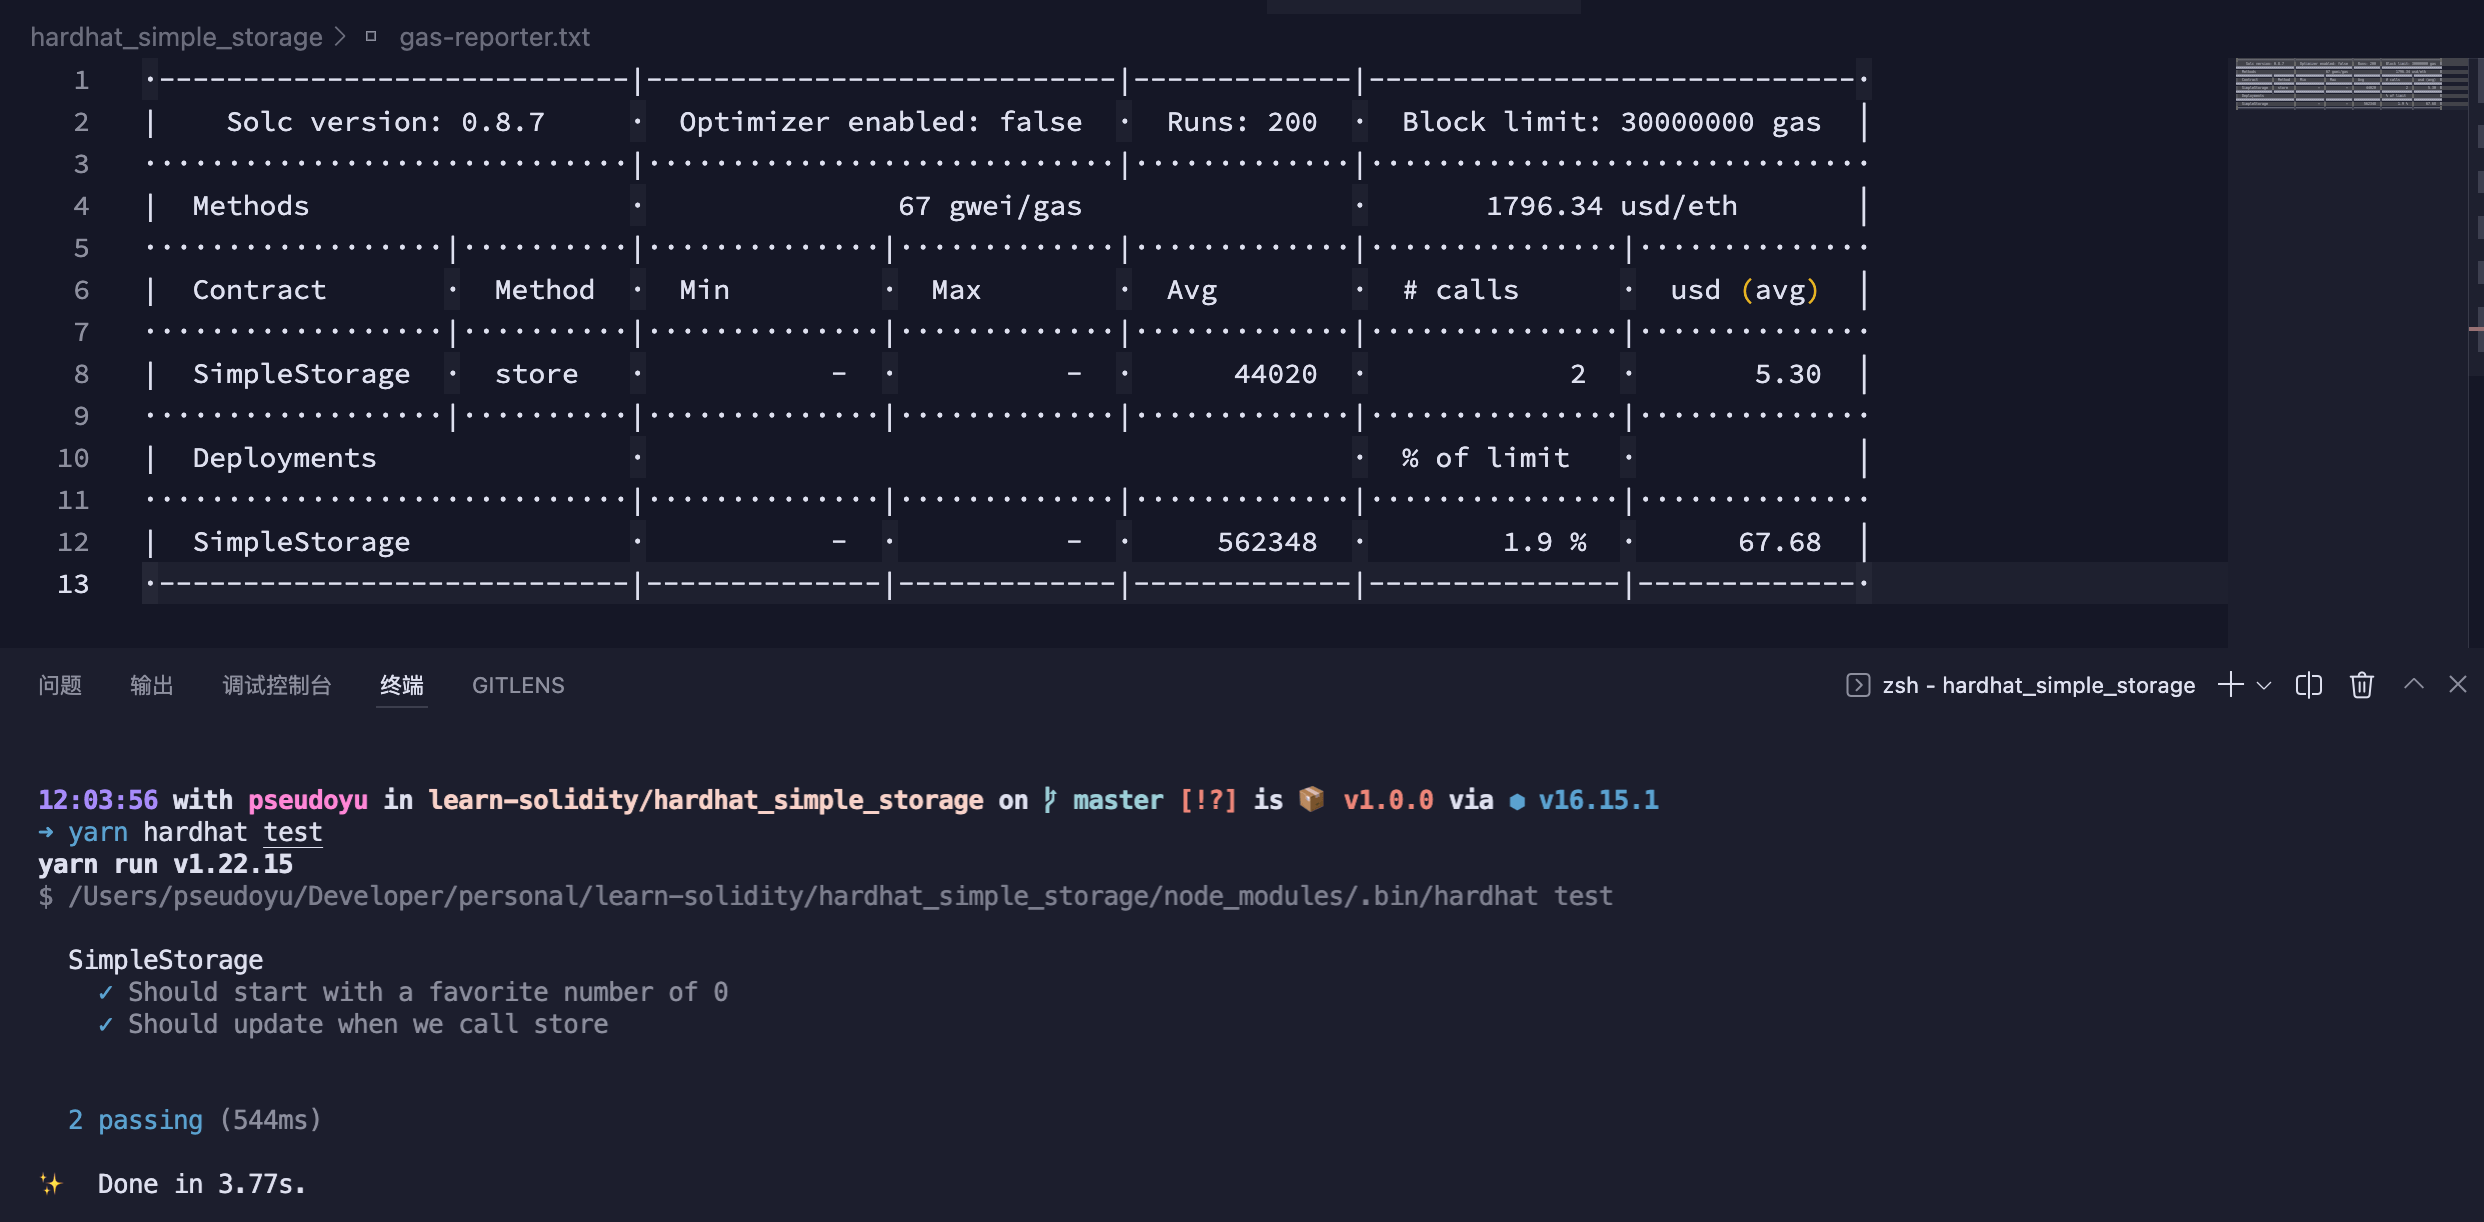
我们可以指定输出文件、是否开启颜色、指定币种、指定代币名称,以及指定代币的 CoinMarketCap API 密钥来根据项目进一步控制输出。
按照以上配置,运行 yarn hardhat test 输出效果如下:
添加 solidity-coverage 支持 #
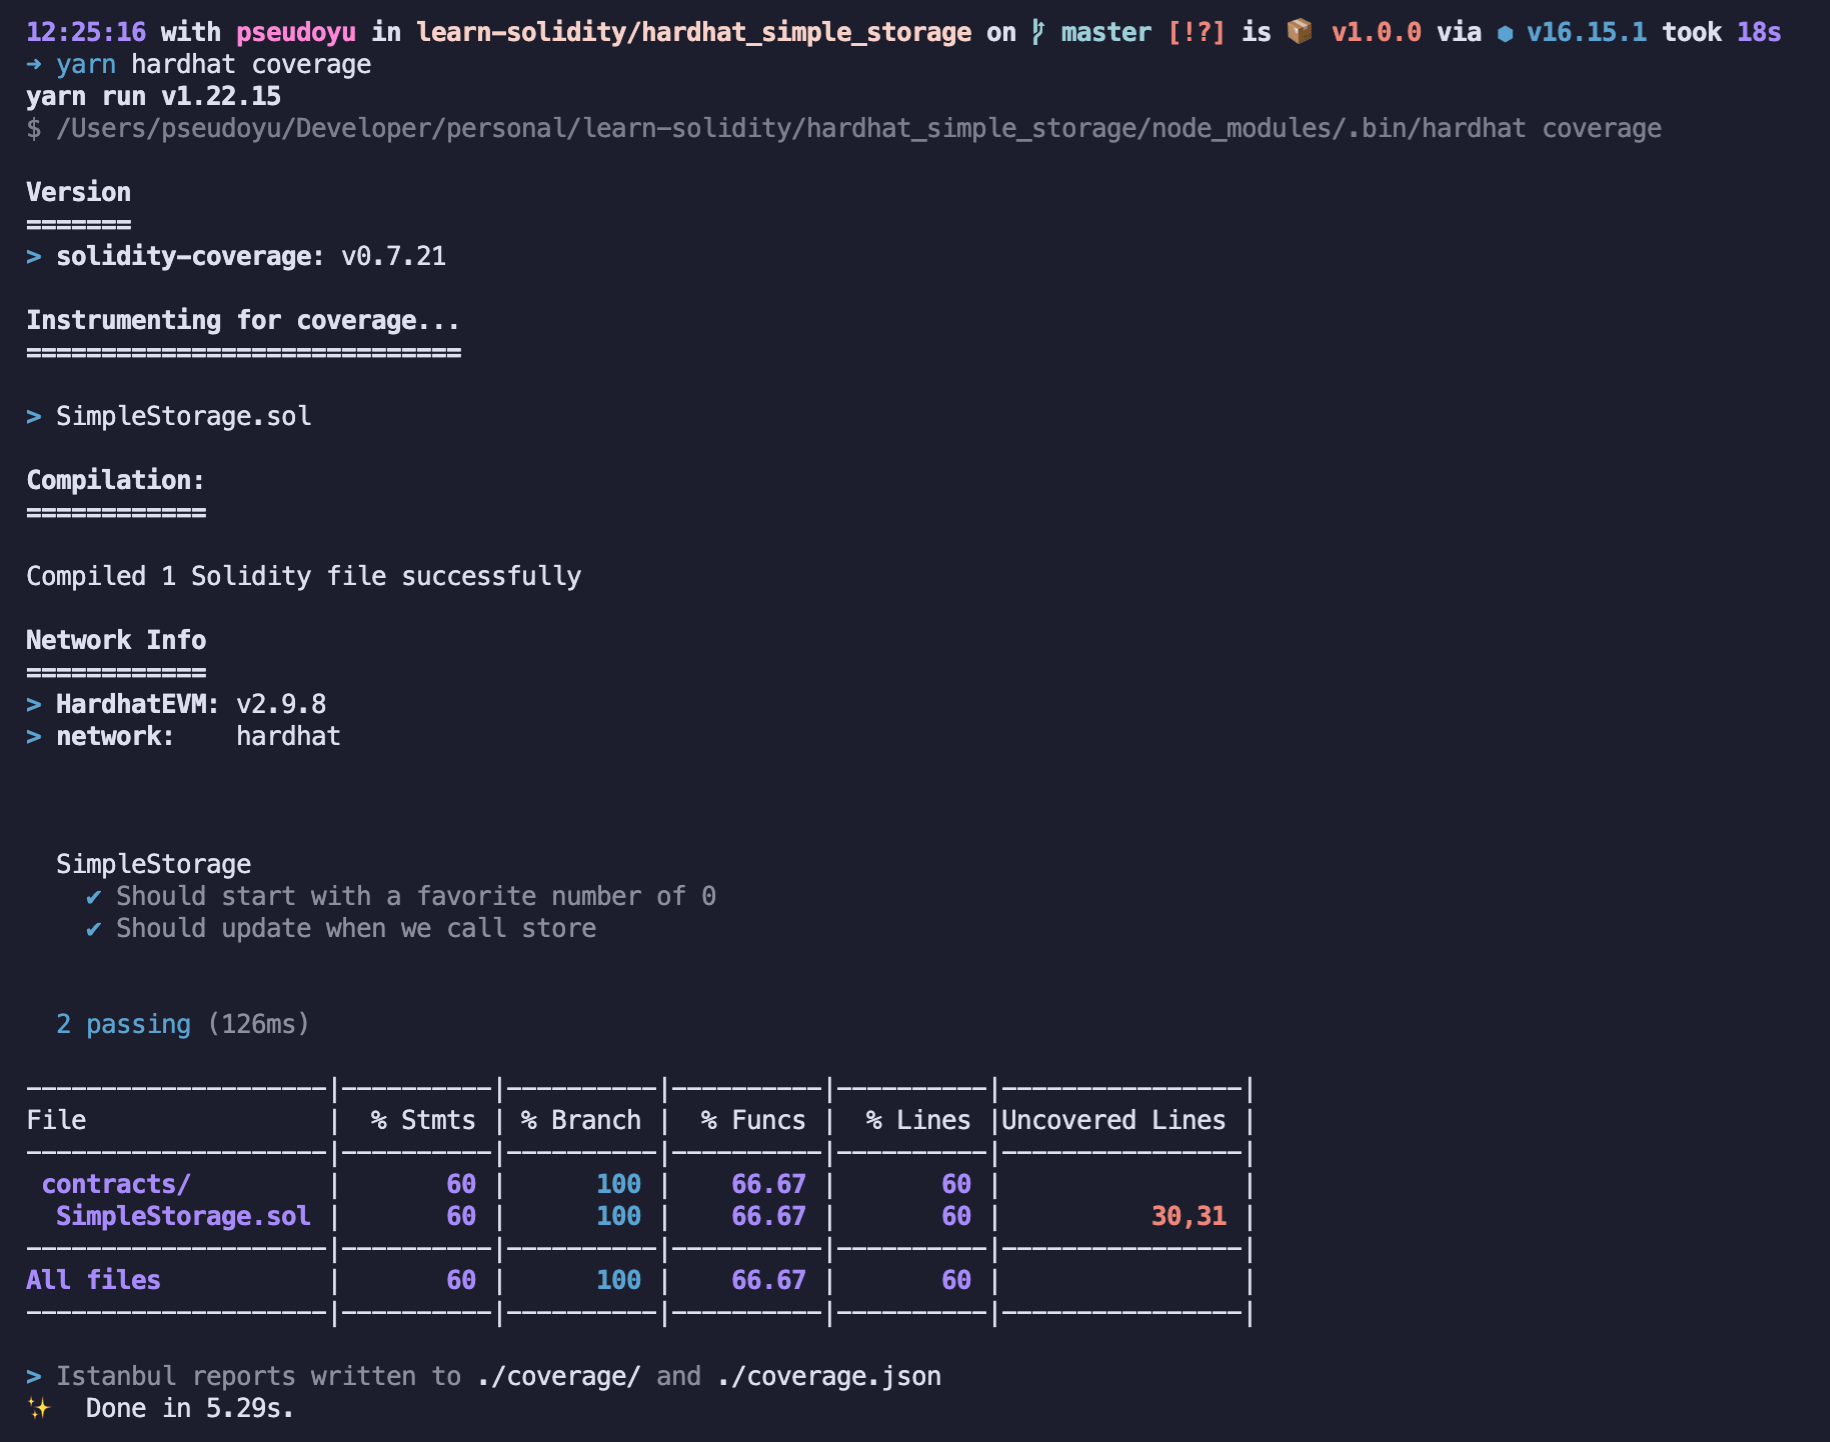
合约测试对于保障业务逻辑正确性与安全防范至关重要,因此,我们需要对合约进行覆盖率测试。HardHat 也有一个 solidity-coverage 插件,可以很方便地输出覆盖率情况。
安装 solidity-coverage 插件 #
我们通过 yarn add --dev solidity-coverage 命令来安装插件:

启用 solidity-coverage 支持 #
我们仅需在 hardhat.config.js 中导入包即可添加覆盖率测试支持:
require('solidity-coverage')运行覆盖率测试 #
通过 yarn hardhat coverage 即可运行覆盖率测试:
Task #
上文我们对 hardhat 库的基础功能与脚本进行了一些使用。除此之外,我们还可以自定义一些任务供开发调试使用。
编写 Task #
Hardhat 中,我们将任务定义在 tasks 目录下,我们将编写一个 block-number.js 的 Task 来获取区块高度:
const { task } = require('hardhat/config')

task('block-number', 'Prints the current block number').setAction(
  async (taskArgs, hre) => {
    const blockNumber = await hre.ethers.provider.getBlockNumber()
    console.log(`Current Block Number: ${blockNumber}`)
  }
)
Task 通过 task() 方法来创建,并通过 setAction() 方法来设置任务的执行函数。其中,taskArgs 是一个包含所有参数的对象,hre 是一个 HardhatRuntimeEnvironment 对象,可以用来获取其他的资源。
运行 Task #
定义完成后,在项目命令的 AVAILABLE TASKS 中就有了我们刚定义好的 block-number 任务,可以通过 yarn hardhat block-number 命令来运行任务,同样的,我们可以指定特定网络运行:
yarn hardhat block-number --network rinkeby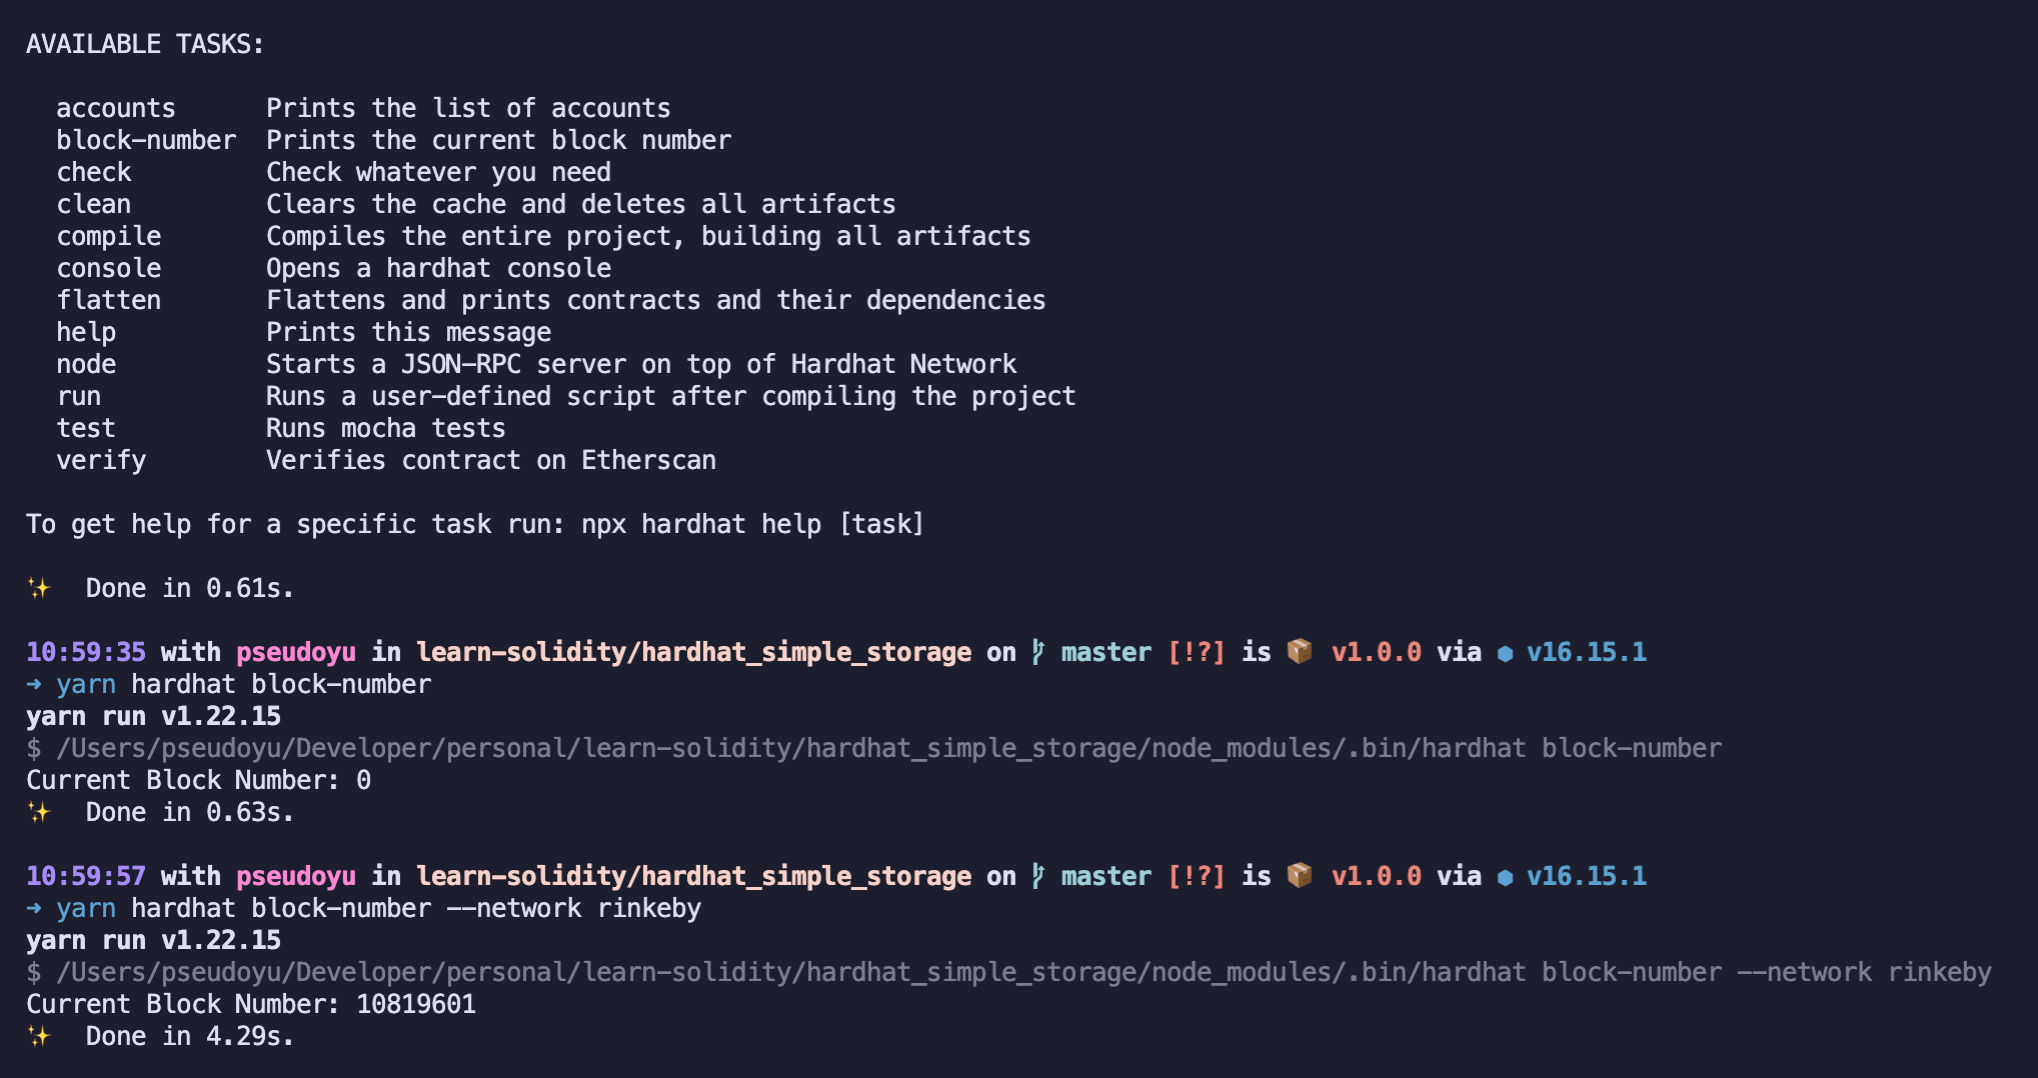
Hardhat Console #
最后,除了通过代码与链/合约进行交互外,我们还可以通过 Hardhat Console 来调试项目,查看链状态,合约的输入、输出等。我们可以通过 yarn hardhat console 命令来打开 Hardhat Console,并进行交互。

总结 #
以上就是我对 Hardhat 框架的基础配置与使用,它是一个很强大的开发框架,我后续还将会继续深入了解它的更多特性与使用技巧,如果有兴趣,可以继续关注,希望对大家有所帮助。